06
05
INSTALLATION
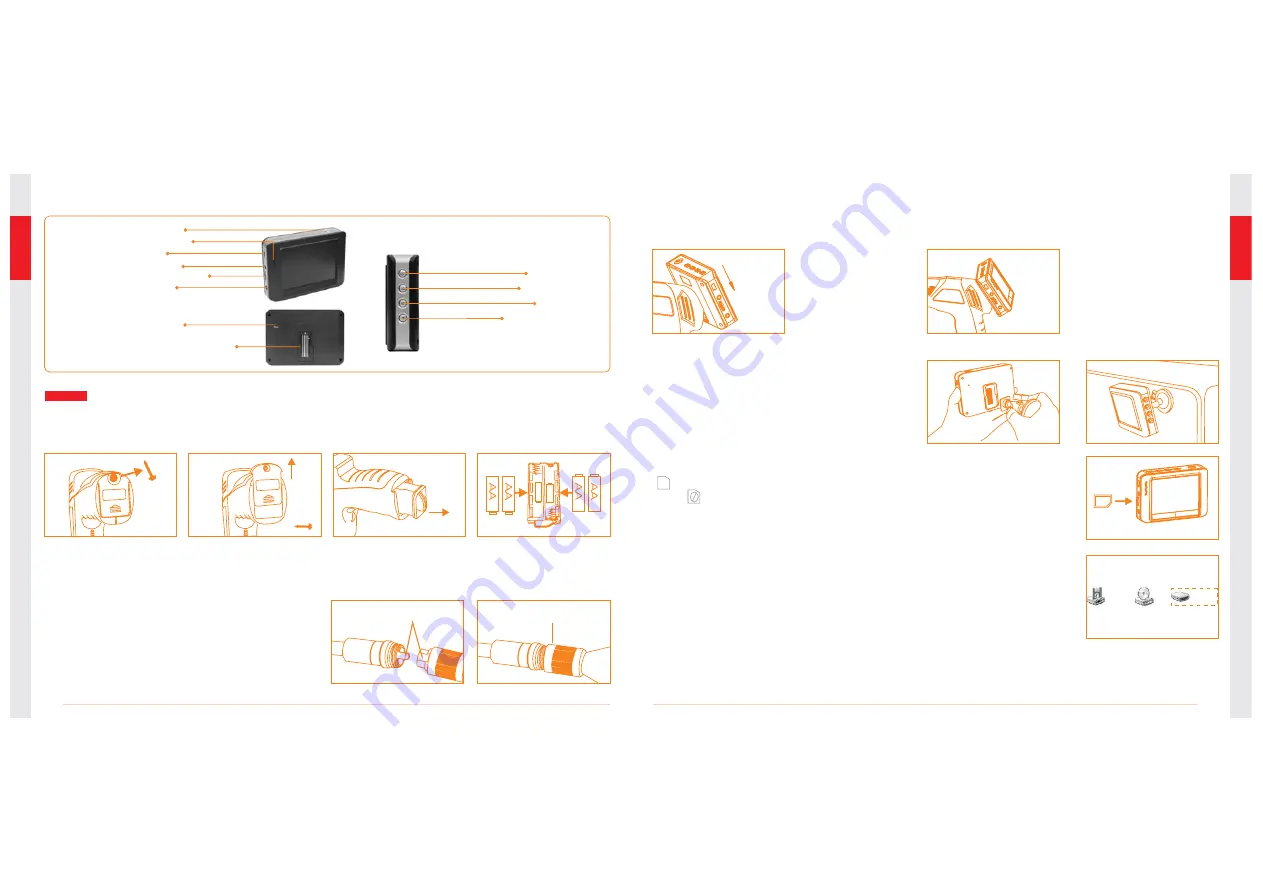
To Install Batteries
(Dry your hands before installation or replacing batteries.)
1. Using a Philips head screwdriver, remove screw and cover as illustrated below:
2. Remove battery compartment and insert four (4) AA batteries into their appropriate slots,
with proper orientation, as indicated on the battery compartment.
3. Reinstall battery compartment and replace battery cover and screw
To Attach Flexible Tube with Handle
To connect the flexible tube camera with control
handle, first make sure that the keyed end of the
tube is aligned with the slot in the handle, then
use slight force to push them together. Once
properly aligned, twist the treaded knob clockwise
until the connection is securely in place.
Fasten the treaded knob
Keyed end plugs into socket
To Install Monitor for Wired Use
EXPLORER PREMIUM supports wired use by connecting the monitor to the camera handle.
Slide the
monitor
downward
Installed
successfully
Monitor
Video Output
Power Jack
Menu
Toggle Down
Confirm
Monitor Docking Station
Reset Button
USB Port
MicroSD Card Slot
Toggle Up
Power Indicator
Power Switch
To Install Monitor Mounting Bracket
Attach the magnetic mounting bracket to
the monitor using the same method used
to attach the monitor to the camera handle.
To Insert SD Card
SD card
CD driver( G )
3.5 Floppy Disk( A )
Mobile Disk( H )
After SD card is inserted into SD card slot successfully, an SD card
icon will appear on the monitor screen; otherwise, the ‘no SD
card’ icon will show.
To Connect USB Cable
Use the provided USB cable to connect the monitor to any PC with a
USB slot. Your computer should automatically recognize the new
hardware, which you may browse by double-clicking on the My Computer
icon on your desktop, and then navigating into the Mobile Disk directory.


