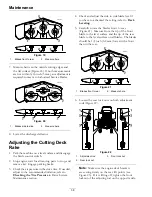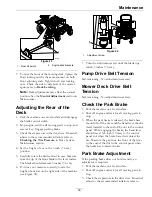
Operation
2. With drive levers locked in “neutral”, shift speed
control lever to desired forward speed.
3. Slowly squeeze and hold both drive levers in
the neutral position and rotate both neutral lock
latches from the neutral lock position to the
forward position.
Note:
Do Not
squeeze both drive levers all the
way back. This will cause the drive wheels to
engage in the reverse direction.
4. To move forward in a straight line, smoothly
release both drive levers to engage drive wheels.
To turn left or right, squeeze the right hand drive
lever to turn right and the left hand drive lever
to turn left.
To make a “zero turn”, squeeze either the left
hand or the right hand drive lever back into the
reverse position while the opposite drive lever is in
a forward position at an equal but opposite speed.
Note:
For smooth operation of this machine,
avoid quick, jerky movements of the drive levers.
Move the drive levers smoothly and deliberately.
To stop, squeeze drive levers back to the “neutral”
position. Move the neutral lock latches into the
“neutral lock” position and release drive levers.
Move the speed control lever to the neutral
position.
5. If the unit tracks to one side or the other, turn the
quick track knob. Turn the knob right to “steer”
right, turn the knob left to “steer” left.
Driving in Reverse
To move rearward in a straight line, squeeze drive
levers into the reverse position.
To turn left or right, squeeze the right hand drive lever
to turn left and the left hand drive lever to turn right.
To make a “zero turn”, squeeze either the left hand
or the right hand drive lever back into the reverse
position while the opposite drive lever is in a forward
position at an equal but opposite speed.
Note:
For smooth operation of this machine, avoid
quick, jerky movements of the drive levers. Move the
drive levers smoothly and deliberately.
To stop, squeeze drive levers back to the “neutral”
position. Move the neutral lock latches into the
“neutral lock” position and release drive levers. Move
the speed control lever to the neutral position.
Operating the Platform
The machine can be used with the platform in the
up or down position. It is the operator's preference
on which position to use.
WARNING
The operator platform is heavy and may cause
injury when lowering and raising the operator
platform. The platform may suddenly drop if not
supported when the latch pin is pulled out.
•
Do Not put your hands or fingers in the
platform pivot area when lowering or raising
the operator platform.
•
Make sure the platform is supported when
the latch pin is pulled out.
•
Make sure the latch secures the platform
when folding it in the up position. Push it
tight against the cushion for the latch pin to
lock into place.
Operating the Machine with the
Platform Up
Operating the machine with the platform up is
recommended when:
•
Mowing near drop-off's
•
Mowing small areas where the machine is too long
•
Areas with low over hanging branches or obstacles
•
Loading the machine for transport
•
Unloading the machine after transport
•
Driving up or backing down slopes or ramps.
•
Turning in tight areas where platform may contact
obstacles.
To raise the platform, pull the bottom upward and
push it tight against the cushion. The latch pin knob
will snap inward to lock the platform into place (see
Figure 9).
24
Summary of Contents for VANTAGE X Series
Page 1: ...VANTAGE X SERIES For Serial Nos 315 000 000 Higher Part No 4502 224 Rev A ...
Page 51: ...Schematics Schematics Electrical Diagram All Units Except Kohler EFI 51 ...
Page 52: ...Schematics Electrical Diagram Kohler EFI 52 ...
Page 53: ...Schematics Electrical Schematic All Units Except Kohler EFI 53 ...
Page 54: ...Schematics Electrical Schematic Kohler EFI 54 ...
Page 55: ...Schematics Hydraulic Diagram 55 ...
Page 57: ...Service Record Date Description of Work Done Service Done By 57 ...
Page 58: ...58 ...

