background image

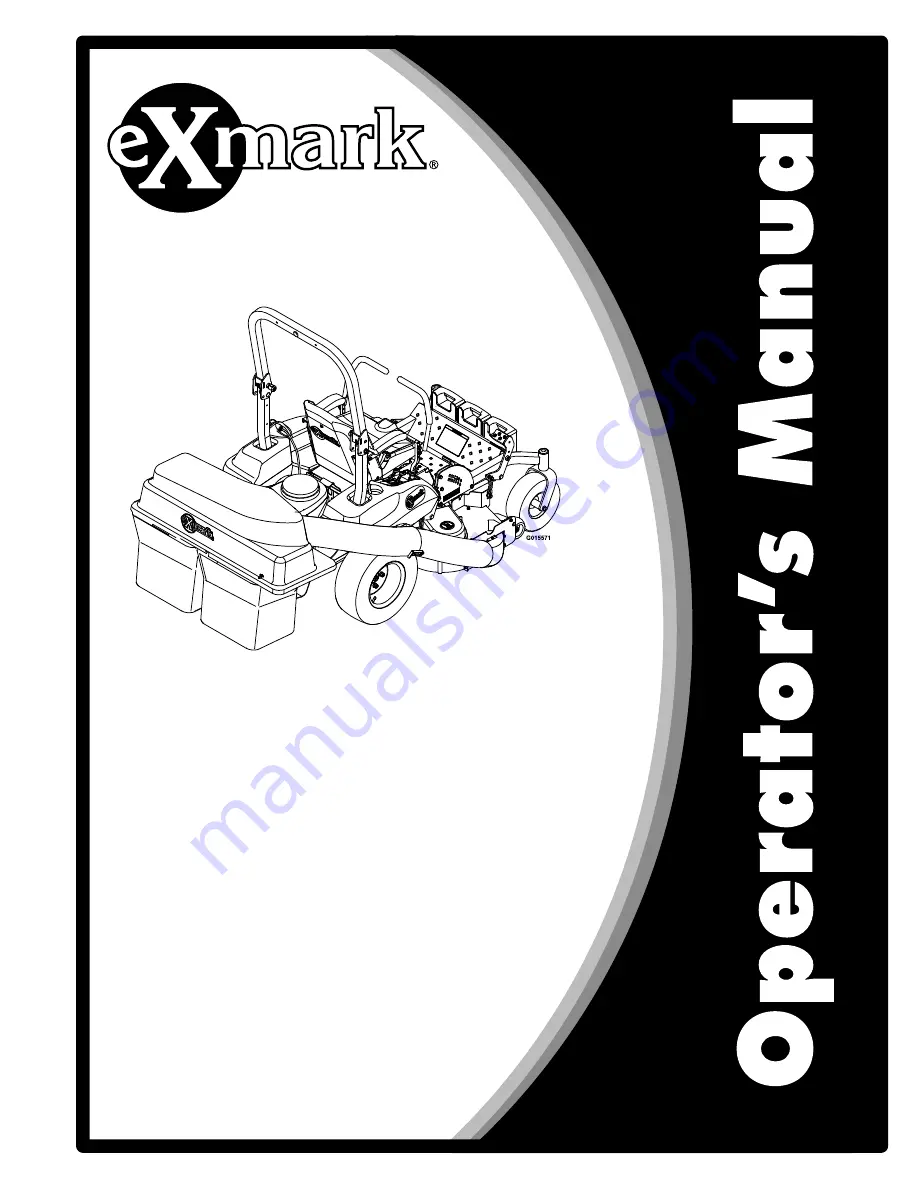
PIONEER

®

BAGGER

For Serial Nos.
316,000,000 & Higher
(To fit Pioneer E-Series Units
Serial Nos. 920,000 & Higher)

Part No. 4502-768 Rev. A


Summary of Contents for PIONEER BAGGER

Page 1: ...PIONEER BAGGER For Serial Nos 316 000 000 Higher To fit Pioneer E Series Units Serial Nos 920 000 Higher Part No 4502 768 Rev A ...

Page 2: ...ctured previously Exmark or its distributors and dealers accept no responsibility for variations which may be evident in the actual specifications of its products and the statements and descriptions contained in this publication 2015 Exmark Mfg Co Inc Industrial Park Box 808 Beatrice NE 68310 2 Contact us at www Exmark com Printed in the USA All Rights Reserved ...

Page 3: ...ons or receive proper training may result in injury Go to http www Exmark com for additional safe operation information such as safety tips training materials and Operator s manuals All Exmark equipment dealers and distributors are kept informed of the latest methods of servicing and are equipped to provide prompt and efficient service in the field or at their service stations They carry ample sto...

Page 4: ...9 Systems 9 Dimensions 9 Product Overview 9 Operation 10 Pre Start 10 Operating Instructions 10 Transporting 12 Maintenance 15 Recommended Maintenance Schedule s 15 Periodic Maintenance 15 Inspect Collection System 15 Check Bags 15 Cleaning 16 Clean Muffler and Rear Frame Area 16 Clean Rear Screen In Hopper 16 Troubleshooting 17 4 ...

Page 5: ...ble for training the users Never let children or untrained people operate or service the equipment Local regulations may restrict the age of the operator Only adults and mature teenagers should operate a mower and even mature teenagers should have adult supervision Be sure a teenager 1 has read and understands the Operator s Manual and recognizes the risks involved 2 is sufficiently mature to use ...

Page 6: ...void sudden turns or rapid speed changes Keep the roll bar in the raised and locked position and use seat belt See inside the back cover to determine the approximate slope angle of the area to be mowed Use a walk behind mower and or a hand trimmer near drop offs ditches steep banks or water Figure 3 Figure 3 1 Safe Zone Use the mower here on slopes less than 15 degrees 2 Danger Zone Use a walk beh...

Page 7: ...er straighten or weld them Keep all guards shields and all safety devices in place and in safe working condition Check all bolts frequently to maintain proper tightness Frequently check for worn or deteriorating components that could create a hazard WARNING Removal or modification of original equipment parts and or accessories may alter the warranty controllability and safety of the machine Unauth...

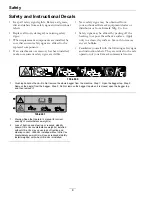
Page 8: ...rface Smooth to remove any air bubbles Familiarize yourself with the following safety signs and instruction labels They are critical to the safe operation of your Exmark commercial mower 109 6809 1 Crushing hazard of hand Do Not remove the whole bagger from the machine Step 1 Open the bagger top Step 2 Remove the bag s from the bagger Step 3 Do Not remove the bagger top when it is closed open the ...

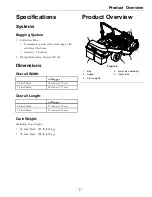
Page 9: ... lift off Dimensions Overall Width w Bagger 48 inch Deck 58 inches 147 cm 52 inch Deck 62 inches 157 cm Overall Length w Bagger 48 inch Deck 97 inches 246 cm 52 inch Deck 97 inches 246 cm Curb Weight Including front weight 48 Inch Deck 987 lb 448 kg 58 Inch Deck 998 lb 453 kg Product Overview Figure 4 1 Bag 4 Lower tube assembly 2 Hopper 5 Upper tube 3 Front weights 9 ...

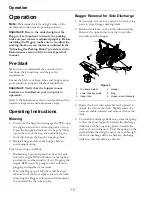
Page 10: ...stall bags and close the hopper before continuing mowing Tips for mowing conditions Maintaining a ground speed that does not pull down the engine RPM will allow for the highest productivity and best quality of cut Bogging the engine RPM down by going too fast will cause plugging and quality of cut issues When the Bagger gets full there will be slight blowout from the front right corner of the deck...

Page 11: ... bracket The weight mount bracket bolted to the toe board remains on the unit Note The removable weights are heavy Use care when lifting them Make sure that you can hold them securely before lifting them Use caution when positioning your hands so that you Do Not set them down on your hands or fingers Note The portions of the Ultra Vac collection system that are not bolted to the mower are designed...

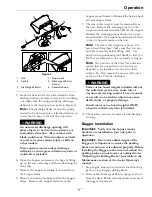
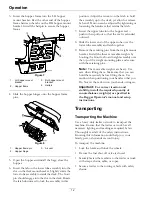
Page 12: ...r tube over the lower tube assembly and latch together 9 Remove the retaining pins from the weight mount bracket Install the three removable weights by hooking the front toe board weight assembly over the top of the weight mounting plate and secure with the retaining pins Note The removable weights are heavy Use care when lifting them Make sure that you can hold them securely before lifting them U...

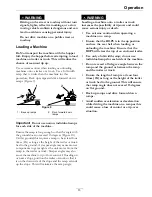
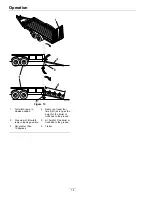
Page 13: ...omponents to get caught as the unit moves from the ramp to the trailer or truck Steeper angles may also cause the machine to tip or lose control If loading on or near a slope position the trailer or truck so that it is on the down side of the slope and the ramp extends up the slope This will minimize the ramp angle WARNING Loading a machine onto a trailer or truck increases the possibility of tip ...

Page 14: ...stowed position 4 Ramp is at least four times 4X as long as the height of the trailer or truck bed to the ground 2 Side view of full width ramp in loading position 5 H height of the trailer or truck bed to the ground 3 Not greater than 15 degrees 6 Trailer 14 ...

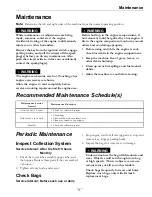
Page 15: ...ent Keep the machine free of grass leaves or other debris build up Clean up oil or fuel spillage and fuel soaked debris Allow the machine to cool before storing Recommended Maintenance Schedule s Maintenance Service Interval Maintenance Procedure After the first 10 hours Check the collection system Before each use or daily Check bags Clean muffler and rear frame area Clean rear screen in the hoppe...

Page 16: ...tremely hot Severe burns can occur on contact and debris such as leaves grass brush etc can catch fire Allow engine parts especially the muffler to cool before touching Remove accumulated debris from muffler and engine area Clean Rear Screen In Hopper Service Interval Before each use or daily 1 Stop engine wait for all moving parts to stop and remove key Engage parking brake 2 Open hopper and remo...

Page 17: ...e full 1 Empty bags more frequently 2 Plugged screen in bagger hopper 2 Remove debris leaves or grass clippings from the screen 3 Ground speed is too fast 3 Drive slower at full throttle 4 Plugged tube 4 Locate and remove plugged debris Excessive grass blowout from the deck 5 Conditions are dry 5 Use lower lift blade or reduce engine speed 1 Bags are too full 1 Empty bags more frequently 2 Ground ...

Page 18: ...ntact us at Exmark Customer Service Department The Exmark Warranty Company 2101 Ashland Avenue Beatrice NE 68310 402 223 6375 or service exmark com Owner s Responsibilities If your product requires warranty service it must be returned to an authorized Exmark service dealer within the warranty period This warranty extends only to commercial attachments and accessories operated under normal conditio...

Page 19: ...se the slope indicator to determine the degree of slope of hills before operating Do Not operate this machine on a slope greater than 15 degrees Fold along the appropriate line to match the recommended slope 2 Align this edge with a vertical surface a tree building fence pole etc 3 Example of how to compare slope with folded edge 19 ...

Page 20: ...SORIES AND OPTIONS CUSTOM RIDE SEAT SUSPENSION SYSTEM DUAL TAIL WHEEL FLOOR PAN EXTENDER HITCH KIT LIGHT KIT MICRO MULCH SYSTEM ROLL OVER PROTECTION SYSTEM ROPS SNOW BLADE SNOWBLOWER SUN SHADE TRASH CONTAINER ULTRA VAC COLLECTION SYSTEM ULTRA VAC QUICK DISPOSAL SYSTEM WEATHER CAB Some accessories and options not available for some models Place Model No and Serial No Label Here Included in the Lite...

Reviews: