background image

5

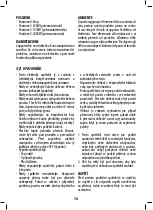
automatically, since a fire risk exists if the heater 

is covered or positioned incorrectly.

-  Do not place the appliance close to curtains and 

other combustible materials.
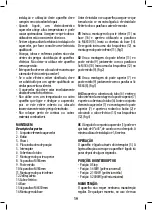
ASSEMBLY

Part Description

1.  Heating element assembly

2. Knob

3. Body

4.  Position indication plate

5.  Pull switch

6.  Tube cover

7.  Upper post assembly

8.  3x M5X6mm screw

9.  Middle post

10. 3x M5X6mm screw

11. Lower post assembly

12. 2x clamp

13. Power cord

14. Base

15. 4x M6X30mm screw

16. Base assembly

Before installing your appliance, make sure 

that the supply plug is not connected to the 

main supply plug. Take out all the screws before 

assembly.

01 

Insert the lower post assembly (11) into the 

base assembly (16) and then fix it tightly by 

means of 4x M6X30 screws (15). Insert the base 

cover (14) and then insert one of the clamps (12) 

onto the lower post (11). (fig.1)

02 

Join the lower post assembly (11) and the 

middle post (9) together with 3x M5X6 screws 

(10). Insert one clamp (12) onto the middle post 

(9). (fig.2)

03 

Join the upper post assembly (7) and the 

middle post (9) together with 3x M5X6 screws (8). 

(fig.3)

04 

Loosen the tube cover (6) and take out the 

inner tube from the upper post assembly (7) 

and tighten the tube cover (6). Join the heating 

element assembly (1) and the upper post 

assembly (7) together, then fix them tightly by 

rotating the knob (2), and put the power cord 

supply (13) into the clamps (12). (fig.4)

05 

According to the requested angle the heating 

element (1) can be adjusted at an angle of 0°-45°.

(fig.5) The minimum installation height of the 

heater is 1.8 meters.

OPERATION

The appliance is switched on by means of the pull 

switch (5). The slight vibration noticeable when 

the appliance is switched on will stop after a few 

seconds.

SWITCH POSITIONS

-  Position 0: Stop

-  Position 1: 650W (normal power)

-  Position 2: 1350W (intermediate power)

-  Position 3: 2000W (full power)

MAINTENANCE

Your appliance does not require any particular 

maintenance. However, in the event of a 

malfunction, please consult a service agent or 

similar qualified person.

THE ENVIRONMENT

When this product reaches the end of its useful life, 

hand it in at a collection point for the recycling of 

electric and electronic equipment. Please refer to 

the symbols on the product, the users instructions 

or the packaging. Contact your municipality for 

the address of the appropriate collection point in 

your neighbourhood.

Summary of Contents for YT2-000060

Page 1: ...e uso Aquecedor de esplanada Instrukcja obs ugi Ogrzewacz na taras Kullanim kilavuzu Teras s t c Brugsanvisning Terrassevarmer Bruksanvisning Terrassevarmeren Bruksanvisning Terrassv rmare Haszn lati...

Page 2: ...2 min 180 cm min 50 cm min 50 cm min 50 cm...

Page 3: ...SEMENT 10 E ADVERTENCIAS 12 I AVVERTENZE 14 CZ UPOZORN N 16 P AVISO 18 PL OSTRZE ENIA 20 RU 22 TR UYARILAR 24 DK ADVARSLER 26 NO ADVARSLER 28 S VARNINGSF RESKRIFTER 30 H FIGYELMEZTET S 32 FI VAROITUKS...

Page 4: ...appliance is not intended for use by persons including children with reduced physical sensoryormentalcapabilitiesorlack of experience and knowledge unless they have been given supervision or instructi...

Page 5: ...crews 8 fig 3 04 Loosen the tube cover 6 and take out the inner tube from the upper post assembly 7 and tighten the tube cover 6 Join the heating element assembly 1 and the upper post assembly 7 toget...

Page 6: ...eze omgevallen is en zal automatisch weer inschakelen wanneer de kachelweerrechtopgeplaatstis 1 Het apparaat is niet bedoeld voor gebruik door personen inclusief kinderen met verminderde fysieke zintu...

Page 7: ...n 12 opdemiddelste paal 9 fig 2 03Verbinddebovenstepaal 7 metdemiddelste paal 9 met behulp van 3x M5X6 schroeven 8 fig 3 04 Maak het buis afdekplaatje 6 los en trek de binnenstebuisvandebovenstepaal 7...

Page 8: ...Die Heizung ist mit einem Kippschutz Schalter versehen derdieHeizungabschaltet wennsie nach vorne f llt Sie wird automatisch erneut eingeschaltet wennsiewiederaufrechtsteht 1 Dieses Ger t ist nicht z...

Page 9: ...ontage alleSchrauben 01 F hren Sie die untere Stange 11 in die Bodenplatte 16 und befestigen Sie sie mit 4x M6X30Schrauben 15 F hrenSiedieAbdeckung 14 einundbefestigenSieeinederKlemmen 12 anderunteren...

Page 10: ...s av rerdangereuxpourl utilisateur Sil appareil pr sentedesprobl mes veuillezl apporter un centre de service apr s vente de l un de nos r seaudedistribution N utilisez pas cet appareil de chauffage pr...

Page 11: ...gn e 3 Corps 4 Plateauindicateurdeposition 5 Interrupteur tirette 6 Protectiondutube 7 Assemblagedupoteausup rieur 8 Vis3xM5x6mm 9 Poteaucentral 10 Vis3xM5x6mm 11 Assemblagedupoteauinf rieur 12 2xatta...

Page 12: ...pesar de que el elemento de calentamiento ha dejado de brillar todav a puede ser directamente y potencialmente peligroso Compruebe que el indicador de selecci n est en la posici n OFF antes de tomar c...

Page 13: ...t cubiertoocolocadoincorrectamente No coloque el aparato cerca de cortinas y otros materialescombustibles ENSAMBLAJE Descripci ndepartes 1 Calefacci n 2 Perilla 3 cuerpo 4 Placaindicadoradeposici n 5...

Page 14: ...gamani per esempio Ci potrebbe causare surriscaldamento Non usare mai la stufa per asciugareilbucato Anche quando l elemento riscaldante non incandescente pu sempre essere molto caldo epericoloso Prim...

Page 15: ...re l apparecchio nelle vicinanze di tendeoaltrimaterialiinfiammabili MONTAGGIO Descrizionedellecomponenti 1 Montaggiodell elementoriscaldante 2 Pulsante 3 Body 4 Indicazionediposizionepiastra 5 Interr...

Page 16: ...to e topn jednotka p estala hnout m e b t st le pod proudem a potenci ln nebezpe n P ed zapo et m jak koli manipualce s p strojem zkontrolujte zda je indik torv b ruvpolozeOFF Vypnuto Vypn tespot ebi...

Page 17: ...pr vn um st n Neumis ujte spot ebi do bl zkosti z clon a jin chho lav chmateri l MONT Popissou st 1 Topn t leso 2 Upev ovac roub 3 T lo 4 Ukazatelpozice 5 P ep na 6 Kryttrubky 7 Horn stkonstrukce 8 3x...

Page 18: ...efazeralgo Desligueoaparelho Depoisdeutilizar Nocasodeesteestardefeituoso Antesdelimpar N outilizeoaquecedorseestetiverca do Nunca desmonte o aquecedor Um electrodom stico mal reparado pode ser perigo...

Page 19: ...einferior 12 2xBra adeira 13 Caboel ctrico 14 Base 15 4xparafusoM6X30mm 16 Montagemdabase Antesdeinstalaroseuaparelho assegure seque tomada n o se encontra ligada electricidade Retiretodososparafusosa...

Page 20: ...Nigdy nie w czaj urz dzenia je li si przewr ci o Nigdyniedemontujurz dzenia Nieprawid owo naprawianeurz dzeniemo eby niebezpieczne dla u ytkownika W przypadku napotkania jakichkolwiek problem w nale y...

Page 21: ...mm 9 Maszt rodkowy 10 3x rubaM5X6mm 11 Dolnymaszt 12 2xzacisk 13 Przew dzasilaj cy 14 Podstawa 15 4x rubaM6X30mm 16 Podstawa Przed monta em urz dzenia upewnij si e wtyczka nie jest pod czona do gniazd...

Page 22: ...zdaj go do odpowiedniego punktu zbierania odpad w elektrycznych i elektronicznych Zapoznaj si z symbolami na produkcie w instrukcji u ytkowania lub na opakowaniu Zapytaj w lokalnym urz dzie miejskim...

Page 23: ...23 1 2 3 4 5 6 7 8 3 5 6 9 10 3 5 6 11 12 2 13 14 15 4 6 30 16 01 11 16 4 6 30 15 14 12 11 1 02 11 9 3 5 6 10 9 2 03 7 9 3 5 6 8 3 04 7 6 1 7...

Page 24: ...KAPALIdurumdaoldu unukontrol etmedenhareketege meyiniz Cihaz udurumlardakapay n z Kullan msonras Ar zadurumunda Temizlemeki in Cihaz asladevrilmi haldekullanmay n z Cihaz asla s kmeyin Hatal tamir edi...

Page 25: ...e kullanmay n Cihaz n yanl yerle tirilmesi veya s t c n n rt lmesi yang ntehlikesineyola abilir Cihaz perdeler veya diger yan c materyallerin yak n nayerle tirmeyiniz MONTAJ Par aa klamas 1 Is tmaelem...

Page 26: ...r om v lgerknappen st rp OFF f rduforetagerdignoget Slukforditapparat Efterbrug Hvisdetharenfejlfunktion F rdureng rdet Brug ikke apparatet hvis det har v ret faldet ned Skil ikke apparatet ad Hvis a...

Page 27: ...kket til eller placeretforkert Anbring ikke apparatet i n rheden af gardiner ellerandrebr ndbarematerialer SAMLING Beskrivelseafdelene 1 Samlingafvarmeelementet 2 Drejeknap 3 Struktur 4 Positionsangi...

Page 28: ...om varmeelementet har stanset gl de kan det likevel v re p og potensielt farlig SjekkatbrytereneriAV posisjon f rduforetar degnoe Apparatetb rsl esav Etterbruk Dersomdetoppst rfunksjonsfeil F rrengj r...

Page 29: ...r 10 3xM5X6mmskrue 11 Nedremonteringsr r 12 2xklemmer 13 Str mledning 14 Bunndeksel 15 4xM6X30mmskrue 16 Fotplate F r du installerer apparatet s rg for at st pselet ikkeerkoblettilstr mmen Fjernallesk...

Page 30: ...problem g till ett auktoriserat Servicecenteridinn rhet Anv ndejdennav rmeh rdin rhetenavbad duschellersimbass ng Dennav rmeh rd rdesignadf rattanv ndasi tr dg rden Apparatenkananv ndasinom och utomhu...

Page 31: ...hs ttenavkl mmorna 12 p detundref stet 11 fig 1 02Kopplaihopunderstaf stet 11 medmellersta 9 medhj lpav3xM5X6skruvar 10 S ttp en avkl mmorna 12 p mellerstaf stet 9 fig 2 03 Koppla ihop versta f stet 7...

Page 32: ...amely t lfordul s eset n automatikusan kikapcsolja a k sz l ket majd visszakapcsolja ha az jra egyenes helyzetbe ker l 1 Ak sz l ketgyermekek cs kkentfizikaivagy ment lis k pess ggel b r emberek vagy...

Page 33: ...se az als tart elemet 11 a k z ps tart elemhez 9 a 3 db M5X6 os csavarral 10 Illesszeam sikp ntot 12 ak z ps tart elembe 9 2 bra 03 Er s tse a fels tart elemet 7 a k z ps tart elemhez 9 a3dbM5X6 oscsa...

Page 34: ...attisesti sen kaatuessa ja kytkee sen j lleen p lle kun l mmitin on asetettu takaisin pystysuoraan asentoon 1 Laitettaeioletarkoitettusellaistenhenkil iden mukaanlukien lasten k ytt n joiden aistit fy...

Page 35: ...an 11 Kuva1 02Liit tolpanalaosa 11 keskiosaan 9 k ytt en ruuveja3xM5X6 10 Liit yksikiinnittimist 12 tolpankeskiosaan 9 Kuva2 03 Kiinnit tolpan yl osa 7 sen keskiosaan 9 k ytt enruuveja3xM5X6 8 Kuva3 0...

Page 36: ...36 GR 15 OFF Service 1 2...

Page 37: ...ervice 1 2 3 4 5 6 7 8 3 M5X6mm 9 10 3 M5X6mm 11 12 2 13 14 15 4 M6X30mm 16 01 11 16 4 M6X30 15 14 12 11 1 02 11 9 3 M5X6 10 12 9 2 03 7 9 3 M5X6 8 3 04 6 7 6 1 7 2 13 12 4 05 1 0 45 5 1 8 5 0 Stop 1...

Page 38: ...eposrednoj blizini kupaonice tu ailibazena Ovaj je ure aj namijenjen za kori tenje u vrtovima i mo e se koristiti u zatvorenom i na otvorenom prostoru Iako se grijalica mo e koristiti na otvorenom gla...

Page 39: ...6mm 11 sklopdonjegpolo aja 12 2xstezaljka 13 napojnikabel 14 baza 15 4xvijakM6X30mm 16 sklopbaze Prije instaliranja ure aja se uvjerite da napojni utika nijepriklju ennaglavninapojniutika Uzmitesvevij...

Page 40: ...vi e za uporabu odnesite ga i pohranite u sabirnim mjestima namjenjenim za recikliranje elektroni kih i elektri nih aparata Napomenitereferenceisimboleproizvoda kojisu nauputamailipakiranju Obratites...

Page 41: ...41 1 2 3 4 5 6 7 8 3xM5X6 9 10 3xM5X6 11 12 2x 13 14 15 4xM6X30 16 01 11 16 4 6 30 15 14 12 11 1 02 11 9 3x M5x6 10 12 9 2 03 7 9 3 M5x6 8 3 04 6 7 6 1 7 2 13 12 4 05 1 0 45 5 1 8 5...

Page 42: ...ac nt mpina i probleme duce i l la un centrudeserviceautorizat Nu utiliza i acest incalzitor n imediata vecin tatebaii du uluisauaunuibazinde not Acestincalzitoresteproiectatpentruafiutilizat n gr din...

Page 43: ...ereaperdelelorsau aaltormaterialeinflamabile ASAMBLAREA Descriereaelementelor 1 Montareaelementuluide nc lzire 2 Buton 3 Corp 4 Plac deindicareapozi iei 5 Comutator 6 Grilajprotector 7 Montareapolului...

Page 44: ...ciancalificatsaude opersoan autorizat MEDIU Atuncic ndacestprodusajungelasf r itulduratei saledeutilizare preda i llaunpunctdecolectare pentru reutilizarea echipamentelor electrice i electronice V rug...

Page 45: ...45 I 1 2 3 4 5 6 7 8 3xM5X6mm 9 10 3xM5X6mm 11 12 2x 13 14 15 4x M6X30mm 16 01 11 16 4xM6X30 15 14 12 11 1 02 11 9 3x M5x6 10 12 9 2 03 7 9 3xM5x6 8 3 04 6 7 6 1 7 2 13 12 4...

Page 46: ...46 05 1 0 45 1 8 5 0 1 650W 2 1350W 3 2000W...

Page 47: ...47...

Page 48: ...48...

Reviews: