22
www.evolutionpowertools.com
cog engages with a curved toothed rack incorporated into the
machines main body. This allows the hand-wheel to be used to
adjust the tilt/bevel angle of the blade
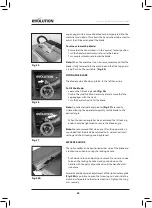
To raise or lower the blade:
• Ensure that the hand-wheel is in the ‘normal’ (outer) position.
• Turn the hand-wheel clockwise to raise the blade.
• Turn counter clockwise to lower the blade.
Note:
When the machine is not in use we recommend that the
blade is fully lowered into the machine and that the top guard
is lying flush on the saw table.
(Fig. 25)
TILTING THE BLADE
The blade can be tilted by up to 45˚
to the left hand side.
To tilt the blade:
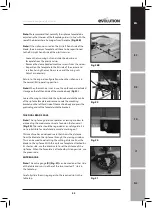
• Loosen the tilt locking knob
(Fig. 26)
• Push in the dual function hand-wheel and ensure that the
cog engages with the track.
• Turn the hand-wheel to tilt the blade.
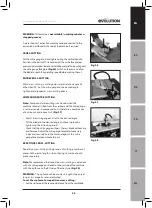
Note:
A protractor scale and pointer
(Fig. 27)
are readily
visible allowing the operator to quickly set the blade to the
desired angle.
• When the desired angle has been achieved the tilt locking
knob should be tightened to secure the blade angle.
Note:
We recommend that when any tilt cutting operation is
concluded that the blade be returned to its normal (vertical)
setting and the tilt locking knob tightened.
RIP FENCE GUIDE
The rip fence
(J)
can be positioned either side of the blade and
is locked in position by using the locking handle.
• Push down to lock, and pull up to unlock. Do not use undue
force on the locking handle. Gently push down on the
handle with the palm of your hand until the handle ‘clicks’
into place.
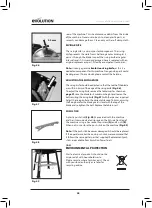
Forwards and backwards adjustment of the rip fence faceplate
(
Fig. 28A)
is possible. Loosen the two wing nuts and slide the
aluminium faceplate to the desired position. Tighten the wing
nuts securely.
Fig. 25
Fig. 26
Fig. 27
Fig. 28A


