14
REPLACING / CLEANING QUARTZ SLEEVE
DANGER: ULTRAVIOLET RADIATION. Disconnect Power Before Replacing Lamp
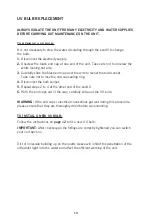
ALWAYS ISOLATE THE UNIT FROM ANY ELECTRICITY AND WATER SUPPLIES
BEFORE CARRYING OUT MAINTENANCE ON THE UNIT.
TO REMOVE A QUARTZ SLEEVE:
PLEASE NOTE: Removing the quartz sleeve will cause water to flow out of the unit.
1.
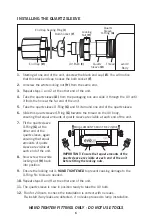
Remove the UV bulb as described on page 13.
2.
With the electricity supply disconnected, evoUV isolated and UV Bulb removed,
unscrew the locking nut at one end of the evoUV.
3.
Carefully remove the quartz sleeve O-Ring and keep safe.
4.
Unscrew the locking nut from the other end and remove the quartz sleeve O-Ring and
keep safe.
5.
Carefully remove the quartz sleeve taking care not to allow it to drop inside the
UV body.
6.
To drain any water that may be left in the unit, we would recommend that you unscrew
the mounting bracket(s), disconnect the unit from the pipework, and tilt the unit to drain
the chamber of water.
7.
Clean the sleeve and polish with a soft cloth or paper towel.
If you live in a hard water
area, you may get limescale on the quartz sleeve; this can be easily removed by using
vinegar or a cold water descaler.
WARNING:
If the end caps / electrical connections get wet during this procedure,
please ensure that they are thoroughly dried before re-connecting.
TO RE-INSTALL A QUARTZ SLEEVE:
Follow the instructions on
pages 6 and 13
to re-install the quartz sleeve and UV bulb.
IMPORTANT:
After checking all the fittings are correctly tightened you can switch your unit
back on.
TROUBLESHOOTING
During this procedure or if you notice water leaking from around the end caps you should
check the following:
1.
Check the O-Ring is undamaged.
2.
Check there are no cracks and breaks in the quartz sleeve.
3.
Check that the locking nut is compressing the O-Ring to form a water tight seal.
4.
Check that the end caps are sufficiently tight.
5.
All components are clean and free from dirt and debris.
*Please note that service items are not subject to a claim under warranty. The service
items listed on page 4 are available from your EA stockist.
Summary of Contents for evoUV
Page 19: ...19...


