


ENVR8304D-8CH
9
3.
Basic Connection
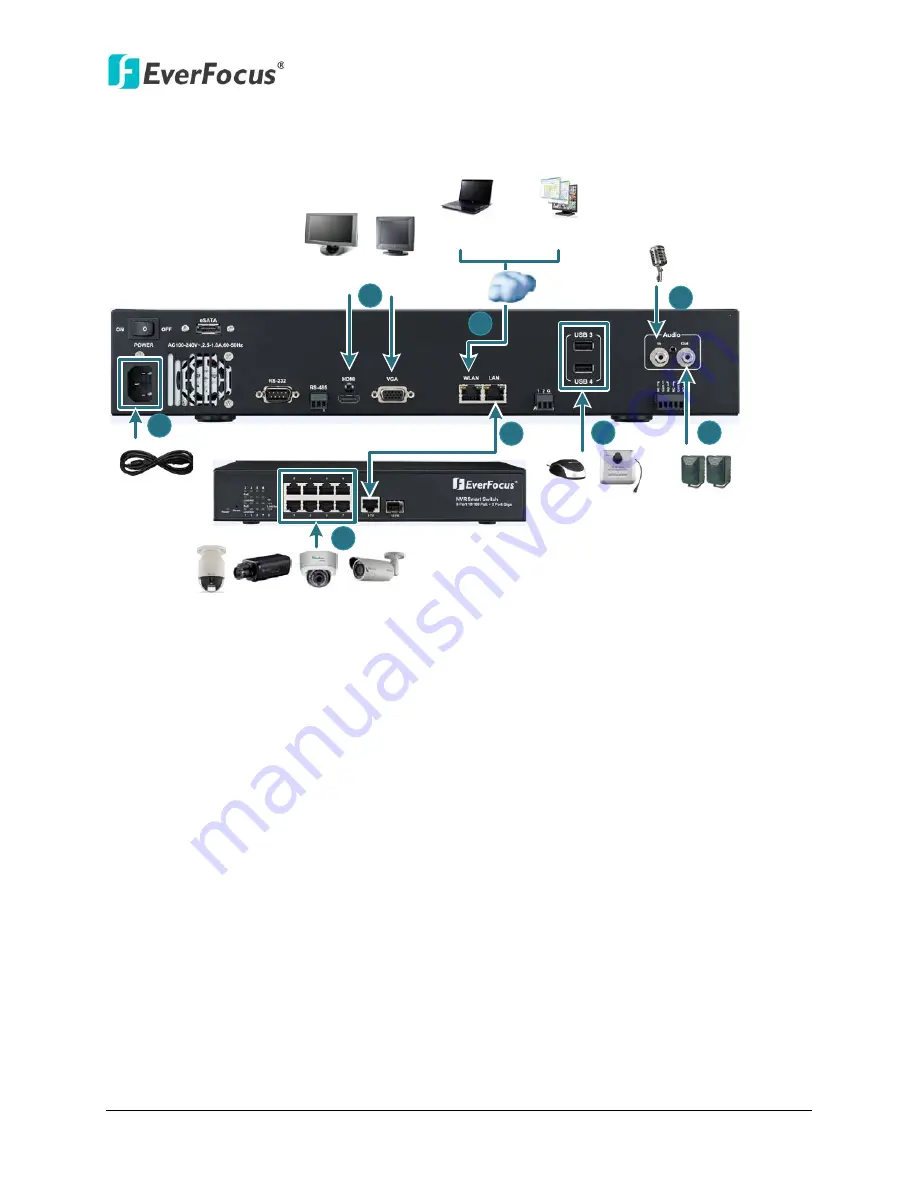
The instructions below describe the basic connection for ENVR8304D-8CH
Power Supply
Line Level
Audio In
Line Level
Audio Out
Main Monitor
(HDMI)
Main Monitor
(VGA)
Web Remote
Client
PowerVideo
Plus
(CMS)
NVR Smart Switch
Mouse &
EKB200 Keyboard
IP Cameras 1 ~ 8
Network
EVNR8304D-8CH
1
2
3
4
5
6
7
8
1. Using the supplied Power Cord, connect one end to the 100-240 VAC~ port on the NVR and
the other end to the 100-240 VAC~ power outlet.
2. To view videos, connect a monitor to the HDMI or VGA port using the HDMI or VGA cable
supplied by the monitor manufacturer.
3. To manage the NVR over network, use a standard RJ-45 CAT5 10/100Mb Ethernet cable to
connect the WLAN port of the NVR to the network. Please refer to
2.5 Connecting the NVR to
the Network
of your User’s Manual.
4. Connect the LAN port of the NVR to a PoE device using a standard RJ-45 CAT5 10/100Mb
Ethernet cable. Please see
2.3.1 Camera Connection
of your User’s Manual for more details.
5. Connect the IP cameras to the 1~8 camera ports at the rear of the PoE switch using Ethernet
cables without separate power sources. Please see
2.3.1 Camera Connection
of your User’s
Manual for more details.
6. Optionally connect a mouse or a keyboard (EKB200) to the NVR to control the system. You
can also control the system using the supplied IR Remote Controller.
7. Connect the audio input devices to the NVR.
8. To listen to audio of video source, connect speakers to the Audio Out port. Note that
speakers with amplifier are required.


