Stainless Steel 2MP/3MP/4MP Network Cameras
9
EZN288MS / EZN368MS / EZN468MS:
1.
Optionally screw the sunshield to the camera (please refer to Optional Accessory in this QIG).
2.
Optionally insert a micro SD/SDHC/SDXC card into the card slot. Please refer to 3. SD Card Slot
and Reset Button.
3.
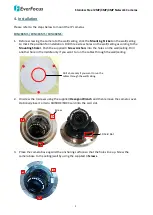
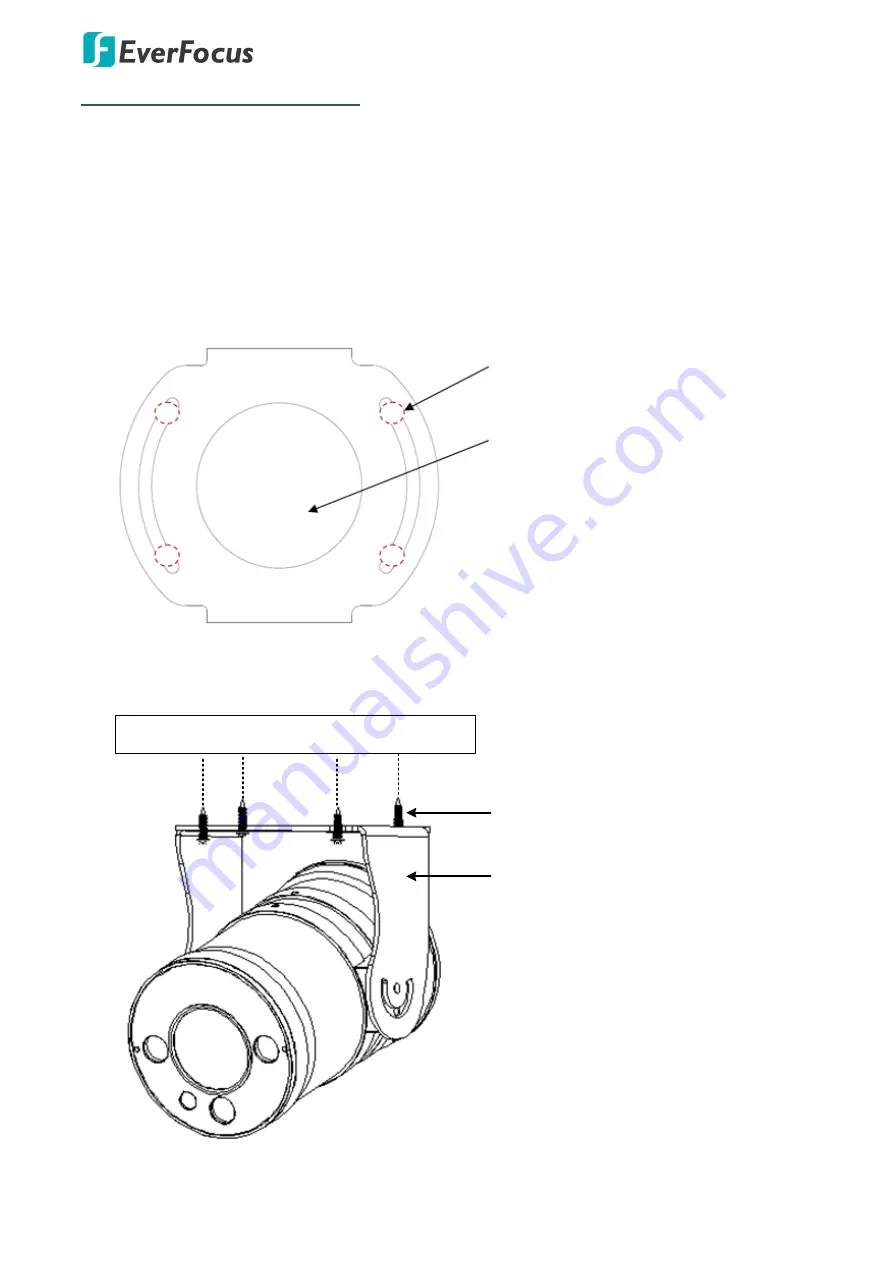
Before screwing the camera to the wall/ceiling, stick the Mounting Sticker on the wall/ceiling
to mark the position for installation. Drill four screw holes on the wall/ceiling according to the
supplied Mounting Sticker and push the supplied 4 Screw Anchors into the holes on the
wall/ceiling. Drill another hole in the middle inside the area only if you want to run the cables
through the wall/ceiling.
Screw Hole Position
Drill a hole if you want to
run the wires through
the wall/ceiling.
4.
Place the camera’s bracket against the anchoring surface so that the holes line up. Screw the
camera to the wall/ceiling using the supplied 4 Screws.
Wall/Ceiling
Bracket
Screw


