


3
context-specific search related menu, exit the zoom mode.
5. IP Utility compatibility
(1)
– This
capability allows you to access and
change the DVR basic network
configuration from a PC over a LAN (IP
address, subnet mask, gateway IP, DNS1
IP DNS 2 IP, and Machine Name), even if
the current IP configuration in the DVR
does not match the settings for the LAN.
This utility can be downloaded from
http://www.everfocus.com/tools.cfm
Item 7 IP Utility program or
http://www.everfocus.com/downloads/product_software/IPUtility.exe
Launch the utility, click the “Find Devices” button. DVRs on the LAN will be listed. The Machine
Name is the DDNS name of the DVR. To change values, first select a device; then click “Login”. In
the popup window enter the admin ID and password of the DVR and click “OK”; then click on the
values to be changed, enter the new values and when complete click on “Set Configuration”. To
verify the changes, click “Find Devices” again. The HTTP port will be reported by the utility, but
must be changed within the DVR menu system. To connect to a DVR, select it and click on
“Connect to Selected Device”. (The “Firmware Upgrade” button is used for IP cameras only; DVR
firmware must be upgraded thought the local or web I/F DVR menu system.)
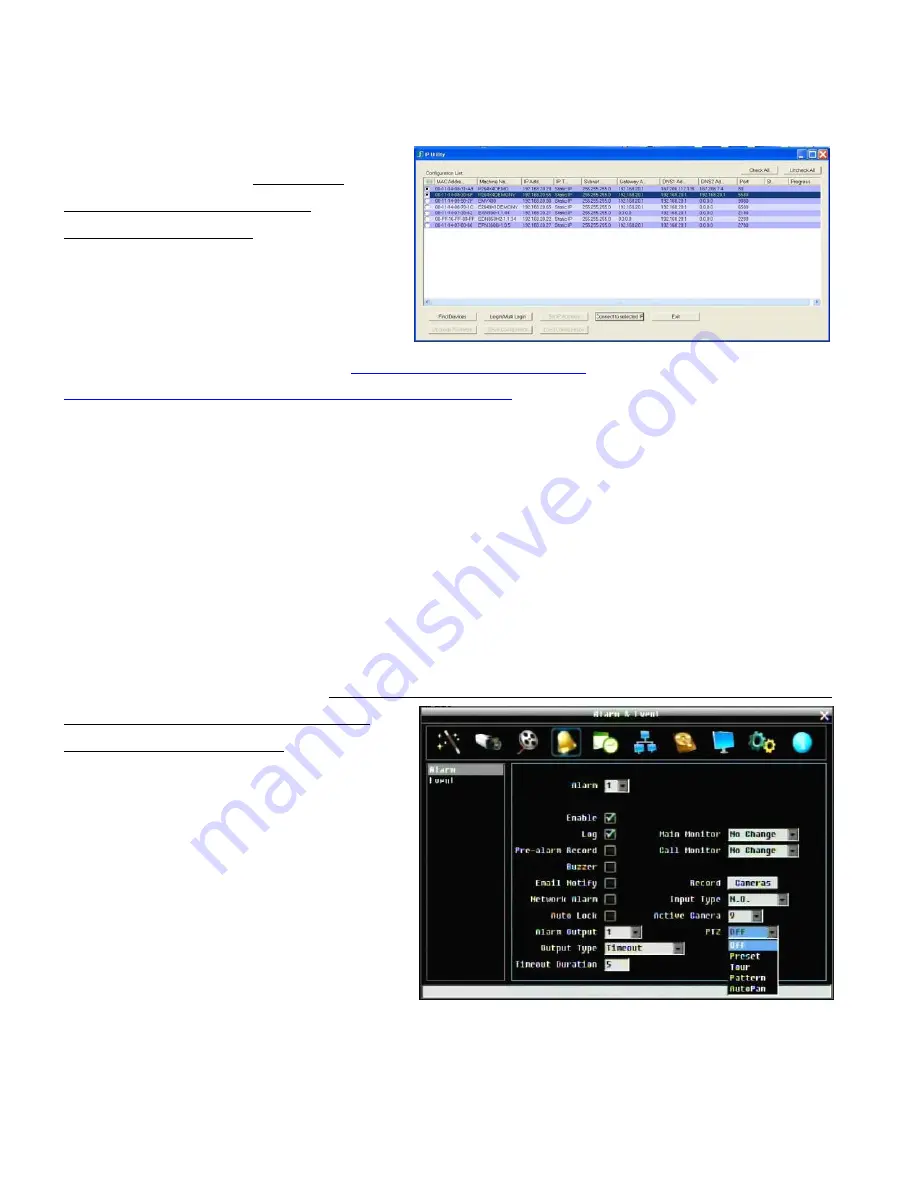
6. Alarm PTZ preset trigger
(3)
– An alarm condition may be programmed to send a command to
move to a PTZ preset or initiate a tour,
pattern or autopan function. In the Alarm
menu there is now a choice for ‘PTZ
Preset’; picking Preset, Tour or Pattern will
offer another drop down to choose the
corresponding number for this instruction.
Autopan requires no number. This
instruction will be sent to the camera
indicated in the “Active Camera” drop
down according to the RS-485 setup in the
DVR. Please verify normal RS-485 control
operation before activating this feature.


