EZN268
25
6.1.2
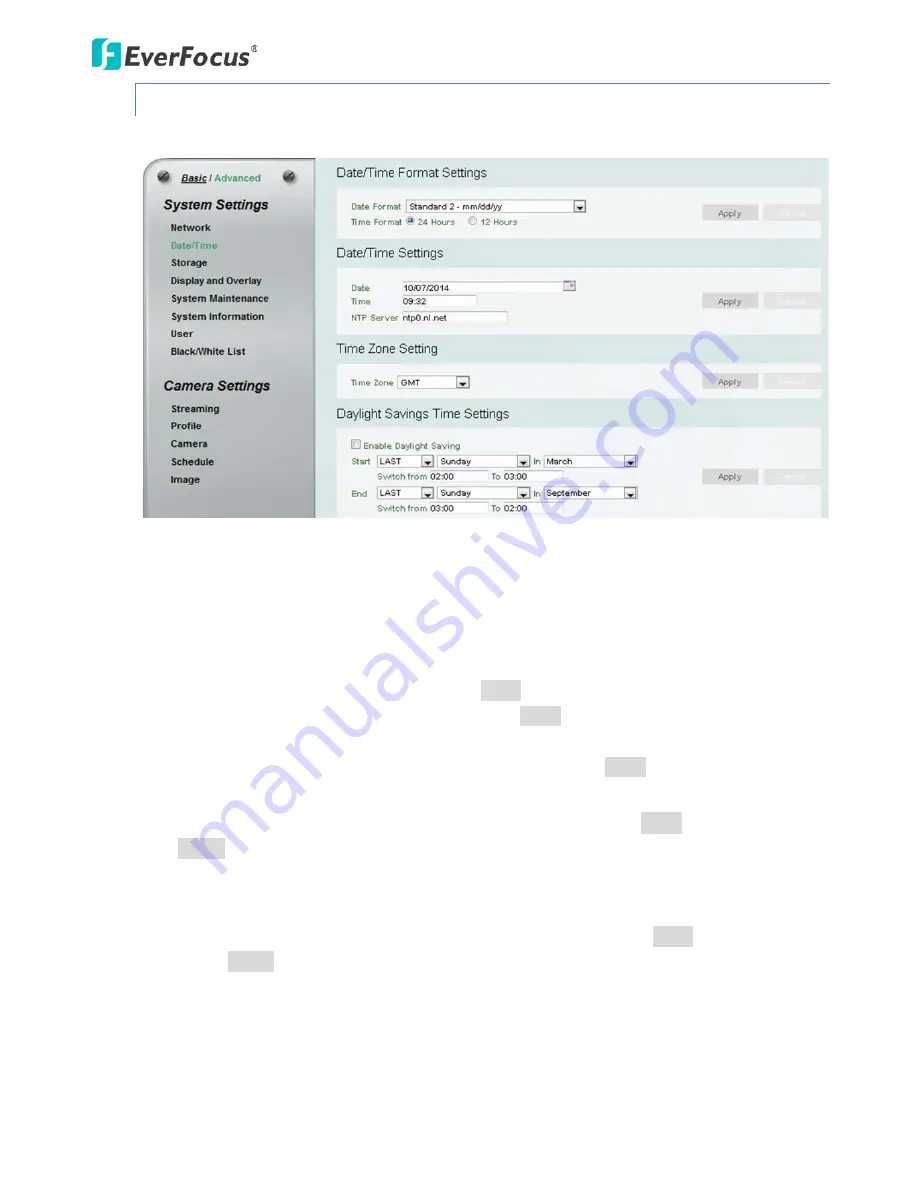
Date / Time
You can set up the system’s time on this page.
【
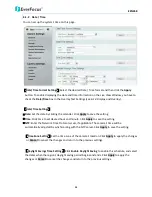
Date/Time Format Settings
】
Select the desired Date / Time format and then click the
Apply
button. To enable displaying the date and time information on the Live View Window, you have to
check the
Date/Time
box in the Overlay Text Settings (see
6.1.4 Display and Overlay
).
【
Date/Time Settings
】
Date
: Set the date by clicking the calendar. Click
Apply
to save the setting.
Time
: Click time to set desired hour and minute. Click
Apply
to save the setting.
NTP
: Enter the Network Time Protocol server, if applicable. The camera’s time will be
automatically adjusted by synchronizing with the NTP server. Click
Apply
to save the setting.
【
Time Zone Setting
】
Set the time zone of the camera’s location. Click
Apply
to apply the changes
or
Cancel
to cancel the changes and return to the previous settings.
【
Daylight Savings Time Settings
】
Click
Enable Daylight Saving
to enable this schedule, and select
the dates when the region’s daylight saving period begins and ends. Click
Apply
to apply the
changes or
Cancel
to cancel the changes and return to the previous settings.


