21
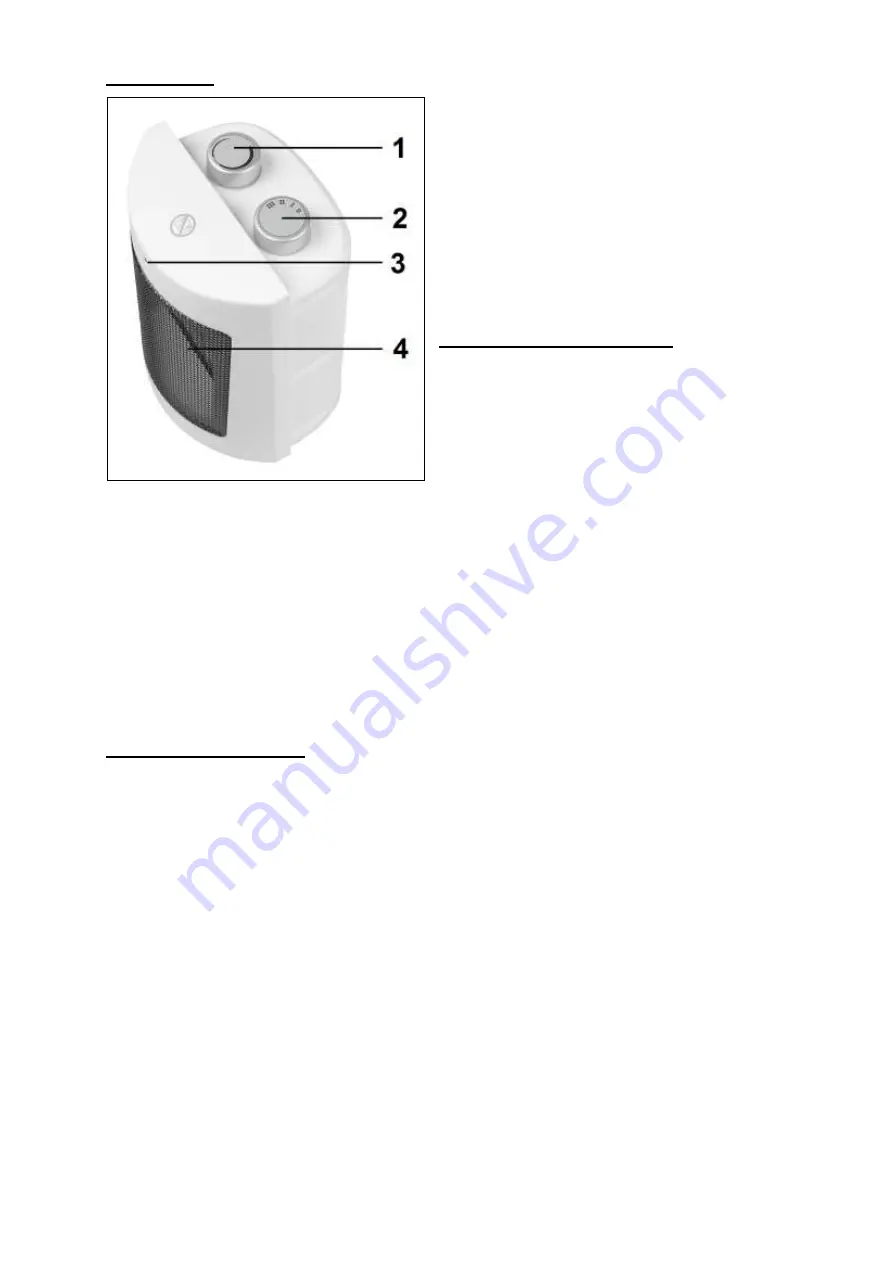
Description
1
– Thermostat dial
2
– Mode selector dial
3
– Indicator light
4
– Heating grill
Location and Connection
Remove all packaging material and
keep out of reach of children. After
removing packaging, check the
appliance for damage or other signs
that could indicate a
fault/defect/malfunction. In case of
doubt, do not use the appliance, but contact your vendor for inspection or
replacement.
Choose a suitable location for the heater which is at least one metre away from
any obstructions, walls or inflammable materials (see also safety instructions).
Make sure a functioning heater is always placed on a solid, flat and horizontal
surface.
Check if the mode selector dial is set to 'OFF' (O).
Fully extend the power cord and plug into a suitable 220-240V socket. To prevent
the circuit overloading, check that no other appliances are connected to the same
group.
Set-up and Operation
Switch the heater on by turning the mode selector dial to one of three positions:
I
Heating
at 500W
II
Heating at 1000W
III
Heating at 1500W
The indicator light at the front will turn on.
It is most economical to heat the space at 1500W, then to switch to 1000W or
500W to maintain the temperature.
Both at half and full power, the fan rotates at the same speed; the difference
between the two lies in the number of heating elements in use.
The thermostat serves to maintain a constant room temperature. To set the
desired temperature, turn the thermostat dial to its maximum position (clockwise
as far as it goes). Set the mode selector dial to I, II or III. Once the desired
temperature is reached, turn the thermostat dial back slowly until you hear a
click. This causes the heater to switch off. The heater will now automatically
switch on and off to maintain the set temperature.
To switch the heater off, set the power dial to ‘0’ (off). Unplug.


