background image


60

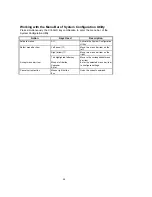
Working with the Pull-Down Menu of System Configuration 
Utility 

When the desired menu bar item is highlighted, press the Enter key to enter the pull-
down menu for values setting. 
 

Action 

Keys Used 

Description 

Select pull-down menu item 

Down arrow (

Move to the next pull-down menu 
item. 


Down arrow (

Move to the previous pull-down 
menu item. 


The highlighted letter key 

Move to the correspondent pull-
down menu item. 

Select a control  

Tab 

Move between the options. 

Change values 

Down/Up arrows (

)(

Modify the settings. 

Accept entries  

Spacebar 

Enable/disable the specified 
function. When a check mark 
appears, the function is on. 


Enter 

Choose <OK> from a list of 
options. 

Reject entries 

Esc 

Undo the current setting.  


Enter 


Choose <Cancel> from a list of 
options. 

Activate accelerators 

Alt 

Invoke all the highlighted letters 
corresponding to their respective 
options. 

Quit 

Esc 

Press the Esc key to close the 
pull-down menu. 

Summary of Contents for 6200-A DeskNote

Page 1: ...indows and Microsoft Mouse are registered trademarks of Microsoft Corporation IBM PC OS 2 PS 2 EGA and VGA are registered trademarks of International Business Machines Inc Intel Pentium are trademarks of Intel Corporation SystemSoft is a registered trademark of SystemSoft Corp Sound Blaster Pro is a trademark of Creative Labs Inc Duracell is a registered trademark of Duracell Inc Photo CD is a tra...

Page 2: ...re or other cause beyond Eurocom Corporation s control or alterations to the equipment at the customers direction Eurocom Corporation shall not be liable for any incidental or consequential damages including but not limited to loss or injury to business profits goodwill or for exemplary damages Service During the Warranty Period If your hardware should fail during the warranty period bring your co...

Page 3: ...3 3 Package well Use the original shipping container and packing materials if possible 4 Provide your complete name address telephone number and fax so we can contact you if required ...

Page 4: ...extension cord is used with this product make sure the total current drawn by the products plugged into the extension cord do not exceed the extension cord or outlet power ratings 10 Do not allow foreign matter to enter the system 11 Do not attempt to service this product yourself Opening or removing covers may expose dangerous voltage points Refer all repair work to qualified service personnel 12...

Page 5: ...5 ...

Page 6: ...ent 11 Basic Operation 12 Power 12 AC Power 12 Internal Battery Power 13 Duracell Smart Battery at Retail 14 Recharged by AC Power 14 Second Battery Power Option 15 Duracell Smart Battery at Retail 16 Recharged by AC Power 16 Setup and Operation 17 Open the Top Cover Display Panel 17 Turn the System Power On 17 ...

Page 7: ...ype III Expansion Slot 25 CD ROM Drive 25 Ventilation 25 Rear View 27 DC in Socket 27 Serial Port 27 Expansion Port 27 RCA Jack 27 External Monitor CRT Port 27 MIDI Game Port 27 Parallel Port 27 External Keyboard or PS 2 Mouse Port 27 Left View 29 Left Side Stand 29 Battery Latch 29 PC Card Type II Expansion Slot 29 2 5 Hard Disk Drive 29 3 5 Floppy Disk Drive 29 Internal Battery Pack 29 Operation...

Page 8: ...y 39 Windows Keys 39 Storage Disks 40 3 5 Floppy Drive 41 2 5 Hard Disk Drive 43 5 25 CD ROM Drive 45 PC Cards Slots 46 Audio System 48 Trackpad Pointing Device 48 Infrared Wireless Communications 48 LCD Panel 49 Power Management 50 Standby Mode 50 Suspend Mode 50 Suspend to Memory 50 Suspend to Disk 50 System Resume 51 Resume from Suspend to Memory Mode 51 Resume from Suspend to Disk Mode 51 Adva...

Page 9: ... Messages Error Detected 55 System Configuration Utility SCU 56 Invoking the System Configuration Utility 56 Working with the Menu Bar of the SCU 57 Working with the Pull Down Menu of the SCU 58 Features of the System Configuration Utility 59 System Menu 59 Devices Menu 60 Power Menu 63 Exit Menu 65 ...

Page 10: ...Computer system and get you up and running quickly It provides m A first look at the system m Basic information you need to know before you operate the system for the first time m An introduction to setting up and turning on the system For detailed explanation of the Notebook Computer s features and operation refer to the following chapters ...

Page 11: ...al port 1 high speed 16C550 compatible Parallel port 1 EPP ECP mode support External monitor port 1 External PS 2 port 1 RCA jack 1 NTSC PAL TV output Expansion port 1 168 pin Infrared 1 IrDA standard MIDI Game port 1 Audio System Compatibility Sound Blaster Pro Microsoft Windows Sound System MPU 401 General MIDI Digitized sound 16 bit stereo Synthesized music FM synthesizer Wave Table synthesizer...

Page 12: ...y are comfortable enough for you to work If you properly care for the Notebook Computer it will provide many years of reliable service However remember this computer system is a precision instrument and it should not be Exposed to excessive heat or direct sunlight Subjected to shock or vibration Exposed to strong magnetic fields Left in a place where foreign matter or moisture may enter the system...

Page 13: ...he internal battery pack may have self discharged during shipment AC Power The Notebook Computer features a universal auto switching power adapter This adapter is suitable for use nearly anywhere 1 Connect the AC power cord to the power adapter 2 Plug the power adapter to the DC in socket on the rear panel of the Notebook Computer 1 Plug the AC power cord into a properly grounded outlet ...

Page 14: ...ery pack which provides hours of continuous portable operation Proper care is required for optimum performance Do not attempt to disassemble the battery under any circumstances The battery may explode if exposed to fire or high temperatures Avoid short circuit the battery by the metal terminals ...

Page 15: ...ply regardless if the system is being operated or not Hours may be needed to charge the battery pack for long service life Some instructions should be carefully concerned before you charge the battery pack Upon the very first use or after a long period of storage the system might indicate that charging is complete after just a short time Simply remove the battery to cool it off and then repeat the...

Page 16: ...designed in addition to the system s internal one to prolong the battery life for the unit s portable use You may need to replace the floppy disk out of the 3 5 drive bay with the Second Battery pack for longer power life Second battery pack 3 5 floppy disk ...

Page 17: ...uracell Smart Battery available at retail outlets around the world to accurately indicate a fuel gauge of the predicted available charge for the present state information Recharged by AC Power The Second battery is charged the same way you do the internal one ...

Page 18: ...over as follows 1 Slide the top cover clasp right to unlatch it 2 Lift the top cover to reveal the display panel keyboard and system controls 3 Raise the display panel to a comfortable viewing angle Turn the System Power On Press the power button once to turn the system on Press it again to turn the system off The system will start perform a Power On Self Test POST and attempt to boot ...

Page 19: ...19 Clasp Power switch button ...

Page 20: ...are features in detail and shows you how to use them It covers m A description of the system unit and its features F The LED Indicators F Button F System Status LCD Bar F Input Output F Hardware Configuration F The keyboard F The Storage Disks F The PC Card Slots F The audio system F The Trackpad pointing device F Infrared wireless communications F The LCD Panel F Power Management ...

Page 21: ...Green System power on either by AC or by battery Red Battery in charge Orange Battery in charge when system power on Color of Light Status Green Internal battery fully charged Red Second battery fully charged Orange Both batteries fully charged This button is used either to turn the system on or to turn it off This is a built in input device for audio system ...

Page 22: ...22 ...

Page 23: ...ays that the floppy disk drive is being accessed HDD in Use This indicator displays that the hard disk drive is being accessed Suspend to Memory This indicator displays that the system has entered the Suspend to DRAM Mode Turbo Speed This indicator displays that the system is running in the maximum speed of the CPU Scroll Lock This indicator displays that the scroll lock function is activated Caps...

Page 24: ...24 ...

Page 25: ...ill display the system status indicating the respective concerned icons Dual Stereo Speakers These are two built in output devices on each side for audio system Trackpad Pointing Device The Trackpad pointing device features a sensitive glide pad for precise control of the cursor with just a fingertip along with two buttons Windows 95 Keyboard The Windows 95 keyboard gives the user a consistent mec...

Page 26: ...26 LCD panel Dual Stereo speakers LCD bar Trackpad and buttons Windows 95 keyboard ...

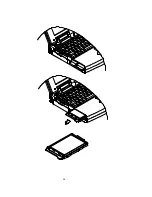
Page 27: ...akers Infrared The wireless communications capabilities are based on IrDA Infrared Data Association standards for cordless connection between the Notebook Computer and an IrDA compliant device PC Card Type III Expansion Slot The Type III PC Card slot is located inside a flip down panel It allows you to conveniently attach numerous accessories to the Notebook Computer It is equivalent to two Type I...

Page 28: ...28 Right side stand Microphone in Line in Headphone Infrared PC card Type III CD ROM drive Ventilation ...

Page 29: ...RCA jack to connect a TV set for example You may need to select the video standard NTSC PAL for video display External Monitor CRT Port This port allows the connection of an external monitor to the system It uses a 15 pin connector and supports super VGA and Simultaneous display of LCD and CRT MIDI Game Port This port is used to either connect any MIDI device such as a MIDI instrument or keyboard ...

Page 30: ...30 DC in socket Serial port Expansion port RCA jack CRT port MIDI Game port Parallel port PS 2 port ...

Page 31: ... a Type II format for system expansion capability 2 5 Hard Disk Drive The system s 2 5 h ard disk features a high capacity for data storage providing high access time for excellent performance 3 5 Floppy Disk Drive This is the location of the Notebook Computer s 3 5 high density 1 44MB floppy diskette drive You may press the button on its top right side for diskette ejection Internal Battery Pack ...

Page 32: ...32 Left side stand Internal battery pack 3 5 floppy diskette drive Battery latch PC card Type II 2 5 hard disk drive ...

Page 33: ...f On Off Off S2 2 On Off Off Off Off Off Off Off S2 3 Off S2 4 Off S2 5 Off Off Off On On On On Off S2 6 Off Off Off Off Off On On On Power of CPU The power of CPU varies with the CPU s voltage supply You may need to attach the proper circuit board of Power of CPU responding to the CPU you install 3 3 volts 3 1 volts 2 9 volts MPEG Accelerator Card Option The MPEG Accelerator Card is optional for ...

Page 34: ...34 Power of CPU Heat sink fan for CPU MPEG Card option S2 ...

Page 35: ...ule package DIMM 0 64 bit DIMM 1 64 bit RAM Size 1Mx16 x4 None 8MB None 1Mx16 x4 8MB 1MX16 X4 1Mx16 x4 16MB 1MX16 X8 None 16MB None 1MX16 X8 16MB 1MX16 X8 1Mx16 x4 24MB 1MX16 X4 1MX16 X8 24MB 1MX16 X8 1MX16 X8 32MB 4MX4 X16 None 32MB None 4Mx4 x16 32MB 4Mx4 x16 1MX16 X4 40MB 1Mx16 x4 4Mx4 x16 40MB 4Mx4 x16 1Mx16 x4 None 40MB 4Mx4 x16 1Mx16 x4 1MX16 X4 48MB 4Mx4 x16 1Mx16 x4 1MX16 X8 56MB 4Mx4 x16 ...

Page 36: ...36 DIMM 1 DIMM 0 S1 ...

Page 37: ...Computer utilizes an 86 key keyboard detachable for various language versions It is laid out slightly differently from a standard AT keyboard but it offers all of the same functions plus some special specific features of the system ...

Page 38: ...ok Computer and it is used for operation of The PgUp PgDn Home End keys The embedded numeric keypad The hot key Cursor Control Keys Four cursor control keys also called Arrow or Direction keys are located below the Enter key The colored function will need to be used with the system function key F PgUp F PgDn F Home F End P gU p P gDn H ome E nd ...

Page 39: ...e capable of providing numeric keypad functions Press the NumLock key to lock the numeric keypad The NumLock indicator will be displayed on the system status LCD bar Press the Fn key with the keys of the embedded numeric keypad to operate with the colored number and symbol keys ...

Page 40: ...ay panel Display Type Display type mode allows you to switch display among LCD only CRT only TV only both LCD and CRT Contrast Control Contrast control allows you to adjust the contrast of the display panel This feature is available for DSTN panel only Brightness Control Brightness control allows you to adjust the brightness of the display panel Volume Control Volume control allows you to adjust t...

Page 41: ...or compatibility with 101 key keyboards the functionality of the Application key should map to existing keys for example the key combination SHIFT F10 could map to the Application key functionality When the user presses either Windows key Left or Right the Start menu appears Both keys can be used to modify other keys The operating system controls the functionality of the Windows keys Only shell ap...

Page 42: ...42 Storage Disks The Notebook Computer comes equipped with several data storage drives 3 5 Floppy Drive 2 5 Hard Drive 5 25 CD ROM Drive ...

Page 43: ...diskette drive is labeled drive A It is capable of starting the system when a bootable diskette is placed in it The floppy diskette drive comes designed to be removable for the desired replacement in the 3 5 bay with the Second Battery pack for longer system use time ...

Page 44: ...e up and the metal shutter toward the disk drive gently insert the diskette into the drive until the diskette is properly seated n To remove the diskette from the drive press the ejection button on the top right side of the drive and remove the diskette ...

Page 45: ...fer rate at speed up to 16 6 MB second The system will automatically configure the hard disk parameters for any supported IDE drive If the hard disk drive is not bootable you must start the system with a bootable diskette in floppy diskette drive A Refer to your DOS manual for more details about hard disk drives DOS files starting your system and formatting disks ...

Page 46: ...46 ...

Page 47: ...tem using the tray loading mechanism for ease of use The CD ROM drive provides the performance required for the multimedia applications in a variety of disc types such as CD DA CD ROM Mode 1 Mode 2 CD ROM XA Mode 2 Form 1 Form 2 Multi session Photo CD and CD I Video CD compatible ...

Page 48: ...ocated on the upper socket Type II x 1 on the left panel Inserting and Removing PC Cards PC cards are inserted and removed in much the same way as floppy disks Although PC cards are electronic devices you do not need to turn off the system power to change them Exit any applications you are using and return to the DOS prompt before inserting or removing a PC card n To insert a card into the slot al...

Page 49: ...requires the use of software drivers and the device specific drivers to control the operation of the socket and any PC Cards inserted into it All slots may be used to install F LAN F FAX modem devices F Memory devices F PCMCIA compatible hard disk drives F Communication devices ...

Page 50: ...eniently take advantage of software that requires a mouse whenever you are away from your desk Infrared Wireless Communications The system adopts infrared technology as the interface for simple fast and convenient data exchange from the Notebook Computer to another or to an IrDA compatible device a printer for example No object should be blocked in each other s line of sight between the Notebook C...

Page 51: ...ntroller 2MB video DRAM Capability to support 800x600 SVGA resolution DSTN TFT display Super VGA resolution output to an external monitor Ability to output the video to other video display device F VGA monitor CRT or RGB projector F TV set Ability to drive both displays of LCD and other video device simultaneously F VGA monitor CRT or RGB projector ...

Page 52: ...ialize the Suspend Mode when any of the disk drives is accessed such as HDD FDD and CD ROM drive Suspend to Memory Suspend to Memory is a 5 volt suspend mode for system power management Suspend to Disk Suspend to Disk is a 0 volt suspend mode for system power management 1 Use your operating system s FDISK program to delete all partitions of the hard disk if any already exists on the target drive 2...

Page 53: ... successfully from the Suspend Mode when connected to some external devices such as PC Card Resume from Suspend to Memory Mode The system may be resumed from Suspend to Memory mode by Resume alarm time hour minute Modem ring Any keyboard key pressed Resume from Suspend to Disk Mode The system may be resumed from Suspend to Disk mode by Power back on ...

Page 54: ...OS and the software application you are using Refer to their respective manuals for detailed information Windows 95 Enter Control Panel for System icon select Device Manager menu for CD ROM settings Keep Auto insert notification disabled from the system repeatedly scanning the IDE port When Advanced Power Management enabled the Notebook system power will be automatically turned off with no need to...

Page 55: ...f Test POST m The System Configuration Utility SCU Power On Self Test POST The BIOS performs a series of power on self test POST to diagnose hardware errors when the system first starts up During the POST procedure the POST verifies that the hardware is installed and operational If a hardware problem exists the POST routine may halt execution depending upon the severity of the problem ...

Page 56: ... for SiS 510X Version 1 01 26 Copyright 1983 1996 SystemSoft Corp All Right Reserved System Processor 200 MHz Intel Pentium CPU System External Cache 256 KB Enabled Video Chip Trident Cyber 9385 with 2 MB Video RAM SystemSoft Plug n Play BIOS Ver 1 0a Base Memory 640 Kb Extended Memory 15360 Kb Shadow Memory 256 Kb Reserved Memory 128 Kb Total Memory 16384 Kb CTRL ALT S to enter System Configurati...

Page 57: ...pyright 1983 1996 SystemSoft Corp All Right Reserved System Processor 200 MHz Intel Pentium CPU System External Cache 256 KB Enabled Video Chip Trident Cyber 9385 with 2 MB Video RAM SystemSoft Plug n Play BIOS Ver 1 0a Base Memory 640 Kb Extended Memory 15360 Kb Shadow Memory 256 Kb Reserved Memory 128 Kb Total Memory 16384 Kb WARNING NO BOOTABLE FLOPPY DRIVE 0 INSTALLED WARNING FLOPPY INFORMATIO...

Page 58: ...information even when the power is turned off and retains that when the system is turned back on Invoking the System Configuration Utility The System Configuration Utility SCU will be accessed when simultaneously press the Ctrl Alt and S keys CTRL ALT S to enter System Configuration Utility The above message only lasts seconds If you miss it the computer will access its boot process You must reboo...

Page 59: ...nus Alt Activate the System Configuration Utility Select menu bar item Left arrow Move to a menu bar item on the left Right arrow Move to a menu bar item on the right The highlighted letter key Move to the correspondent menu bar item Accept menu bar item Mouse left button Spacebar Enter Enter the selected menu bar item to configure settings Cancel current action Mouse right button Esc Undo the cur...

Page 60: ...ghted letter key Move to the correspondent pull down menu item Select a control Tab Move between the options Change values Down Up arrows Modify the settings Accept entries Spacebar Enable disable the specified function When a check mark appears the function is on Enter Choose OK from a list of options Reject entries Esc Undo the current setting Enter Choose Cancel from a list of options Activate ...

Page 61: ...rackpad Boot Device Diskette A Specifies where the system Hard disk C boots from PCMCIA card Video Display LCD and CRT Enables both LCD and CRT simultaneously Auto sense The display auto switches to CRT if one is sensed Video Expansion Enabled Enables the LCD expanded mode System Security Enter old password You may enter a password up Enter new password to 10 printable alphanumeric Verify new pass...

Page 62: ...ut output PIO mode for high data transfer rate Hard Disk 2 Disk Type None No hard disk is installed in the system Custom Modifies the values for cylinders heads sectors per track landing zone write pre composition and size MB Auto ID Automatically configures the hard disk parameters for any supported IDE drive Enhanced Options LBA mode Enables Logical Block Address LBA mode to overcome 528MB barri...

Page 63: ...Q9 Specifies the system s IRQ5 audio IRQ configuration IRQ7 DMA setting DMA0 Specifies the system s DMA1 audio DMA channel DMA3 configuration MIDI Port MIDI port 300H Specifies the system s 310H General MIDI I O port 320H address 330H Wave Table Enabled Enables Wave Table music synthesizer Keyboard NumLock Specifies NumLock is on at system boot time Keyboard Repeat Key repeat rate 2 cps Defines th...

Page 64: ...64 ...

Page 65: ...sults in moderate performance and battery life High battery saving Enables the power saving to its highest which results in minimum performance but longest battery life Video Monitoring Video RAM access will prevent the system from entering a standby mode Suspend Controls Battery weak Warning only Emits a series of the warning audio beeps Suspend system Automatically suspends the system upon a low...

Page 66: ...66 ...

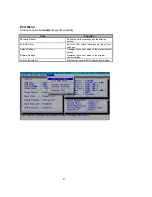
Page 67: ...nt settings and reboots the system Exit No Save Exits the SCU without saving any of the current changes Default Settings Changes the current setup to the system default values Restore Settings Restores the current setup to the original custom values Version Information Displays the current BIOS version information ...

Reviews: