13
6.2 PREPARATION
Clean the battery poles to remove dust and corrosion residue.
Only for open batteries:
Remove the plugs of the battery cells. Check the liquid level in the cells, consult the ope-
rating instructions of your battery for more information. Replenish only sufficient distilled water to ensure that the
minimum filling level is achieved. The liquid will expand during the charging process and the battery may overflow.
Leave the cells of the battery open until the end of the charging process.
In the event of closed and maintenance-free batteries, please follow the instructions of the battery manufacturer
to the letter.
6.3 CONNECTING THE BATTERY CHARGER
6.4 CHARGING THE BATTERY
Make sure that the charger is not connected to the mains socket and that the charging cable is not con-
nected to the battery charger.
Always first connect the red plus cable (+) of the charger to the plus pole of the battery. Then connect the black minus
cable (-) to the minus pole of the battery. If you wish to charge the battery while it is installed, connect the black
minus cable (-) to the chassis, far away from the battery, carburettor and fuel lines. Always stick to this sequence.
Now plug the mains cable (position A in the overview) of the battery charger into the socket. The backlight of the
display (position D in the overview) is activated. The display shows the battery voltage (position 1 in the overview).
CAUTION
If the error message „Er 1“ appears in the display, the charging cables are connected incorrectly. Remove
the pole clamps from the battery poles and connect them correctly
CAUTION
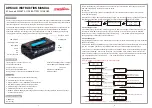
To start the charging process, press the selection switch for the charging programme (position C in the overview)
repeatedly until the charging programme you want is set. If no charging programme is set, the charging process will
not start. The last charging programme set is saved and can be started the next time the charger is used by pressing
the selection switch once. The charging programmes are switched through in the following order (see also Fig. 2 in
the overview):
1. 12 V-Car
6. 12 V-Motorbike-winter
2. 12 V-Car-winter
7. 12 V-Motorbike-AGM
3. 12 V-Car-AGM
8. 12 V-Motorbike-Lithium
4. 12 V-Car-Lithium
9. 6 V-Mode
5. 12 V –Motorbike
10. 6 V-Winter-mode
6.4.1 SELECTING THE CHARGING PROGRAMME
Once charging has started, the charging programme can no longer be changed. If you want to charge with a charging
programme other than the one set, unplug the charger from the mains and disconnect the battery from the charger
(see section 6.5). Wait approx. 30 seconds until the display is dark and then proceed according to section 6.4.1 and set
the correct charging programme.
Depending on the battery‘s state of charge, the unit adjusts the charging current to optimally charge the connected
battery. Only during the main charging phase is charging carried out with the specified maximum charging current.
Shortly before the full charging capacity is reached, a lower charging current is used. In this way, the battery is gently
and optimally charged to full capacity (see also section 6.4.4)
The animated battery symbol shown in the display (position 2 in the overview) indicates that the battery is being
charged.


