INST
ALL
ATION
Note:
Before installation, please inspect the unit. Be sure that nothing inside the package is damaged.
Please keep the original package in a safe place for future use.
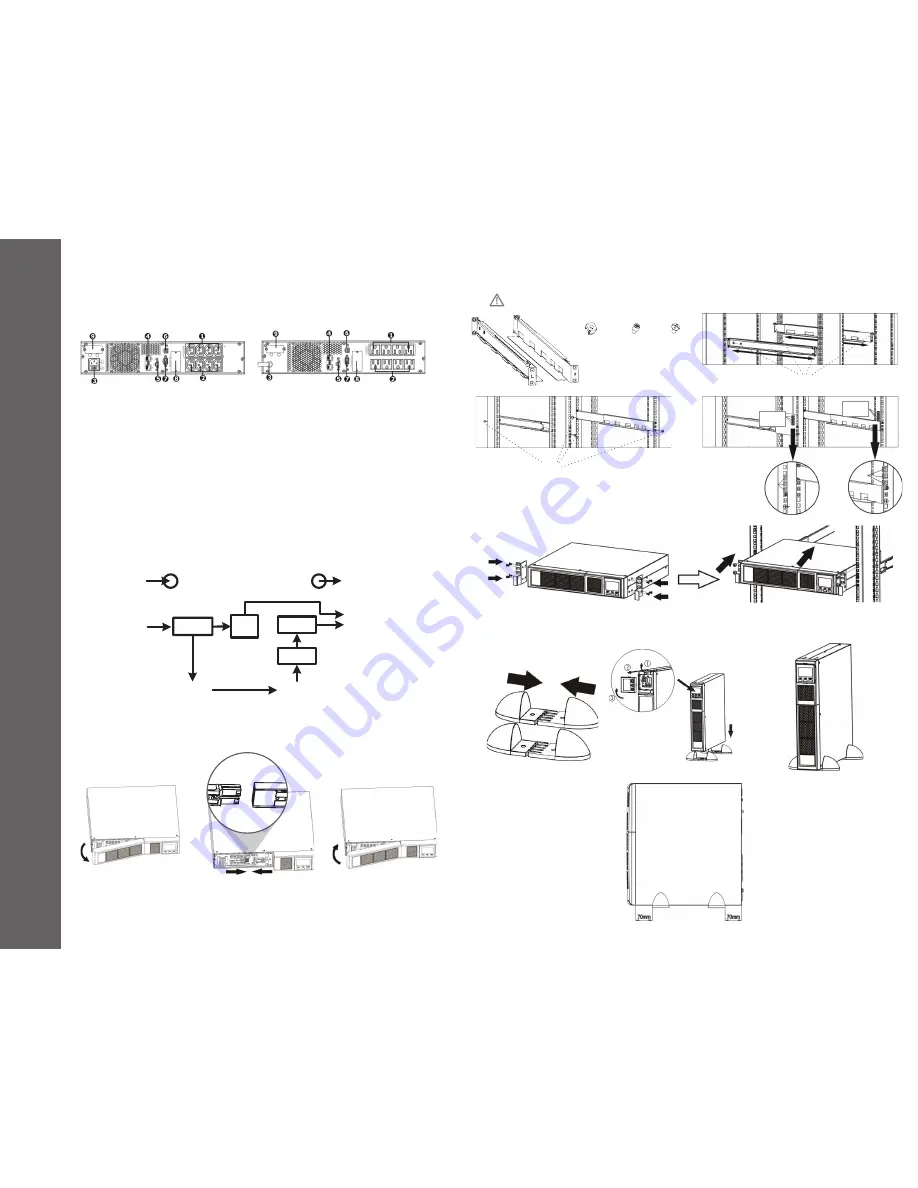
1.1 Rear Panel View
IEC Type
NEMA Type
1. Programmable outlets: connect to non-critical loads
2. Output receptacles: connect to mission-critical loads
3. AC input
4. Network/Fax/Modem surge protection
5. Emergency power off function Connector (EPO)
6. USB communication port
The UPS is composed of mains input, EMI/RFI Filters, Inverter, Battery charger, DC-to-DC converter, battery,
AVR TX and UPS output
1.2 Operation
EMI/RFI
Filters
Battery
Charger
Battery
DC-to-DC
Converter
Inverter
AVR
TX
Output
For safety consideration, the UPS is shipped out from factory without connecting battery wires. Before
installation of the UPS, please follow the steps below to re-connect the battery wires.
1.3 Installation
Remove Front Panel
Connect the AC Input and re-connect
battery wires
Put the front panel back
on the unit
Rack-Mount Installation
Caution! – DO NOT use the mounting brackets to lift the unit. The mounting brackets are only
for securing the unit to the rack.
Tower Installation
1
2
3
Note:
When installing the
UPS or battery pack with feet,
please keep 70mm distance
from the edge of the unit
M6
Screws
3 Cage
Nuts
3 Cage
Nuts
Fixing
Studs
Cage
Nuts (6)
Fixing
Studs (4)
M6
Screws (8)
Summary of Contents for UPS1500RM2U
Page 44: ...www V7 world com 08 17 2016 ...


