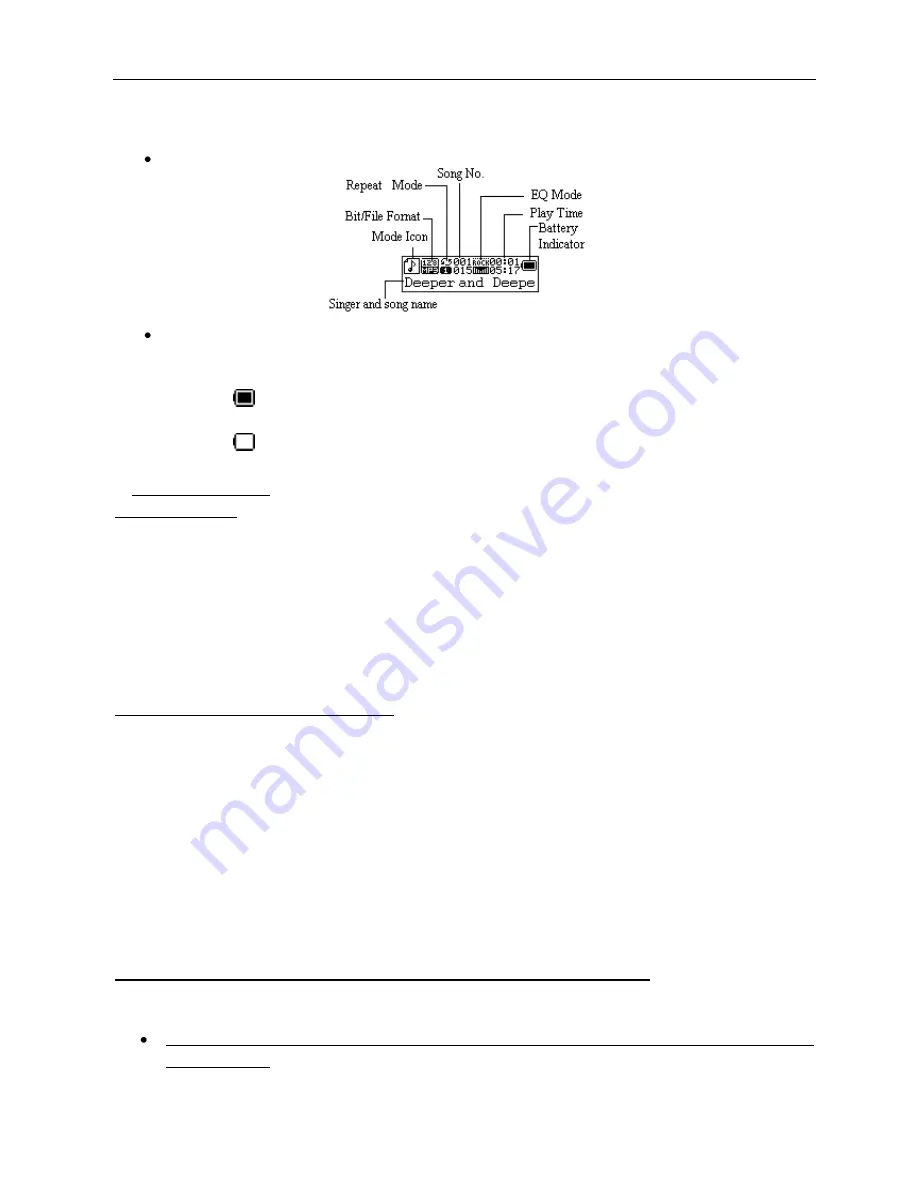
LCD Display Window
Battery Icon
The player displays remaining battery level information with 9 icons ranging
o
From:
Indicates that the battery is fully charged
o
To:
Indicates the battery power is depleted and a new battery should be installed
2. GETTING STARTED
Install the battery
Remove the battery cover on the rear of the player and insert one AAA battery (included) and the player
will turn ON automatically and enter the main interface. If the Player does not turn ON, make sure t
he „+‟
and „-„ends
of the battery match the diagram inside the player.
o
After connecting to a PC via USB cable, the player will turn ON automatically and enter USB
mode.
o
When connected to a USB port, the Player receives power from the computer and can be
operated without a battery installed.
Loading Music Files on the MP3 Player:
Connect the MP3 Player to a USB port on your computer using the included USB Cable. Your computer
will automatically recognize the MP3 Player as
a “Removable Disk” in your System Tray (lower-right corner
of the desktop) and in the
“My Computer” directory. Connecting to the Player to a USB port turns the
power ON to the Player unit.
Loading music files into the MP3 Player is very easy. Locate the music files on your computer that you
want to load onto
the MP3 Player and simply, “drag and drop” the music files into the MP3 Players‟
Removable Disk directory. You can easily; add new folders, rename existing ones, and organize your
music in the same manner that you would for other groups of folders, files, and data sets on a computer or
USB drive.
The Proper Way t
o Disconnect or “Eject” the MP3 Player from the Computer
If the MP3 Player is not properly
„Ejected” from the computer; music & recorded files may be lost or
damaged, and the player may not function correctly.
For Windows and MAC systems, follow the normal system procedures for the SAFE ejection of a
“USB DEVICE”.
o
First, make sure all MP3 Player functions have stopped and all programs using the player


