ETC
43
•
Loosen the chuck by rotating the handgrip (A).
•
Insert the drill/bit into the chuck.
•
Tighten the chuck so that the drill/bit is firmly clamped.
4. USE
The On/Off switch
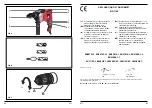
Fig.D
Switch the machine on by pressing the triggerswitch (A). When you release the
triggerswitch (A) the machine will turn off.
Switch-lock
You can lock the On/Off switch by pressing the triggerswitch (A) and then pressing knob
(B). Release the switch-lock by pressing the triggerswitch (A) shortly.
Speed-control
The rotation-speed can be continuously adjusted from 0 to 2800 rotations per minute by
pressing the switch (A) deeper or less deep.
Adjusting of the maximum rotation speed
•
Switch the machine on by pressing triggerswitch (A).
•
Lock the triggerswitch (A) by pressing knob (B).
•
Adjust the speed by turning the small wheel (C) to the desired maximum rotation
speed.
Switching the direction of rotation
•
Direction of rotation counter-clockwise: shift switch (D) to “L”.
•
Direction of rotation clockwise: shift switch (D) to “R”.
Switch for percussion drilling
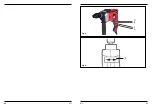
Fig.E
With the switch on top of the machine you can select normal or percussion drilling (7).
•
Slide the switch to the “Drill” symbol for normal drilling.
•
Slide the switch to the “Hammer” symbol for percussion drilling.
5. SERVICE & MAINTENANCE
Make sure that the machine is not live when carrying out maintenance work
on the motor.
The machines have been designed to operate over a long period of time with a minimum
of maintenance. Continuous satisfactory operation depends upon proper machine care
and regular cleaning.
06
ETC
Stanna omede;bart maskinen när:
•
Maskinen genererar onormalt mycket gnistor från kollektorn.
•
Elkabel eller kontakter uppvisar någon som helst defekt, t ex skadad isolering.
•
Strömbrytaren inte fungerar som den ska.
•
Rök eller dålig lukt indikerar bränd isolering.
Elektrisk säkerhet
Vid användning av elektriska maski ner, iaktta alltid de säkerhetsföreskrifter som gäller
lokalt i samband med brandfara, fara för elektriska stötar och kroppsskada. Läs förutom
nedanstående instruktioner även igenom bladet med säkerhetsföreskrifter som bifogas
separat. Förvara instruktionerna omsorgsfullt!
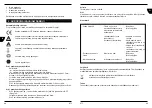
Kontrollera alltid om din nätspänning överensstämmer med värdet på
typplattan.
Maskin klass II – dubbel isolering, jordad kontakt behövs ej.
Vid utbyte av kablar eller stickkontakter
Släng omedelbart bort gamla kablar eller stickkontakter så fort de har ersatts av nya
exemplar. Det är farligt att sticka in stickkontakten till en lös kabel i vägguttaget.
Vid användning av förlängnings kablar
Använd uteslutande en godkänd förlängningskabel som är lämplig för maskinens effekt.
Ledarna måste ha en diameter på minst 1.5 mm
2
. Om förlängningskabeln sitter på en
haspel, rulla då ut den helt och hållet.
3. MONTERING
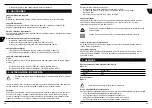
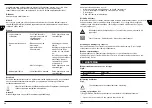
Använd endast skarpa borr av rätt typ för borrning i betong, metall respektive trä.
Fig.B
Betong/Sten
Hårdmetall
Metall
HSS
Tra
HSS
Montering av tillbehör
Fig.C
Ta alltid stickkontakten ur vägguttaget före monteringen.
Placering och avlägsnande borrbits
•
Lossa på borrchucken genom att vrida på flänsen (A).
•
Sätt i borrskärets skaft i borrchuckens hållare.
S
FI
DK
N
EE
LV
LT
GB
S
FI
DK
N
EE
LV
LT
GB


