


11
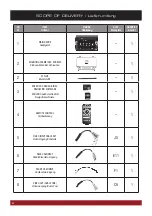
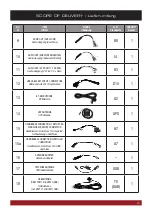
INSTALLATION EXAMPLE / Einbaubeispiel
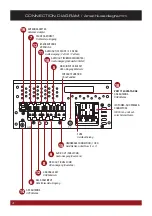
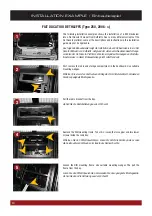
Now connect all connections according (refer to page 2-3) with the sockets on
the new ESX device. Plug in also the ISO power- and speaker connector and the
antenna connector.
Schließen Sie jetzt alle Kabelstecker entsprechend (siehe S. 2-3) am neuen
ESX-Gerät an. Schließen Sie ebenfalls den ISO Strom- und Lautsprecherste-
cker sowie den Antennenstecker an.
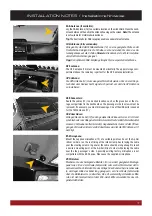
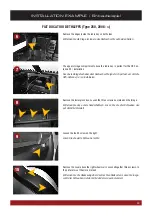
Slide the ESX device carefully into the radio bay. Before you complete the installa-
tion of the new ESX device, check its function. Please note that it may take up to
15 minutes, until a GPS signal can be received (in the open).
Schieben Sie das ESX-Gerät vorsichtig in den Radioschacht. Prüfen Sie vor dem
Zusammenbau das neue ESX-Gerät auf seine Funktion. Bitte beachten Sie, dass
es bis zu 15 Minuten dauern kann, bis ein GPS Signal (unter freiem Himmel) emp-
fangen werden kann.
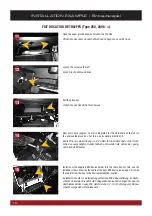
After the successful check of the functions, re-assemble the new device in the
reverse order (steps no. 8 -13).
Führen Sie nach erfolgreicher Prüfung der Funktionen dann den Zusammenbau
(Nr. 8 -13) in umgekehrter Reihenfolge durch.
16
17
18
FIAT DUCATO III DETHLEFFS (Type 250, 2006 ->)