


Supra-5000 Digital Cinema and Secured Media Projection System Quick Start Guide
May 19
th
, 2021
⑥
Powering Up the Projector
⑦
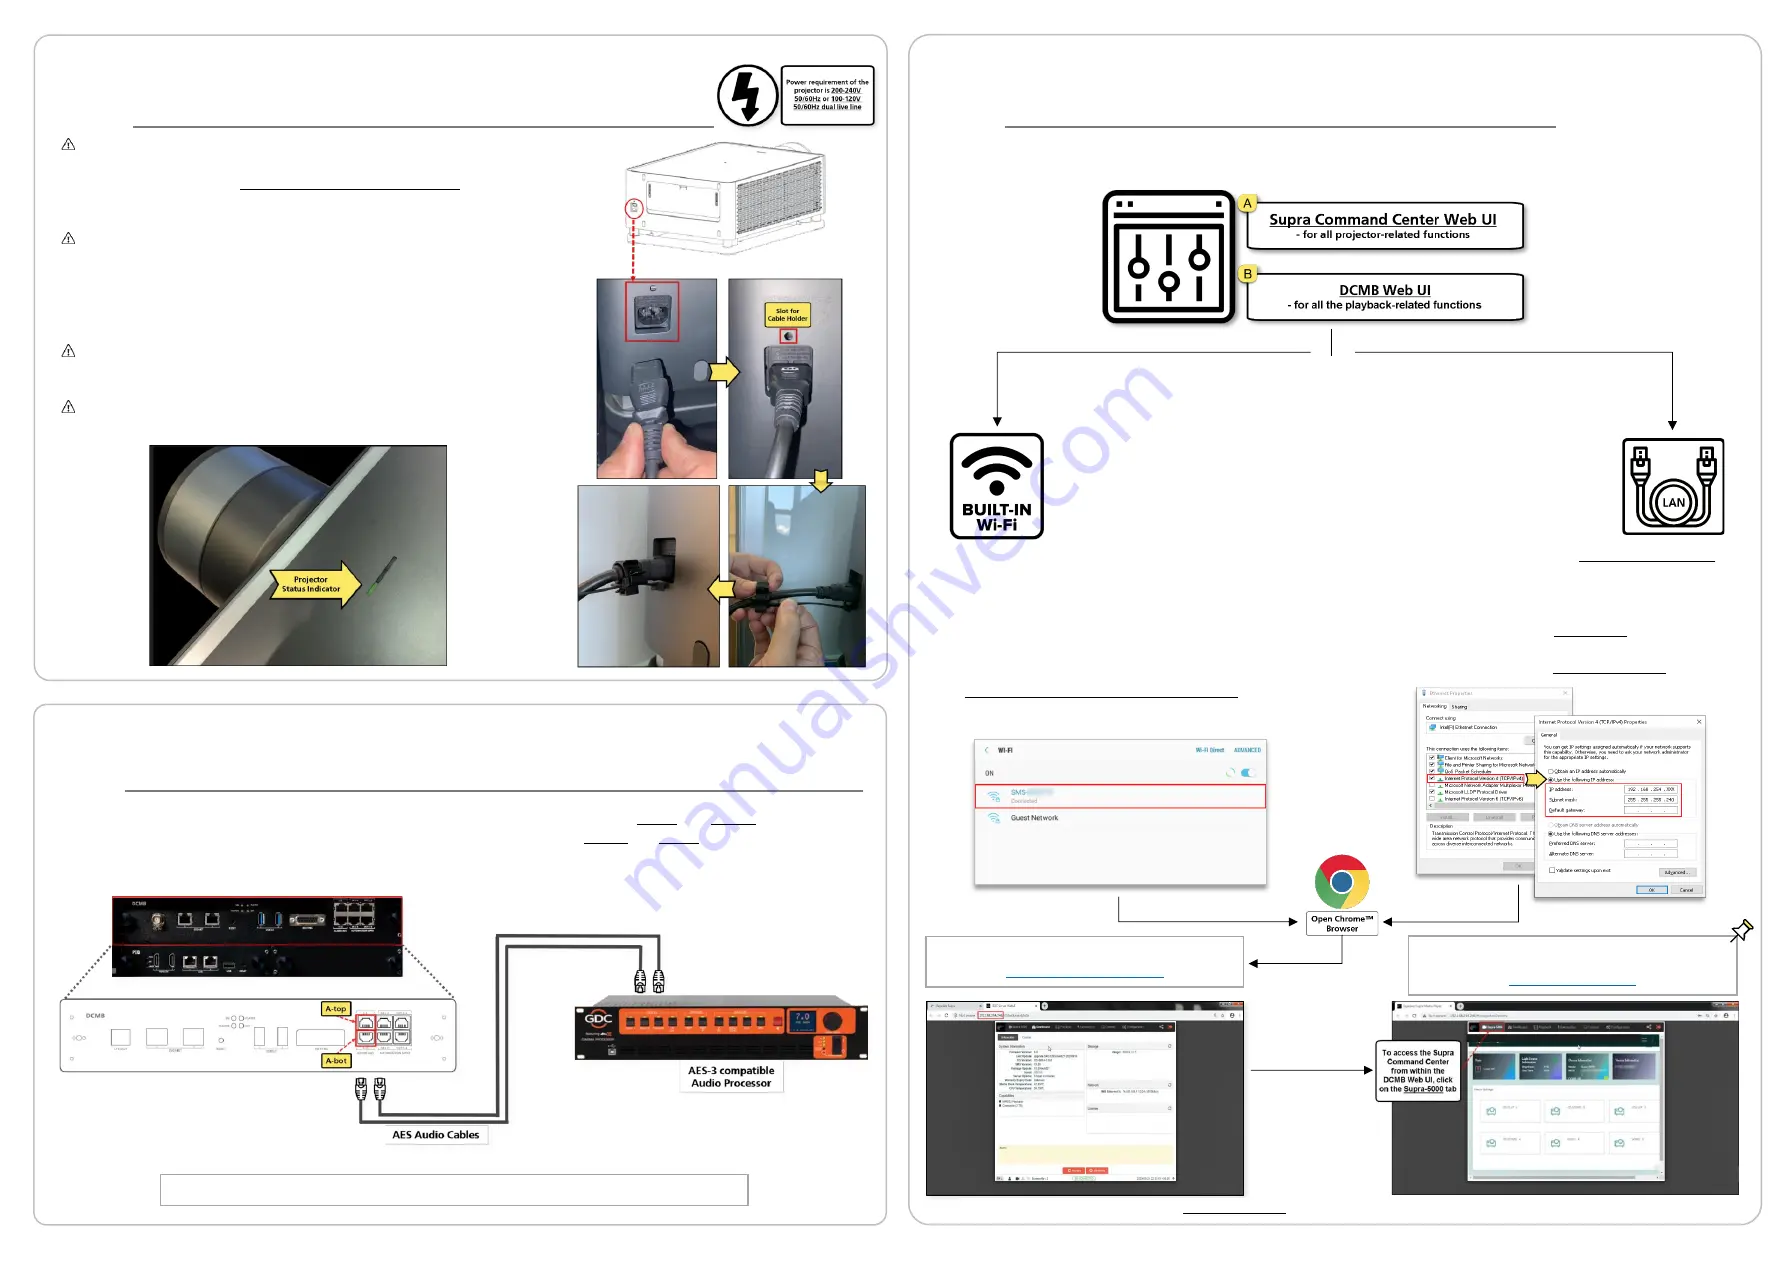
Controlling the Projector
The Espedeo Supra-5000 projector is controlled and operated using a web interface.
The web interface has been organized into two sections:
The Espedeo Supra-5000 web interface can be wirelessly accessed
via Chrome™ browser on a
recommended Android tablet
OR
via Chrome™ browser on a computer connected via a wired
(LAN) or wireless connection to the projector.
✓
Espedeo Supra-5000 has an in-built Access Point
which makes it possible to connect wirelessly to
the projector without the need for an external
Wi-Fi router.
✓
This Access Point name will be shown as “
SMS-
XXXXXX
”, where
XXXXXX
represents the unique
Serial Number of the projector’s DCMB
.
Connect the laptop or tablet to this Access Point.
✓
Connect the laptop to the LAN2 network port
of the projector’s PIB using a network cable.
✓
Make sure that the laptop
’
s network interface
IP is in the range from 240 to 255 (except for
241 and 246). Additionally, the Subnet mask
value should be set to 255.255.255.240.
Access the DCMB Web UI using the URL:
http://192.168.254.246
We recommend that you refer to the Supra-5000 User Manual, for more details how to access and operate the above-mentioned web interfaces.
⑧
Connecting to an Audio Processor
The Supra Command Center web interface can also be
accessed in a separate browser tab using the URL:
http://192.168.254.241
The Espedeo Supra-5000 features 16-channel AES-3 outputs on the Audio AES (A-top and A-bot) RJ45
connectors of
projector’s
DCMB. You can use AES cables to connect the A-top and A-bot connectors on
DCMB to the inputs of an AES-3 compatible Audio Processor.
Number of audio cables provided depends on the sound format specified while placing the order.
Before connecting the Supra-5000 projector to a power source,
make sure all the requirements for the installation environment
are met (Refer to the Supra-5000 Installation Manual for more
details).
Connect the power cord (included in the package) to the power
supply connector on the projector. Attach the strip part of the
cable holder into the slot provider above the connector. Wrap the
clamp part of the cable holder around the power cord. Insert the
strip into the clamp as shown, to secure the power cord in place.
Attach the power plug to a recommended AC Power outlet.
Turn ON the power source to start the projector.
Once the projector has booted-up completely, the Status Indicator
on the top panel of the projector should be steady
Green
.


