


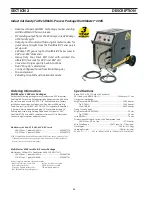


36
4.6 hanDlIng the tIg torch
starting the arc
There is nothing difficult or technical about starting an arc in
the proper manner. We recommend the particular procedure
outlined briefly below, to ensure maximum protection of the
workpiece from the atmosphere at the start of welding opera-
tions. In DC welding, when striking an arc the electrode must
touch the workpiece in order for the arc to start. As soon as the
arc is struck, withdraw the electrode approximately 1/8 inch
above the workpiece to avoid contaminating the electrode
in the molten puddle.
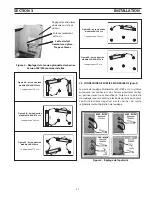
To strike an arc, first turn on the power supply and hold
the torch in a horizontal position about 1 inch above the
workpiece or starting block, as shown in Example A below.
Then quickly swing the end of the torch down toward the
workpiece, so that the end of the electrode touches the plate.
The arc will then strike. Once the electrode “scratches” the
plate retract the torch approximately 1/8”. This will establish
the arc.
The arc can be struck on the workpiece itself or on a heavy
piece of copper or scrap steel, and then carried to the starting
point of the weld. Do not use a carbon block for starting the
arc, as the electrode becomes contaminated causing the arc
to wander. When starting to weld with a hot electrode, the
action must be very rapid as the arc tends to strike before the
torch is in proper welding position.
To stop an arc, merely snap the electrode quickly back up
to the horizontal position. This motion must be made rap-
idly so the arc will not mar or damage the weld surface or
workpiece.
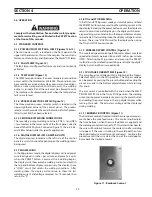
The use of hand or foot controls allows the operator to strike
the arc, vary welding current and terminate the arc without
moving the torch. This is strongly recommended for proper
TIG welding.
example a
example B
sectIon 4
operatIon
Summary of Contents for Multimaster 300
Page 1: ...Multimaster300 300X MIG TIG STICK WELDING PACKAGE 0558007770 06 2010 Instruction Manual...
Page 4: ...4 table of contents...
Page 40: ...40 TABLE DES MATI RES...
Page 66: ...66 section 6 replacement parts...
Page 67: ...67 section 6 replacement parts 26...
Page 68: ...68 section 6 replacement parts...
Page 69: ...69 section 6 replacement parts...
Page 70: ...70 section 6 replacement parts...
Page 71: ...71 section 6 replacement parts...
Page 72: ...72 section 6 replacement parts...
Page 73: ...73 section 6 replacement parts...
Page 74: ...74 section 6 replacement parts...
Page 75: ...75 section 6 replacement parts...
Page 76: ...76 section 6 replacement parts Mulitmaster 300 Mulitmaster 300X...
Page 77: ...77 section 6 replacement parts Mulitmaster 300 Mulitmaster 300X...
Page 78: ...78 section 6 replacement parts Mulitmaster 300 Mulitmaster 300X...
Page 79: ...79 section 6 replacement parts Mulitmaster 300 Mulitmaster 300X...
Page 80: ...80 section 6 replacement parts Mulitmaster 300 Mulitmaster 300X...
Page 81: ...81 section 6 replacement parts Mulitmaster 300 Mulitmaster 300X...
Page 84: ...section 6 replacement parts...


