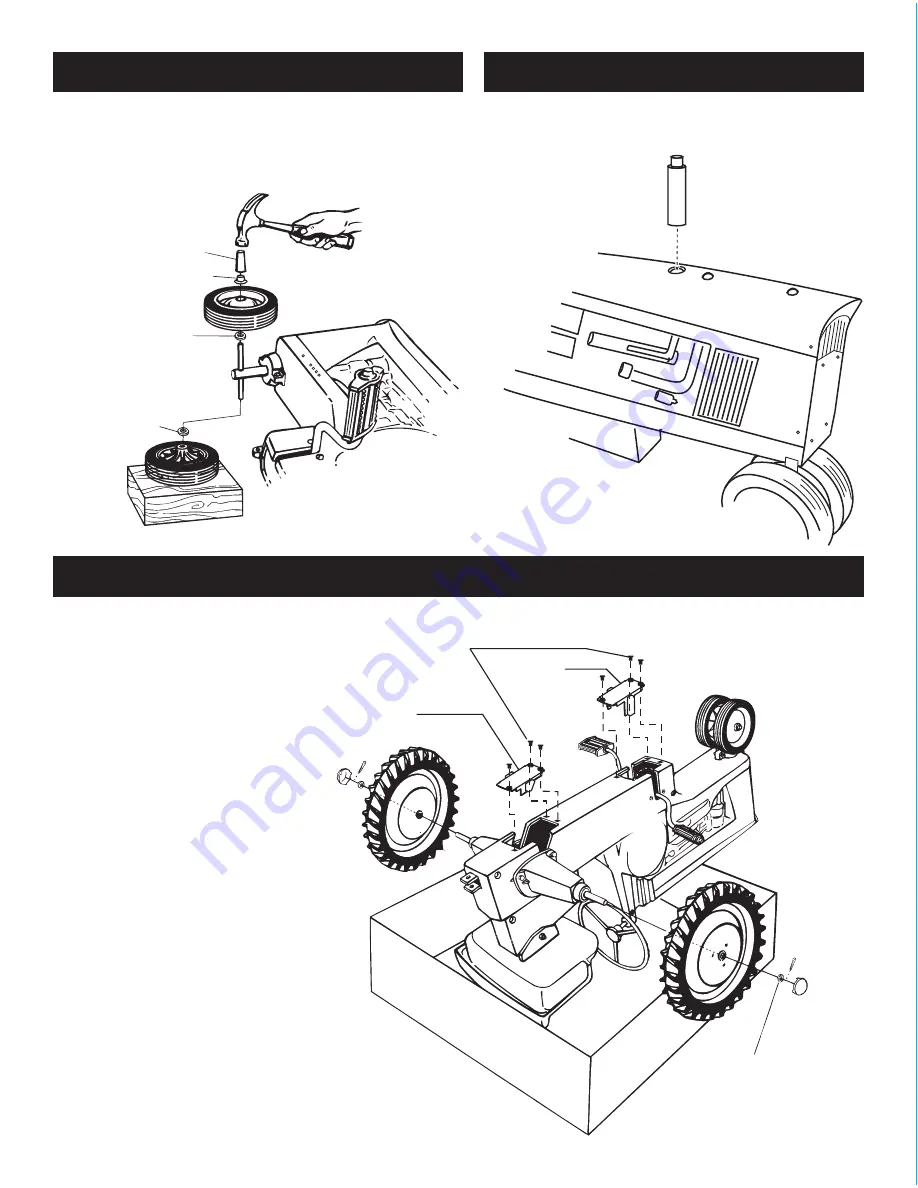
STEP 4
STEP 6
STEP 5
Carefully place front axle on edge of workbench
(or a properly protected table) and pound capnut
onto spindle as shown. It is critical to support axle
hubs as shown for proper front wheel alignment.
Repeat for opposite side.
Capnut
driver
Capnut (1 per side)
Tire
Front axle
Woodblock
3
/
4
" O.D. Washer
3
/
4
" O.D. Washer
15
/
16
" washer
NOTE: Use additional
15
/
16
"
washer(s) to take up end play
Rear wheel
(1 per side)
Cotter key
(1 per side)
Hubcap
(1 per side)
M4 x
1
/
4
” screws
(3 for each cover)
Pedal guard
Axle guard
Position tractor close to one edge of carton lid.
Find the rear wheel which has a slot for the axle
on one side, and slide it onto the right axle as
shown with the slot to the outside. Slide
15
/
16
"
O.D. washer onto axle. Insert cotter key through
hole in one side of axle and use a pair of pliers
to bend the prongs around axle. Pound hubcap
into position using a block of wood and a
hammer. Repeat for other side; make sure you
keep the hubcap side of the wheel to the
outside. IMPORTANT! Any end play between
washer and cotter pin of over
1
/
8
inch should be
taken up by adding additional
15
/
16
" O.D. x
17
/
32
"
I.D. washers. Secure rear axle guard into
opening in rear body with 3-M4 x
1
/
4
" screws.
Repeat for pedal guard. Flip Tractor-Cycle over
and apply decals per directions on the sheet.
Your ERTL Tractor-Cycle is finished and ready
for years of unending play!
3
Snap exhaust stack into hole on top of hood.


