5
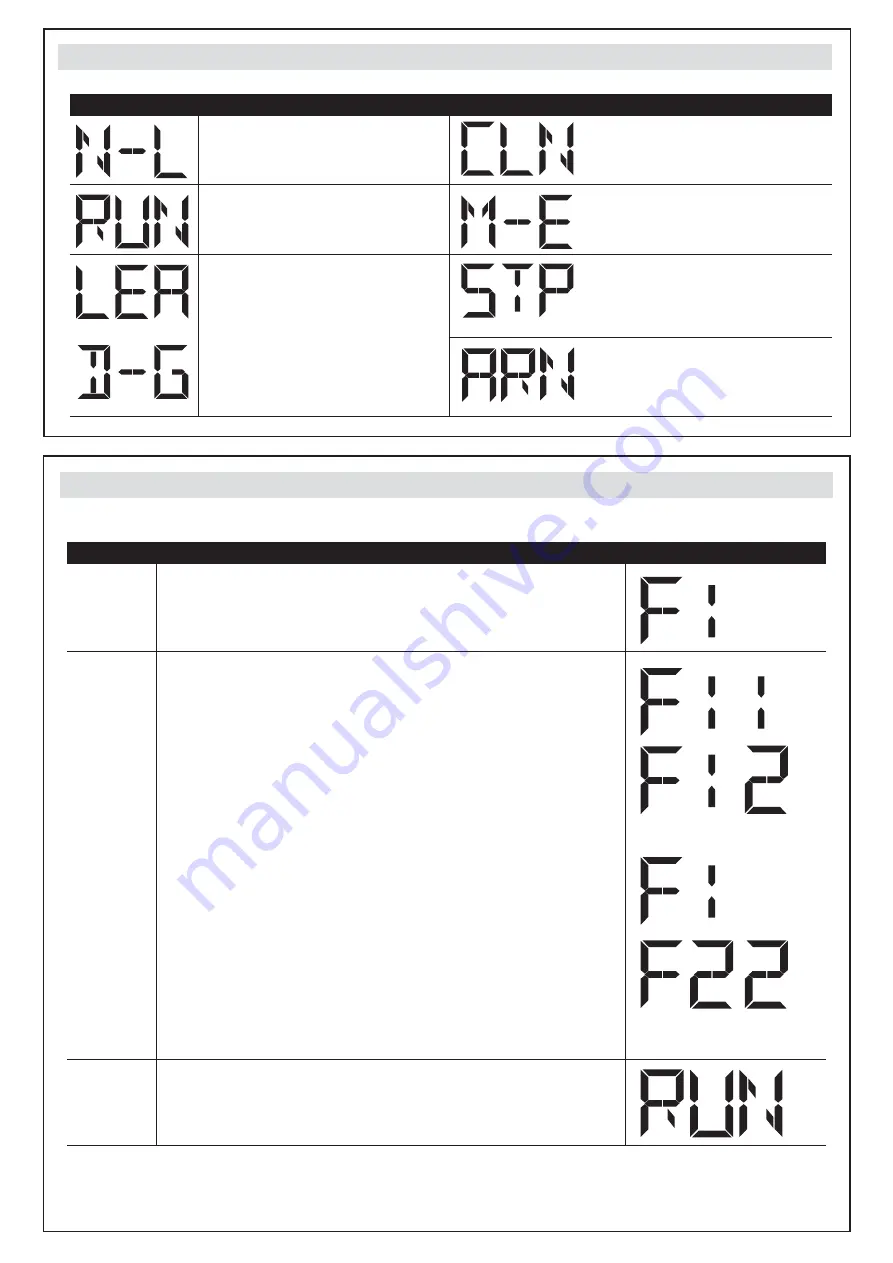
Display indications
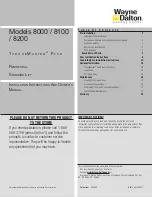
Operation for Function settings
For example: How to set the Function “F1-2”; the steps are following:
(1) Press the “SET” button for 3seconds, the LED will display F1.
(*) To enter “F2” Function or another Functions, press the “UP”
button to adjust F2 ~ F8.
1.
Step
Operations LED Display after the Step
(2) After completing the operation (1) then press the “SET” button
again, you will enter the second option.
(3) Continually, press “UP” button until you search the Function “2”
(**) of F1 as the right hand-side picture. “F1-2” is set completely.
(**) If you would like to set one of Function “0 ~ 8” as the second
option, please press “UP” or “DOWN” button to adjust it.
(4) If you would continue setting up the next Functions, press “SET”
to return the first option, like F1, F2, F3.....etc.
For example, after complete F1-2 setting. You would continue
setting F2-2, please press “SET” to return the formal option. The
LED display shows the first two numbers as the first option F1. And
then follow the operation (*) and (2) ~ (3) until complete the setting.
After setting all Functions you need, then wait for 10 seconds, the
LED will display “RUN”. And you can use transmitter to operate the
gate.
2.
3.
LED Display
Programmable Functions
“N-L”: The system learning is not done.
“RUN”: The system is in normal
performing.
“CLN” the memory of the system is all
cleaned/deleted. Press “UP+DOWN”
for 5 seconds.
“STP”: the motor stop in the middle of
the operating process.
“ARN”: The system learning is in
progress.
“ME”: Motor operation error.
“LEA”: Enter learning mode and then
wait for learning instructions.
The operation of gate learging:
(1). Press “SET” + “DOWN” + “UP”
for 3 seconds, and the LED display shows
“LEA” +”DG”; and then press the
transmitter A botton one time. After
1~3seconds, the LED display shows the
current value during learning mode, it
shows 10 for 1A


