12 -
Epson TM-S9000
Cut sheet paper
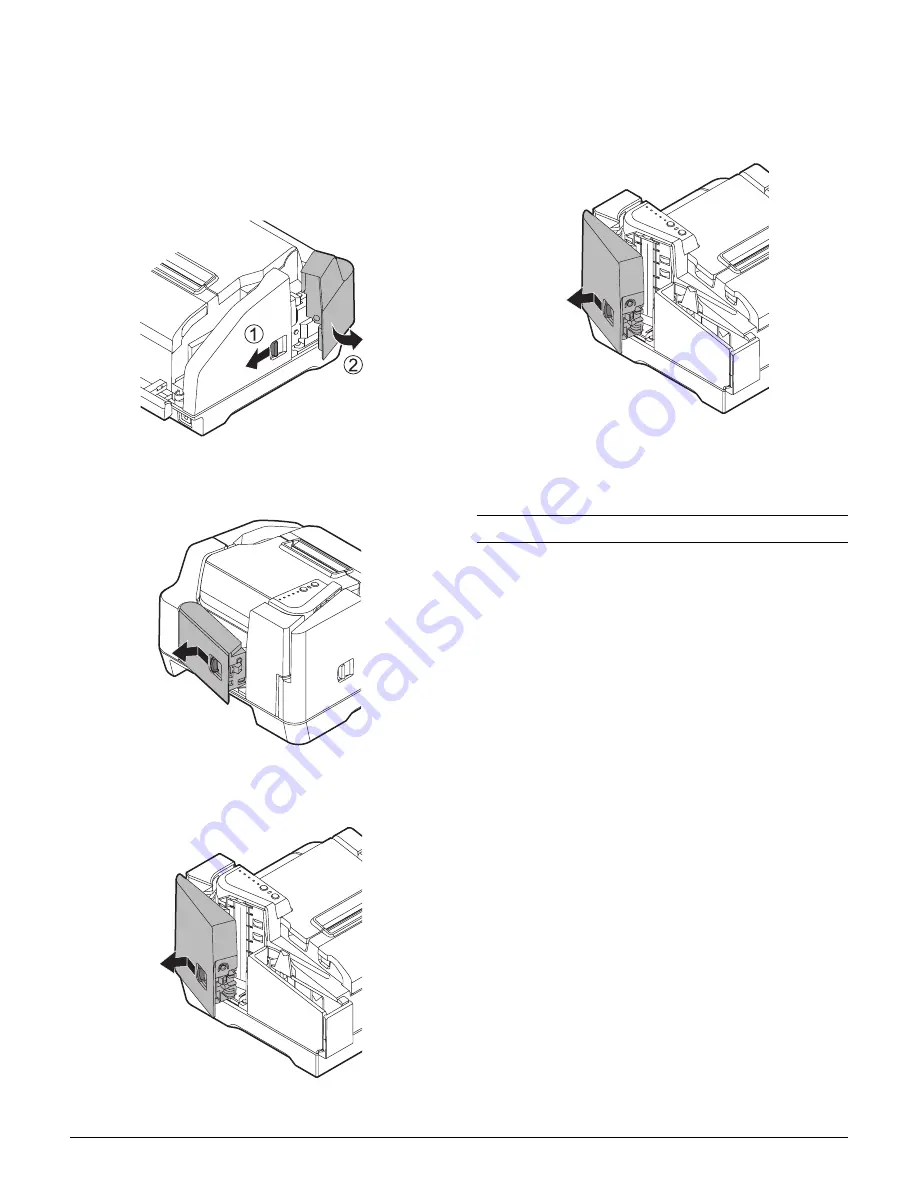
Depending on where the paper is jammed, open the MICR
cover, rear cover, or scanner cover, and remove the jammed
paper.
To open the MICR cover, pull the MICR cover open lever and
open the MICR cover by pulling it outward.
To open the rear cover, pull the rear cover open lever and open
the rear cover by pulling it outward.
To open the scanner cover, pull the scanner cover open lever
and open the scanner cover by pulling it outward.
ID card
1. Pull the scanner cover open lever and open the scanner cover
by pulling it outward.
2. Remove the jammed ID card.
3. Close the scanner cover firmly until it clicks in place.
Self-Test
Note:
❏
Before you begin, make sure all the covers are closed.
❏
The nozzle check pattern is only printed on cut sheet paper.
❏
Paper for the self-test must be cut sheets of
≥
2.76
×
5.98"
{
≥
70
×
152 mm}
The self-test checks the following functions:
❏
Control circuit functions
❏
Product mechanisms
❏
Print quality
❏
Control software version
❏
Memory switch settings
Printing on roll paper
1. Hold down the
Feed
button while turning on the product.
2. After the product prints and the Paper LED begins flashing,
turn off the product to exit test printing, or press the press
the
Feed
button again to restart the test print. The printer
will print “*** completed***” when the test is finished.
Printing on cut sheet paper
1. Hold down the
Cleaning
button while turning on the
product.
2. When the Document LED flashes, insert three pieces of cut
sheet paper in the ASF. The printer will print
“*** completed***” when the test is finished.


