


• Do not carry the product by its control panel; this may damage the product.
1.
Turn off the product.
2.
Lift up the scanner and check to see if the print head is in the far right position (the home position). If
not, turn on the product, wait for the print head to move, then turn the product off again.
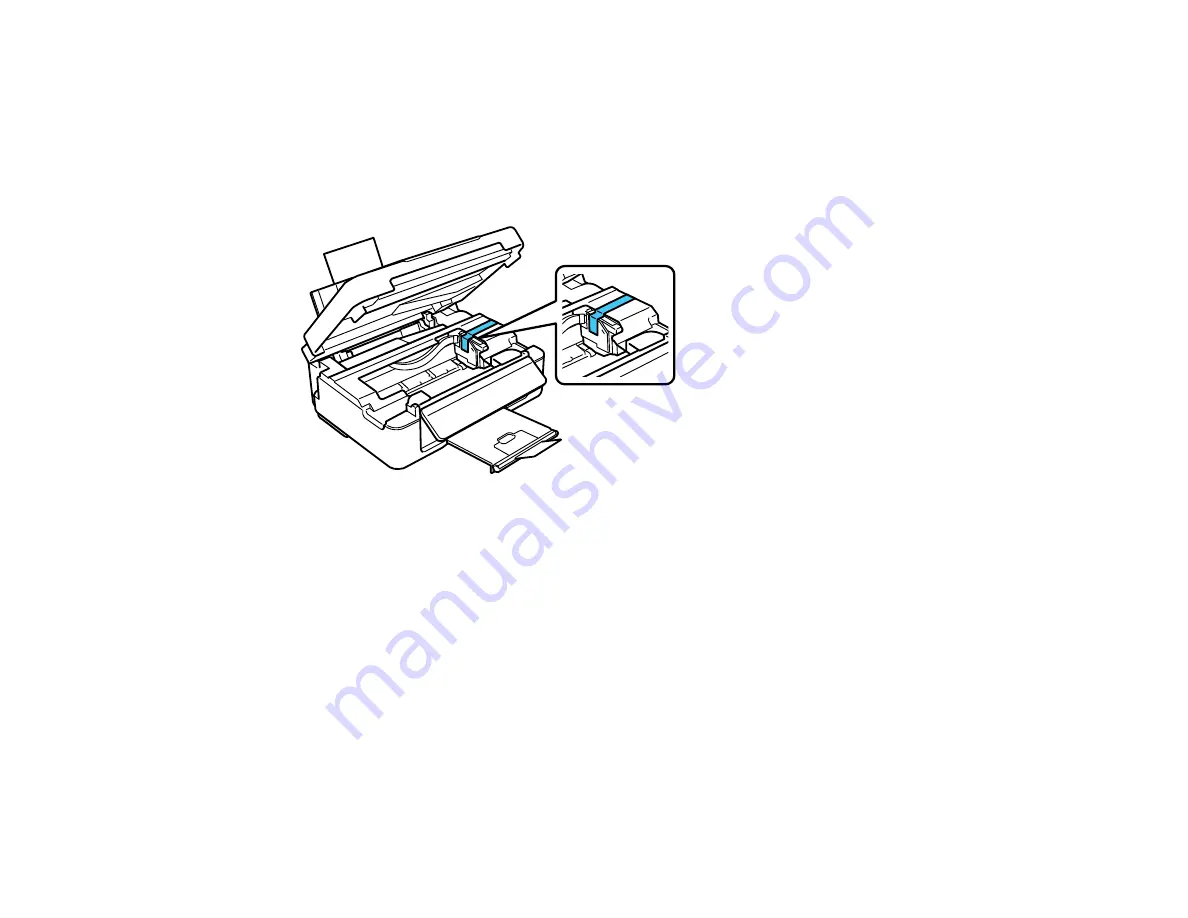
3.
Secure the ink cartridge holder to the case with tape.
Caution:
Do not place tape on the white flat cable inside the product; otherwise, you may damage
your product.
4.
Lower the scanner.
5.
Remove all the paper from the product.
6.
Unplug any connected cables.
7.
Close the output tray and paper support.
172
Summary of Contents for Stylus TX430W
Page 1: ...Epson Stylus TX430W User s Guide ...
Page 2: ......
Page 11: ...Epson Stylus TX430W User s Guide Welcome to the Epson Stylus TX430W User s Guide 11 ...
Page 20: ...Product Parts Back 1 AC inlet 2 USB port Parent topic Product Parts Locations 20 ...
Page 87: ...87 ...
Page 97: ...3 Adjust the scan area as necessary 97 ...
Page 104: ...104 ...
Page 112: ...3 Adjust the scan area as necessary 112 ...
Page 149: ...149 ...
Page 162: ...162 ...
Page 168: ...168 ...


