


Custom Printing
2-7
◗
Vivid
For printing graphics-intensive documents like
presentation pages with charts and graphs. Intensifies
colors and lightens the midtones and highlights.
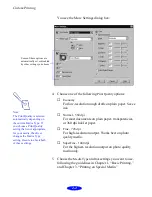
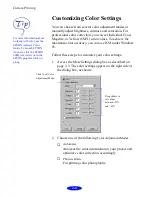
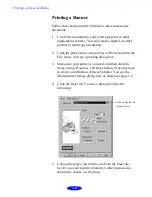
3. If you want to specify individual color correction values,
use the scroll bars to increase (drag right) or decrease
(drag left) the settings listed below. (If you want to use
the options described in step 4, you won’t be able to
specify individual color correction values.)
◗
Brightness
Makes your image lighter or darker.
◗
Contrast
Increases or decreases the difference between the
bright or dark parts of an image.
◗
Saturation
Makes colors more vivid or less vivid.
◗
Cyan, Magenta, Yellow
Increases or decreases the amount of the three ink
colors that combine to make a full-color picture. Use
to fine-tune the color balance in your printout.
4. For even more fine-tuning, choose
Video/Digital Camera
,
or
ICM
(Windows 95 only).
◗
Video/Digital Camera
Use for printing images captured from a digital
camera or video. Increases contrast and saturation
and makes the image sharper.
◗
ICM
(Windows 95 only)
Automatically adjusts printout colors to match colors
on the screen.
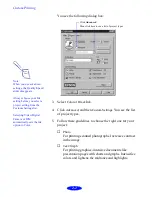
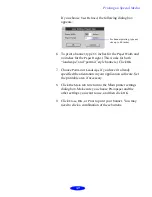
5. Click
OK
to return to the Main printer settings dialog
box.
Note:
When you choose
Video/Digital Camera or
ICM, all the other color
options are preset.
The availability of ICM
depends on your Print
Quality, Media Type, and
Halftoning settings.


