


Custom Printing
2-3
◗
Video/Digital Camera
For images captured from a digital camera or video.
Increases color brightness and makes the image
sharper.
◗
Economy
For rough drafts of text only, on plain paper. Saves
ink.
◗
ICM
(Windows 95 only)
Automatically adjusts printout colors to match the
colors on your screen.
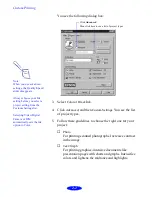
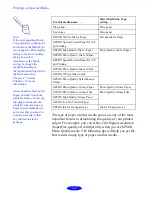
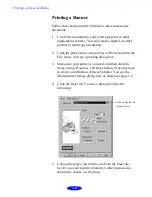
6. Choose the
Media Type
you want to print on. (If you are
not sure which setting to select, refer to the table on
page 3-2.) The available media are limited by the project
you choose. For example, you can’t use plain paper or
transparencies with the
ICM
setting.
7. Click
OK
, then click any other buttons that your
application uses for printing.
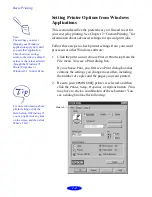
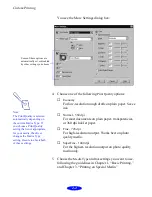
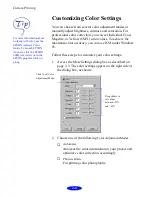
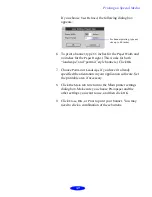
Customizing Print Quality and
Special Effects
If you need the maximum control over your project, or you
want to experiment with special effects, you can adjust
individual settings in your printer software. Follow these
steps:
1. Create your document, image, or project in your
application software.
2. Access the Main printer settings dialog box as described
on page 1-2.
3. Click
Advanced,
and then click
More Settings
.
Note:
See Chapter 3, “Printing on
Special Media,” for
information about using
special media.
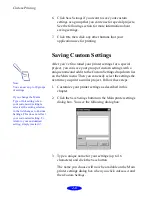
Note:
After you customize your
print settings for a special
project, you can save them as
a group. Then
you can reuse them whenever
you print a similar project.
See page 2-8 for instructions.


