


1.
Select
Wi-Fi
on the home screen.
To select an item, use the
u
d
l
r
buttons, and then press the OK button.
2.
Select
Wi-Fi Direct
.
3.
Press the OK button.
If you have made Wi-Fi Direct (Simple AP) settings, the detailed connection information is displayed. Go to
step 5.
4.
Press the OK button to start making settings.
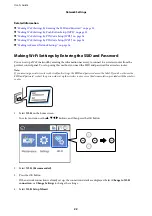
5.
Check the SSID and password displayed on the printer's control panel.
On the computer's network connection screen or the smart device's Wi-Fi screen, select the SSID shown on the
printer's control panel to connect.
Note:
For other regions than North America and Latin America
You can check the connection method on the Web site. To access the Web site, scan the QR code displayed on the
printer's control panel using the smart device or enter the URL (
) on the computer, and then go to
Setup
.
6.
Enter the password displayed on the printer's control panel on the computer or smart device.
7.
After the connection is established, select
Dismiss
on the printer's control panel.
8.
Press the
button.
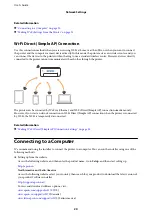
To connect the computer to the printer using Wi-Fi Direct, you need to install the printer driver on the computer.
Related Information
&
&
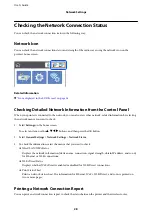
“Checking the Network Connection Status” on page 28
&
“When You Cannot Make Network Settings” on page 106
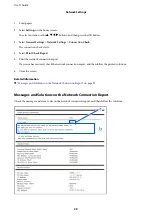
Making Advanced Network Settings
You can change the network device name, TCP/IP setup, proxy server and so on. Check your network environment
before making changes.
1.
Select
Settings
on the home screen.
To select an item, use the
u
d
l
r
buttons, and then press the OK button.
2.
Select
General Settings
>
Network Settings
>
Advanced
.
3.
Select the menu item for settings, and then select or specify the setting values.
Related Information
&
&
“Setting Items for Advanced Network Settings” on page 27
User's Guide
Network Settings
26


