45
4.
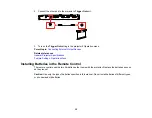
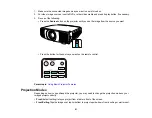
Press the arrow buttons on the remote control or the control panel to adjust the position of the
projected image as necessary.
1
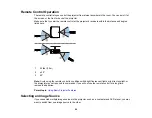
Maximum horizontal range (H × 47%)
2
Maximum vertical range (V × 96%)
3
1/2 the vertical height of the image
4
1/2 the horizontal width of the image
Note:
You cannot move the image to both the horizontal and vertical maximum values.
5.
When you are finished, press the
Esc
button on the control panel or remote control.
Note:
When adjusting the image height, position the image lower than where you want it to be and then
move it up. This will help prevent the image from moving down after adjustment. The image is clearest
when the lens is at the home position. To move the lens to the home position, press and hold the
Lens
button on the remote control or control panel for at least three seconds.
Parent topic:
Summary of Contents for LS11000
Page 1: ...Home Cinema LS11000 User s Guide ...
Page 2: ......
Page 8: ......
Page 22: ...22 Front Rear Front Ceiling ...
Page 152: ...152 As with any bright source do not stare into the beam RG2 IEC EN 62471 5 2015 Inside ...


