


Installing the Wall mount
46
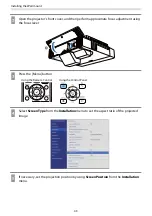
c
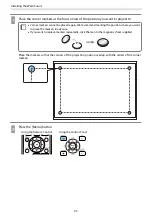
Select
Auto Screen Adjustment
from the
Installation
menu
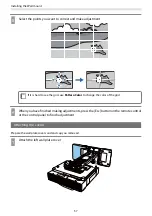
You see the guidance screen for Auto Screen Adjustment.
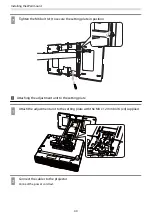
d
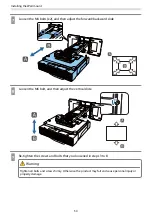
Loosen all of the adjustment dials and adjustment screws
e
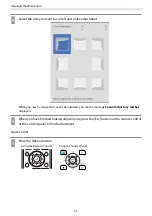
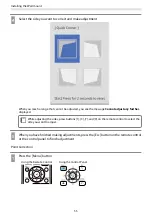
Move the projector to adjust the position of the image so that the yellow areas at the four
corners of the guidance screen overlap with the corner markers
Make sure that all of the corner markers are within the yellow areas.


