38
7
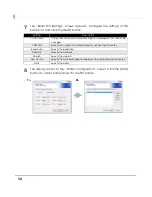
The “Serial Port Settings” screen appears. Configure the settings of the
Serial port and click the [Next] button.
8
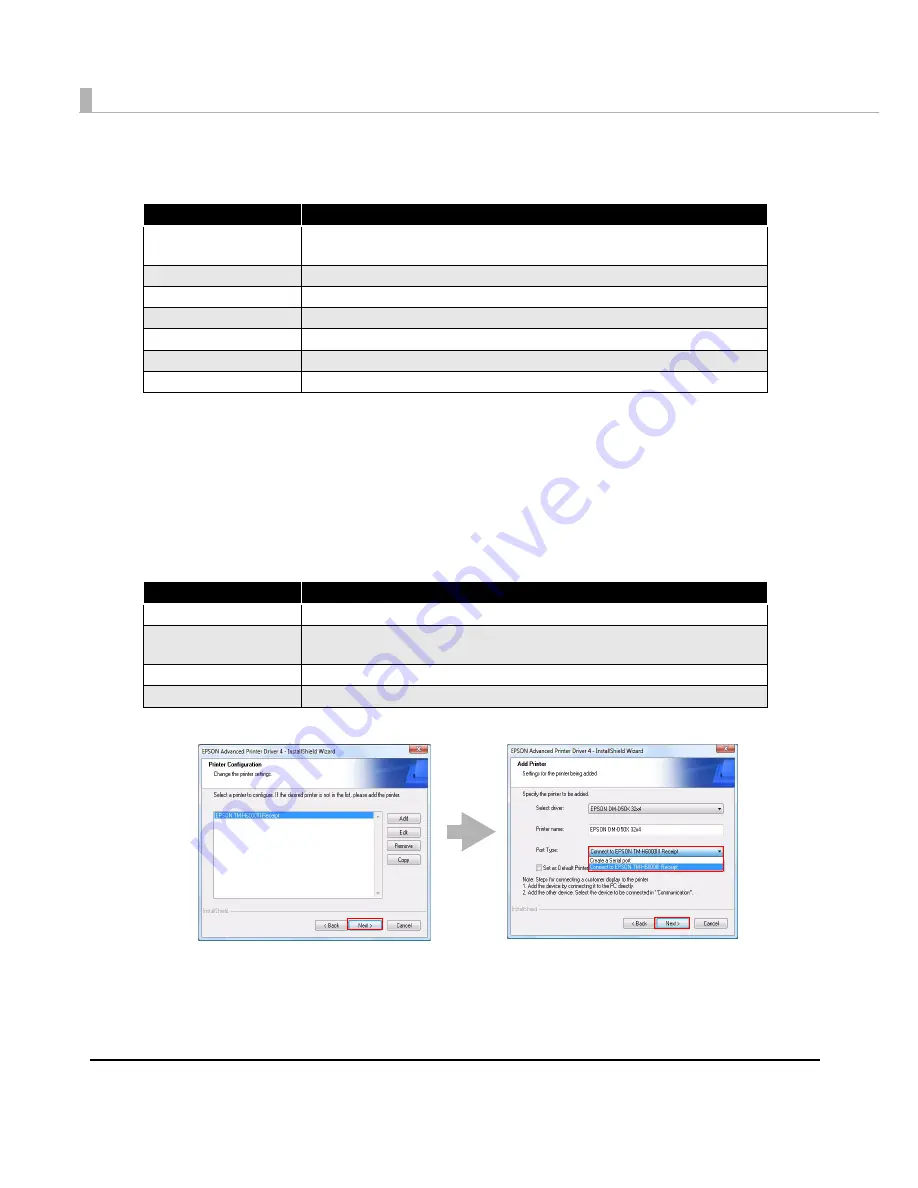
The display returns to the “Printer Configuration” screen. Click the [Add]
button to add a printer driver for the Customer Display.
9
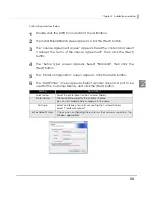
The “Add Printer” screen appears. First select a printer driver to use for
the Customer Display. Then, select the Port Type setting same as that for
the TM printer made at Step 6 to 7 (example: "Connect to EPSON TM-
H6000III Receipt"), and click the [Next] button.
Setting
Description
Printer name
The printer name you entered at Step 6 is displayed. This cannot be
changed.
COM Port
Specify the number of serial port used for connecting the printer.
Baud Rate
Specify the baud rate.
Data Bits
Specify the data bits.
Stop Bits
Specify the stop bits.
Flow Control
Specify the method of data flow between the computer and the printer.
Parity
Specify the parity.
Setting
Description
Select driver
Select the printer driver for the Customer Display.
Printer name
The name of the driver for the Customer Display.
Do not use Unicode/2-byte characters for the name.
Port Type
Select an interface to use for connecting the Customer Display.
Set as Default Printer
Select the printer driver for the Customer Display.
8>
9>
Summary of Contents for Advanced Printer Driver Ver.4
Page 18: ...18 ...


