


Installing the
Hard
Disk On the Mounting Bracket
You can install a hard disk drive on top of the mounting
bracket rather than under it. Refer to the illustration of the
mounting bracket on page 5-8 and the one below while following
these steps:
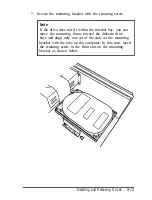
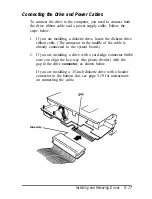
1.
Remove the screw securing the mounting bracket to the base
of the computer and slide the mounting bracket toward the
diskette drive bays until the slots clear the tabs. (See the
illustration on page 5-8.)
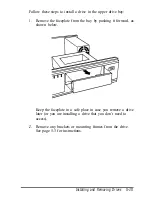
2.
Lift the mounting bracket out of the computer.
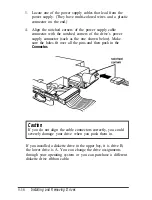
3.
Turn the hard disk drive over and locate the four mounting
holes on the drive.
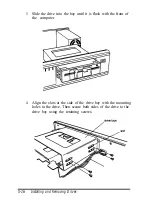
4.
Position the bracket on the hard disk drive, aligning the
holes in the bracket with the holes on the drive.
Installing
and
Removing Drives
5-11
Summary of Contents for ActionDesk 4000
Page 1: ......
Page 128: ...Hard disk drive types continued Specifications A 9 ...
Page 130: ...DMA Assignments Specifications A 11 ...
Page 131: ...A 12 Specifications ...
Page 132: ...System I O Address Map Specifications A 13 ...
Page 133: ...A 14 Specification ...
Page 134: ...Specifications A 15 ...
Page 135: ...A 16 Specifications ...
Page 136: ...Speaker connector pin assignments J21 Specifications A 17 ...
Page 137: ...A 18 Specification ...
Page 138: ...Specifications A 19 ...


