Epic EER20W Owner'S Use And Care Manual Download Page 11

EER20W | EER24W | EER24BL

USING THE SURFACE UNITS

Your range is equipped with four surface units with two different sizes. 

Three of them are 6” and one of them is 8” in size. The surface controls 

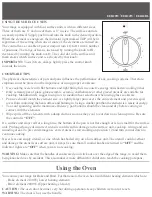
are easily operated. Simply push in and turn the knob to the desired position.

When the element is energized, the indicator light marked TOP will be lit 

regardless of the setting when one or more of the elements are turned on. 

The control has a variable of power output from LO to HI with a number 

of positions. The range of heat is increased by turning the knob to HI, 

decreased by turning the knob to LO. The solid dot in the surface unit 

mark shows which surface unit is activated by that knob.

IMPORTANT:

 To switch on, always lightly press the control knob 

inwards then turn.

COOKWARE TIPS

The physical characteristics of pots and pans influence the performance of any cooking systems. Therefore, 

emphasis must be placed on the importance of using proper cookware.
•  Use cooking vessels with flat bottoms and tight fitting lids to conserve energy and shorten cooking times.

•  Only certain types of glass, glass/ceramic, ceramic, earthenware or other glazed utensils are suitable for 

  cooktop. Manufacturers suggest using low to medium heat selections when using glass cookware.

•  Pan size should match the element size. A slightly larger pan covers the entire element and prevents spill


  overs from contacting the heat surface and burning in. Using a smaller pan than the element is a waste of energy.

•  To avoid spattering and to maximize efficiency, pan bottoms should be clean and dry before coming in 

  contact with the elements.

•  Wipe spills off the elements with a damp cloth as soon as they cool to cut down on clean up time. Be sure  

  the control is 

“OFF”

.

If a surface unit stays red for a long time, the bottom of the pan is not flat enough or is too small for the surface 

unit. Prolonged usage of incorrect utensils could result in damage to the surface unit, cooktop, wiring and sur-

rounding areas. To prevent damage use correct utensil, start cooking on position 12 and turn control down to 

continue cooking.

Never leave an empty utensil, or one which has boiled dry, on a hot surface unit. The utensil could overheat 

and damage the utensils or surface unit. Always be sure that all control knobs are turned to 

“OFF”

 and the 

indicator lights are 

“OFF”

 when you are not cooking.

WARNING:

 Make sure that the handles of cookware do not stick out over the edge of the range, to avoid them 

being knocked over by accident. This also makes it more difficult for children to reach the cooking pots/pans.

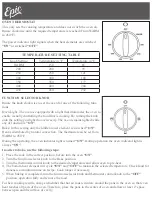
You can use your range for Bake and Broil. For that reason, the oven has two different heating elements which are:

  - Bake element 2100W (Lower heating element)

  - Broil element 2000W (Upper heating element)

CAUTION:

 The oven door becomes very hot during operation. Keep children well out of reach.

WARNING: 

The door is hot, use the handle.

Using the Oven

Summary of Contents for EER20W

Page 1: ...EER20W EER24W EER24BL Electric Range Owners use and care guide V 01...

Page 2: ...ury DANGER It is recommended that a separate circuit serving only your appliance be provided Never clean appliance parts with flammable fluids These fumes can create a fire hazard or explosion Never u...

Page 3: ...iance must be installed and grounded by a qualified technician in accordance with the National Electrical Code ANSI NFPA No 70 Latest Edition and local electrical code requirements Replacement Parts O...

Page 4: ...dequate ventilation Switch off the burners and allow cooling completely IMPORTANT This range is designed and manufactured solely for the cooking of domestic household food and is not suitable for any...

Page 5: ...any possibility of entrapment suffocation or injury Do Not Use Water on Grease Fires Smother fire or flame or use dry chemical or foamtype extinguisher Use Proper Pan Size This appliance is equipped w...

Page 6: ...of Oven or Areas Near Units Surface units and heating elements may be hot even though they are dark in color Area near surface and interior surfaces of an oven become hot enough to cause burns During...

Page 7: ...e cooktop surface should be avoided If cabinet storage is to be provided the risk can be reduced by installing a range hood that projects horizontally a minimum of 5 inches beyond the bottom of the ca...

Page 8: ...with the floor so that the cord runs parallel with the floor The range must be level to operate safely and properly There are four leveling legs located at the corners on the bottom of the range The...

Page 9: ...the range must be secured by installing the anti tip device included with this appliance The Anti tip bracket can be installed on either the right or left back leg Place the anti tip bracket on the f...

Page 10: ...setting position BURNER CONTROL KNOB The range comes with four burners To operate the burners simply push in and turn the knob to the desired position These controls go from low to high power output...

Page 11: ...revents spill overs from contacting the heat surface and burning in Using a smaller pan than the element is a waste of energy To avoid spattering and to maximize efficiency pan bottoms should be clean...

Page 12: ...d ON Heat is distributed by natural convection The thermostat can be set from WARM to 450 F During the operating the oven indicator light is turned ON During operation the oven indicator light is alwa...

Page 13: ...oven is hot outside surfaces of the range get hot IMPORTANT Always use suitable protective gloves when inserting removing the broiler pan shelves pans and other cooking utensils from the oven OVEN RAC...

Page 14: ...g Clean the burners and reflector bowls with mild detergent and warm water Wring excess water out of the sponge or cloth when cleaning them Replace the burners and reflector bowls as following Line up...

Page 15: ...t but sturdy surface To re install the door repeat the steps above in reverse order REMOVABLE STORAGE DRAWER For cleaning you can remove the drawer by pulling it out until the stop point and lifting i...

Page 16: ...s not work Light bulb is loose or defective Switch operating oven light is broken Oven does not work You have blown a household fuse or tripped a circuit breaker You have not set the control knobs cor...

Page 17: ...losses due to failure of the unit Commercial or Rental Use Limited to 90 days Parts Labor Plastic parts such as door bins panels door shelves racks light bulbs etc Punctures to the evaporator system...

Reviews: