background image


19 / 48 


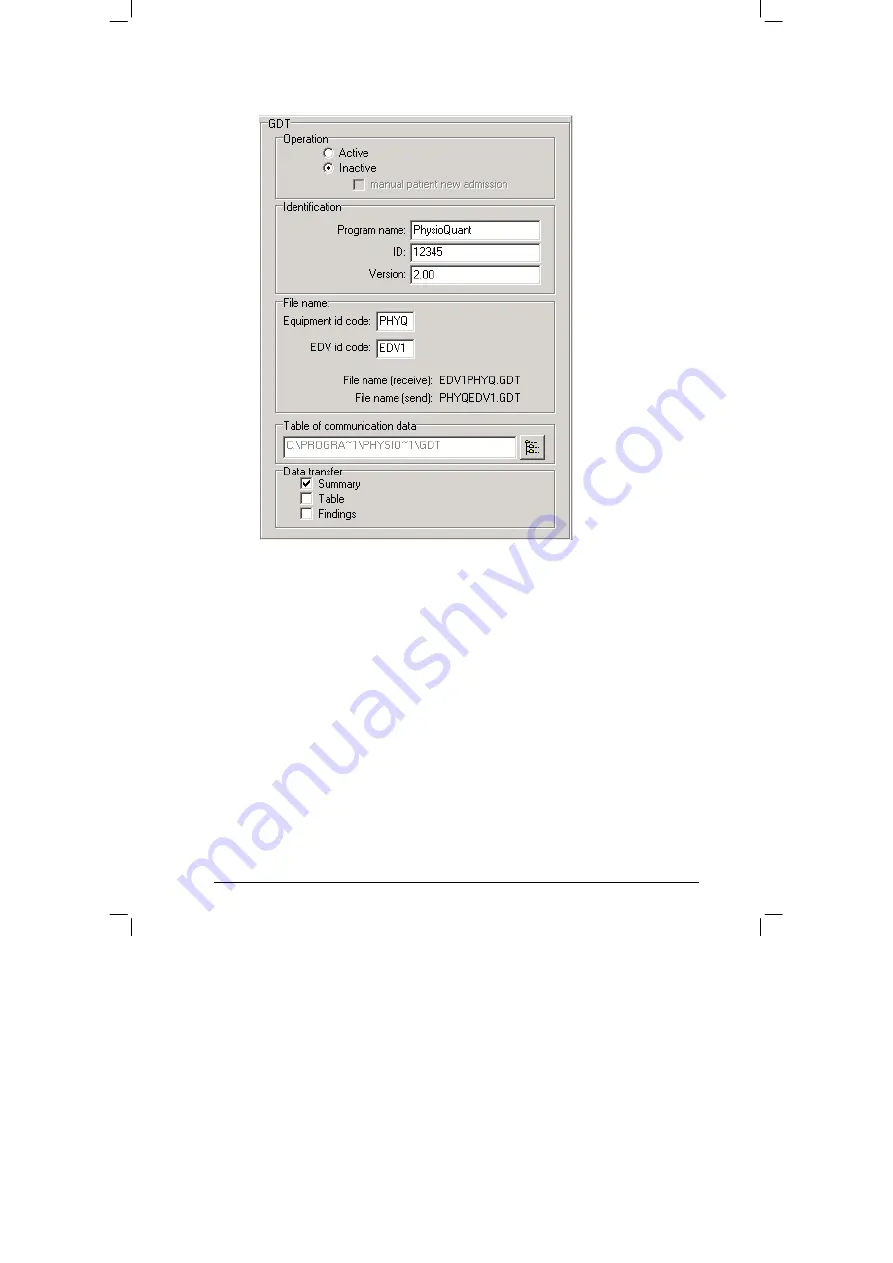
Operation 

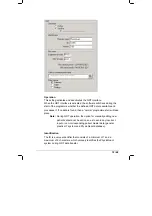
This setting activates and deactivates the GDT interface. 
When the GDT interface is activated, the software will check during the 
start of the programme whether the defined GDT data is available and 
processes it. If no data is found, then a 'normal' programme start will take 
place. 

Note:

  During GDT operation, the option for manually adding new 

patients should not be active, so as to avoid any incorrect 
input or non-corresponding patient master data (general 
practice IT system and PhysioQuant database).  


Identification 

The ID is a unique identifier that consists of a minimum of 1 and a 
maximum of 8 characters, which uniquely identifies the PhysioQuant 
system during GDT data transfer. 

Summary of Contents for 45-00-0501

Page 1: ...PhysioQuant Ambulatory Blood Pressure System User Manual ENVITEC ...

Page 2: ...2 48 ...

Page 3: ...es that may result from optical or technological developments All trademarks stated and used in the text are the property of the present owner and are protected by law All reproduction translation and duplication in any shape or form including extracts require the written approval of the manufacturer This manual is subject to updates by EnviteC Wismar GmbH Doc No 45 07 0500002 a 2004 Envitec Wisma...

Page 4: ...4 48 ...

Page 5: ...isplay options 23 4 4 Power supply 23 4 5 Inserting batteries 24 4 6 Function control 25 4 7 Connecting the cuff to the recorder 26 5 PHYSIOQUANT CUFFS 26 6 COMMENCING LONG TERM BLOOD PRESSURE MEASUREMENT 27 6 1 Connecting the recorder 27 6 2 Starting the programme 27 6 3 Selecting a patient 28 6 4 Adding a new patient 29 6 5 Editing patient data 29 6 6 Programming the recorder 30 6 7 Attaching th...

Page 6: ...ble 40 8 7 Hourly mean values graph and table 40 8 8 Findings report 40 8 9 Printing 41 8 10 GDT export to general practice IT systems 41 9 ERROR CODES 42 10 SCOPE OF DELIVERY 43 11 ACCESSORIES AND SPARE PARTS 43 12 CLEANING AND MAINTENANCE 44 12 1 Cleaning and disinfection of device surface 44 12 2 Cleaning and disinfection of cuffs 44 12 3 Cleaning of tubes 45 12 4 Maintenance and validity check...

Page 7: ...o things to which you should pay careful attention when using the device The safety instructions in this manual are indicated in the following way This refers to a potentially dangerous situation Failure to observe this warning may result in injuries and or damage to the product CAUTION ...

Page 8: ...propriate manner and for the purpose it is intended It will also ensure the health and safety of users and patients dependent on it Please read through the whole manual carefully since information that is relevant to several sections is only provided once The printed text of this manual is in accordance with the version of the device as well as the relevant safety instructions standards at the tim...

Page 9: ...not suitable for use in Intensive Care Units PhysioQuant can be used to take blood pressure measurements at various intervals for up to 30 hours and is able to store measurement results Biocompatibility The product components described in this manual including accessories which when used for their intended purpose come into contact with patients have been explained in such a way that they conform ...

Page 10: ...lease contact the manufacturer or consult a technical expert At all times observe standard IEC 60601 1 1 The PhysioQuant Recorder can be connected to and operated from a PC on which PhysioQuantWin software has been installed Please note that no patient should be connected to the PhysioQuant Recorder as long as it is connected to the PC Before using the device on a patient the user should check tha...

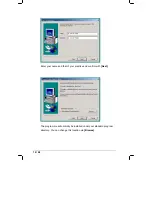
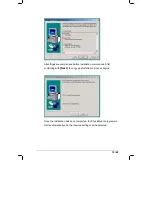
Page 11: ...tion of your CD ROM drive is activated then installation will begin automatically If not Open Windows Explorer select your CD ROM drive and double click on setup exe The installation wizard appears Confirm that you are to start the installation by clicking on Next and follow the on screen instructions ...

Page 12: ...12 48 Enter your name and that of your practice and confirm with Next The programme will normally be installed under your standard program directory You can change this location via Browse ...

Page 13: ...sed before installation commences After confirming with Next the copy and installation process begins Once the installation has been completed the PhysioQuant programme starts automatically and the required settings can be selected ...

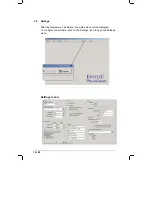
Page 14: ...14 48 3 2 Settings After the programme has started the main screen will be displayed To configure the software click on the Settings icon to open the Settings menu Settings menu ...

Page 15: ...stallation page 18 Setting language date and time format CRITICAL VALUES Setting the critical values for day phase and night phase These critical values will be displayed as lines in the graphic representation of the analysis and will be part of the statistical calculations Selecting another folder for the database This displays all serial interfaces of the system ...

Page 16: ... The description of the GDT interface and the required settings can be found in Section 3 5 GDT interface 18 Activate print preview Selecting standard print pages Headings that should be included with every print out ...

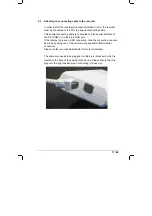
Page 17: ...nterface of the PC COM x via the 9 pin DSB port If the recorder only has a USB connection then the connection can also be made by using one of the commercially available USB to serial converters Please contact your specialist dealer for more information The cable also needs to be plugged into the 6 pin black port which is located at the back of the casing of the device Please ensure that the plug ...

Page 18: ...en created under Settings whereby selection is facilitated by the integrated Explorer functionality 3 5 GDT interface The GDT interface is a standard produced by the German Quality Assurance Medical Software QMS Qualitätsring Medizinische Software for system independent data transfer between medical devices and general practice IT systems The PhysioQuantWin software has an integrated GDT interface...

Page 19: ... then a normal programme start will take place Note During GDT operation the option for manually adding new patients should not be active so as to avoid any incorrect input or non corresponding patient master data general practice IT system and PhysioQuant database Identification The ID is a unique identifier that consists of a minimum of 1 and a maximum of 8 characters which uniquely identifies t...

Page 20: ...on data files The data transfer folder can be created where you want In order to avoid any networks errors a separate folder should be created for each individual work station e g on a local PC NB GDT data files will need to be read and then deleted by the general practice IT system before any further GDT data files can be generated Data transfer Prior selection will determine which data is transf...

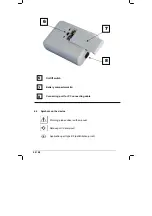
Page 21: ...easurement in process Info button to display the most recently measured values The following values will be displayed respectively Systolic value S mmHg Diastolic value D mmHg Pulse frequency HR min 1 Day Night button to change the measurement interval between day and night interval LCD display to display all information 1 2 3 4 5 1 2 3 4 5 ...

Page 22: ... switch Battery compartment lid Connecting port for PC connecting cable 4 2 Symbols on the device Warning please observe the manual Data export data import Application part type BF defibrillation proof 7 6 8 6 7 8 ...

Page 23: ...n selected 4 4 Power supply The PhysioQuant Recorder requires either two nickel metal hydride rechargeable batteries or two alkaline batteries When starting the recorder via the PhysioQuantWin software please ensure that the relevant power source has been selected see 6 6 Programming the recorder page 30 In addition the device also has a built in lithium cell to indicate the time The capacity of t...

Page 24: ...nsert two fully charged rechargeable batteries or two new batteries before taking a new measurement 4 5 Inserting batteries The battery compartment is located on the underside of the recorder In order to open this compartment use your thumb to move the battery compartment lid approx 6 mm backwards and then remove the lid in an upward direction Please ensure that the batteries are inserted correctl...

Page 25: ... rechargeable battery capacity fully charged and C50 refers to a 50 rechargeable battery capacity half empty In order to carry out a 24 hour measurement the capacity needs to be at least 90 If the capacity is below 90 then you will need to insert new batteries or fully charged rechargeable batteries When the self test has been completed successfully the following information will appear on the dis...

Page 26: ...he recorder by pulling back the external metal plug cover 5 PhysioQuant Cuffs Various cuff sizes are available for the PhysioQuant standard large and children size Please select the correct cuff size see printed text on the cuff Cuffs that are too small will result in measurements that are too high Cuffs that are too large will result in measurements that are too low Replace the cuffs at regular i...

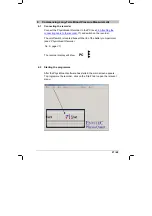
Page 27: ...ble to the recorder 17 and switch on the recorder The on off switch is located beneath the lid of the battery compartment see 4 PhysioQuant Recorder No 6 page 21 The recorder display will show PC 6 2 Starting the programme After the PhysioQuant software has started the main screen appears To programme the recorder click on the Start tab to open the relevant menu ...

Page 28: ...e patient database appears In the NAME field enter the first letter of the patient s surname All patients whose names start with this letter will then be displayed e g those beginning with P Select the required patient by double clicking on the relevant line ...

Page 29: ...o so open the entry screen with the NEW button Enter all the required data and save it to the database with Save 6 5 Editing patient data Patient data that has been entered can be edited and updated at any time Edit button in the Patient selection window EXCEPTION Patient ID cannot be changed once it has been entered and saved ...

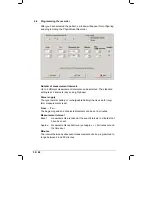
Page 30: ... and night phase Power supply The type normal battery or rechargeable battery that is used for long term measurements is set From To The beginning and end of selected intervals can be set in minutes Measurement interval Exact measurements are taken at the exact intervals in minutes that have been set Approx measurements randomly vary at approx 2 minutes around the times set Minutes The interval be...

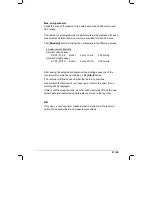
Page 31: ...al 2 night phase 22 00 05 59 Exact every 30 min 250 mmHg After saving the selected configuration the starting sequence of the recorder will commence by clicking on the Start button The recorder will first check whether there are any previous measurements that have not yet been read If this is the case then a warning will be displayed If this is not the case then the recorder will be switched off a...

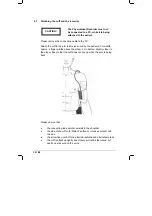
Page 32: ...rox 2 finger widths above the elbow For children slightly closer to the elbow Ensure that the cuff does not rise up when the arm is being bent Please ensure that the connecting tube points upwards to the shoulder the side of the cuff with Patient written on it makes contact with the skin the arrow lies over both the arteria brachialis and arteria femoralis the cuff is attached tightly and closely ...

Page 33: ...ease ensure that the patient remains calm while the measurement is being taken The patient may stand up or sit down Begin the measurement by pressing After a brief moment the device will inflate the cuff Once the required inflation pressure has been reached the device will gradually decrease the pressure Cuff pressures are displayed and for every detected oscillation the letter M will be displayed...

Page 34: ... Record any unusual events in the patient diary master copy on CD and also carry out an additional measurement with the Start Stop button if this happens At any time measurement can be interrupted via the Start Stop button Cuff pressure will then decrease Do not open the battery compartment Important guidelines for patients Cancel the measurement with the Start Stop button if the cuff remains infl...

Page 35: ... After an incorrect measurement the measurement will be repeated after 2 minutes An error message is only displayed in the error table with its corresponding error code after 3 incorrect measurements After the error messages E04 Empty battery rechargeable battery E07 Inflation time finished and E10 200 measurements carried out the measurement will not be repeated After error message E07 the subseq...

Page 36: ...message is used to manually switch the measurement intervals from the day to night phase and vice versa Note You can only manually switch between day and night phase when 2 measurement intervals only have been programmed via the PhysioQuantWin software when the starting sequence of the recorder was commenced If more or less measurement intervals have been programmed then the Day Night button has n...

Page 37: ...he recorder display will show PC 7 2 Starting the programme After the PhysioQuant software has started the main screen appears To import data from the recorder click on the Import tab to open the relevant menu The measurement values are imported from the recorder and assigned to the relevant patient The graphical representation of the measurement results is also displayed see 8 5 Single value grap...

Page 38: ...saved measurement results click on the Analysis tab to open the relevant menu 8 2 Find delete measurement results The selection window of the patient database is displayed Select the required patient see 6 3 Selecting a patient page 28 The measurement result selection window appears for those patients whose data have been stored in the database ...

Page 39: ...rder to delete a specific measurement result from the database you need to click on the relevant date line in the selection window the line will appear in blue Then click on Delete After a confirmation message appears the result will be deleted 8 3 Representation The saved measurement values can be represented in various ways by clicking on the relevant tabs ...

Page 40: ... that have been carried out manually by using the Start Stop button are displayed behind the time indication and marked with the symbol Deleting individual measurements In order to delete individual measurements you need to click on the relevant line the line will appear in blue Then click on Delete After a confirmation message appears the measurement will be deleted 8 7 Hourly mean values graph a...

Page 41: ...r Settings see 3 2 Settings page 14 The integrated printing preview allows you to view the selected pages prior to printing 8 10 GDT export to general practice IT systems If the PhysioQuant software of the general practice IT system interface has been activated you can then create a GDT file in accordance with the selected settings by using the GDT export tab which will be saved in the configured ...

Page 42: ...cted At least 8 oscillations need to be detected for a correct measurement The cuff should be attached sufficiently tightly you should be able to put one finger beneath the cuff but not two PhysioQuant will regulate the deflation rate for follow up measurements accordingly E 10 Memory full 200 blood pressure measurements have been carried out and the memory of the device is full E 11 Movement duri...

Page 43: ...ware interface cable carrier bag belt and manual PhysioQuant Recorder 45 00 0502 Includes PhysioQuant standard adult blood pressure cuff carrier bag belt and manual 11 Accessories and Spare Parts Standard cuff Adult 45 00 0509 Large cuff Adult 45 00 0510 Cuff Child 45 00 0511 Interface cable 45 00 0515 Bag 45 00 0513 Belt 45 00 0512 ...

Page 44: ... been checked and approved by the Service Department 12 2 Cleaning and disinfection of cuffs Light stains can be removed by using a moist cloth For heavier stains rinse the cuff with soapsuds or disinfected cleaning agent not in the washing machine No fluid should enter the cuff inflation section or the connecting tube therefore please remove the inflation section when cleaning the cuff After you ...

Page 45: ...amage or functional errors which may endanger the safety of the patient and user of the device then you should only use the device again after it has been repaired Measurement technical check The PhysioQuant is a measuring device in accordance with the German Medical Device Code Operation V MP Betrieb V 11 Appendix 2 As a result the device must undergo a measurement technical check every 2 years T...

Page 46: ...ton The display shows 0 current pressure in mmHg Create a test pressure of 200 mmHg and measure the decrease in pressure after waiting a minimum of 30 seconds Decreases in pressure of 3 5 mmHg are normal Decreases in pressure 6 mmHg indicate the presence of an unacceptable leakage In such an event the PhysioQuant Recorder will need to be sent away for repair You can exit the calibration mode by pr...

Page 47: ...g device Size available in various sizes Cuff pressure 300 mmHg maximum adjustable Display operation controls Patient display LCD measurement values error codes Operation controls Keypad Start Stop Day Night Info Interfaces PC connection digital interface RS 232 USB via adapter Other Dimensions L x W x H 10 5 cm x 8 0 cm x 2 7 cm Weight 190 g incl batteries Operating temperature 10 to 40 Rel humid...

Page 48: ...48 48 ENVITEC Envitec Wismar GmbH Alter Holzhafen 18 23966 Wismar Germany Tel 49 0 3841 360 1 Fax 49 0 3841 360 222 Email info envitec com Website www envitec com ...

Reviews: