BrightEye NXT 900 Series Frame Syncs
Page 6
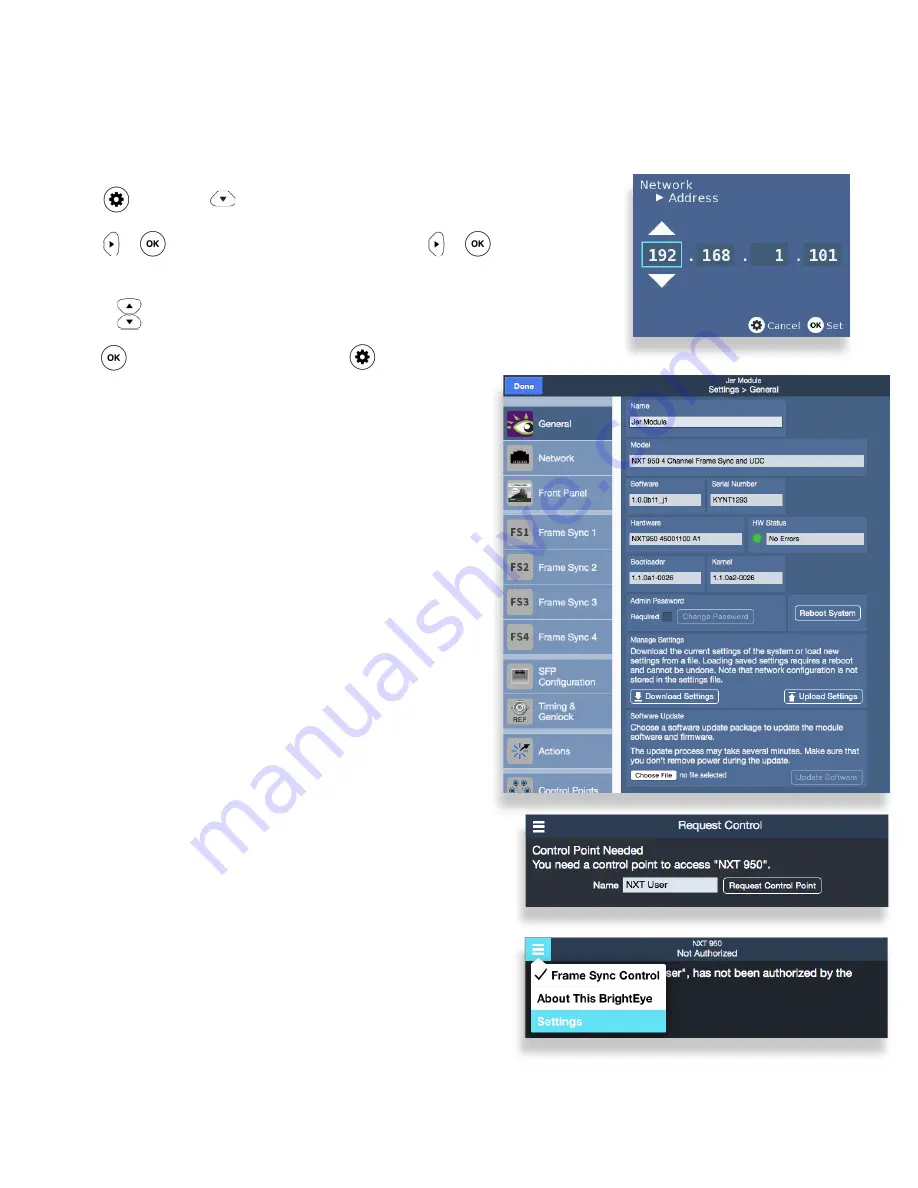
5. Set the IP Address from the Front Panel
Press and use the arrow to navigate to the Network menu.
Press or to highlight the Address submenu. Press or to enter the
Network Address submenu.
Use the arrows to modify the IP address and other network settings as needed.
Press to save the new IP address, or press to cancel.
Requesting a Web Control Point
To establish a Control Point, browse to the NXT Frame Sync’s IP
address from the computer or device you want a Control Point on.
The Control Point Needed screen displays.
Enter the name you want to use for the Control Point; for example,
“QC Operator.” Click Request Control Point. The message “Not
Authorized” displays.
Select Settings from the upper left pull-down menu in the
browser page. The Settings page displays.
6. Navigate to the NXT on Your Web Browser
After you have set the unit’s IP address to be compatible with your
network, you can connect to it with a web browser. Navigate to the
BrightEye NXT’s new IP address. The Settings page displays.
7. Set an Administrative Password if Desired
By default you will have full access to all controls in the Settings
arena. To set an administrative password, go to the General menu.
Under Admin Password check Required and follow the password
setting steps.
8. Control Options
The NXT Frame Sync can be configured and controlled from the
Settings menus. You may also set up multiple control points that
allow access for different operators. You could, for example, set up
a control point that allows full access to frame sync 1, but allows
only monitoring of frame syncs 2, 3 and 4. If you prefer not to
set any Control Points, skip this section and continue on to the
“Configuring the Frame Syncs” section on page 8.


