background image

BrightEye NXT 900 Series Frame Syncs

Page 12

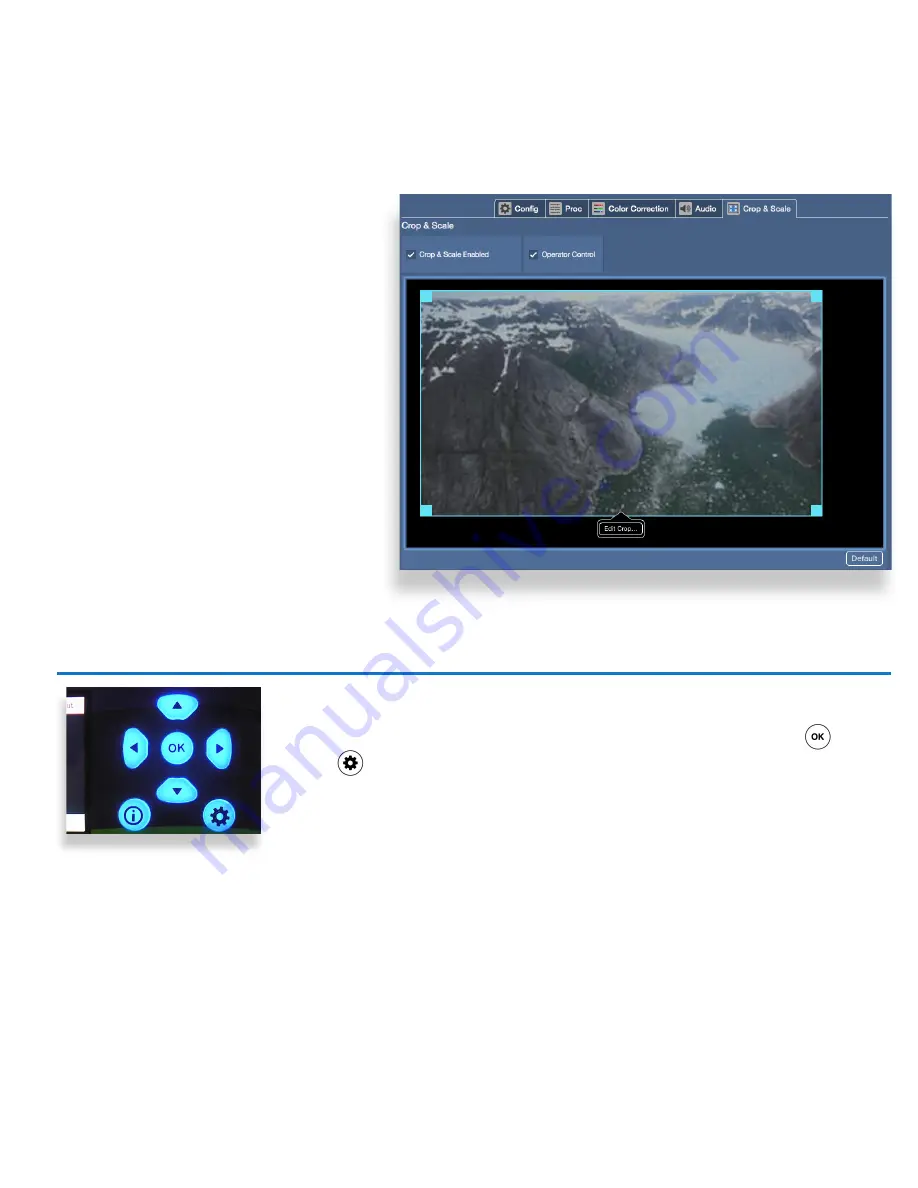
The Crop and Scale feature allows you to position, 

crop, and scale the input source into the output 

space.

Position and Size Controls 

To move or re-size an image, simply click on it. A 

border with corner tabs will appear around the 

image. Click anywhere on the image and drag to 

move it. Use the corner tabs to re-size the image. 

Crop and Zoom Controls 

Click the Edit Crop button in the control bar to crop 

the image and to zoom in and out. In this mode the 

border will have corner and side tabs, and the zoom 

slider will be in the control bar. Use the corner and 

side tabs to define the crop area, and the slider bar 

to zoom the image in and out. Click Done when 

finished. When you return to the Position and Size 

controls, the crop will be maintained when you 

change the size of the image window. 

Superior scaling means that you can zoom in on a 

small portion of the input signal and the re-sized 

image will look great. Correct aspect ratio is always 

maintained when images are re-sized. 

Crop and Scale Tab

Training Videos

In addition to this Quick Start Guide, please see our training videos at the links below to learn how to set up and configure your 

BrightEye NXT Frame Sync. The training videos address initial setup, configuration, operation, and more.  


https://www.ensembledesigns.com/videos/nxt-900-series-setup-config-video 
https://www.ensembledesigns.com/videos/nxt-900-series-overview-video

Factory Reset

To reset your BrightEye NXT Frame Sync to factory settings, press and hold both the           
and the           while powering up the unit. Wait for the arrows to turn red and blink three 
times. The unit will then be reset to its factory default settings. 

September 2017

For additional assistance, contact us at +1 530.478.1830 or  [email protected]. All Ensemble Designs products have 

a 5-year warranty. Avenue and BrightEye products are designed and built in California at Ensemble Designs. Come visit us! 

Summary of Contents for BrightEye NXT 900

Page 1: ...Video Proxies Optional SFPs for Fiber I O HDMI and HDCP Support Front Panel Live Monitor Video Proc Amp and Color Correction Audio Channel Swap and Level Adjust Monitor Pre and Post Processed Signals...

Page 2: ...uration menus on the front panel screen Use the arrows to scroll through the configuration menus navigate submenus or to change the values of a selected setting Press or to drop down successive levels...

Page 3: ...f you need to genlock the unit Power Two SFP Ports Connect fiber optic or SDI signals two I O connections per port HDMI one I O connection per port BrightEye NXT 955 2 Channel SDI Frame Sync U D C The...

Page 4: ...FP ports so you can add the I O interfaces you need SFP s may be added to provide connections to Fiber HDMI Analog Composite additional SDI or IP Encapsulated SDI interfaces The SFP ports can be used...

Page 5: ...NXT locks to house reference or to its own internal precision standard During setup you ll select Internal or External Reference from the Timing Genlock menu 3 Connect Power Supply Connect the power s...

Page 6: ...page The Settings page displays 6 Navigate to the NXT on Your Web Browser After you have set the unit s IP address to be compatible with your network you can connect to it with a web browser Navigate...

Page 7: ...t you just requested will now be shown at the top of the Pending Authorization area You can rename the Control Point and choose which Frame Sync Channels the Control Point has control of Click Done Th...

Page 8: ...rame Sync 1 through Frame Sync 4 Input signals will be shown in the left hand thumbnail The processed output will be shown in the right hand side Frame Sync configurations can be stored with Presets a...

Page 9: ...e different output standards Config Tab The Config Tab allows you to Custom name the Frame Sync Select the Output Standard Change the Input Selection if you are using SFPs Note If using SFPs you will...

Page 10: ...e Proc Controls Adjust Gain Chroma and Pedestal Turn operator access to the Proc Controls On or Off Enable or disable the Color Correction Controls Adjust Red Green and Blue Gain and Offset Turn opera...

Page 11: ...Tab Provides agile and complete audio control Adjust the level of all 16 possible embedded audio channels and map those channels to produce any combination of swaps and mixes on the output Audio dela...

Page 12: ...can zoom in on a small portion of the input signal and the re sized image will look great Correct aspect ratio is always maintained when images are re sized Crop and Scale Tab Training Videos In addit...

Reviews: