background image

DECREASED SURFACE BOIL

If the surface boil has decreased from the initial installation, check the 

following: 

1.     Air filter: Replace air filter, 

AquaMaster®

 part number is 

        940569 (Solar AquaAir Ultra 1) or 940017 (Solar AquaAir Ultra 2).
2.     Piston Replacement: Replace every 18 months. 

NOTE: 

Complete maintenance and replacement instructions are 

included in each kit.

MAINTENANCE & TROUBLESHOOTING

Under normal conditions, an Air Filter change is required after 

approximately 3 months for SolarAir 1 Ultra (Air Filter # 940569) and 

every 12 months for SolarAir 2 Ultra (Air Filter # 940017). It will be 

necessary to replace the Air Filter more often if dusty conditions exist. 

The Outdoor Enclosure air inlets and discharge ventilation holes need to 

be kept clean and free of debris and clear of weed and plant growth. If 

the circulation of air is prevented by debris, the compressor will overheat 

and reduce the life of the compressor.

CAUTION: 

Before performing any maintenance and troubleshooting, 

disconnect power from system. All maintenance and troubleshooting 

should be performed by a qualified electrician or serviceman.

Page 17

Summary of Contents for AquaMaster Solar AquaAir Ultra 1

Page 1: ...Solar AquaAir Ultra Aeration Systems Owner s Manual Solar AquaAir Ultra 1 2 Piston Compressor 24V A DIVISION OF ENQUATICS INC ...

Page 2: ......

Page 3: ...ns repairs or using unauthorized parts or repair facilities Read the entire manual before attempting to install service or operate any Solar AquaAir Ultra Diffused Air Aeration unit Improper installation operation service repair maintenance or alteration of this product may result in property damage or bodily injury Disconnect electrical power before servicing this unit Use only parts that are sup...

Page 4: ...ting Initial FishKill 16 Winter Operation and Precautions 16 DangerThinIce 16 Decreased Surface Boil 17 Maintenance and Troubleshooting 17 18 Product Damage InDelivery 19 Apparent Damage or Loss 19 Concealed Damage 19 Product Warranty 19 SHIPPING CLAIMS When you receive your AquaMaster unit examine the package for any signs of external damage it may have sustained en route If there is apparent dam...

Page 5: ...y today Our revolutionary stainless steel compressor enclosure will provide a lifetime of rust and corrosion protection and provides superior cooling and performance Your 24 Volt Solar AquaAir Ultra Diffused Air Aeration System information is as follows Solar AquaAir Ultra 1 1 Single Head Compressor 1 2 Running Amps Solar AquaAir Ultra 2 1 Single Head Compressor 3 2 Running Amps Solar AquaAir Ultr...

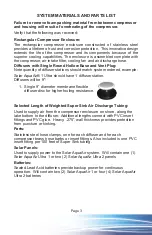
Page 6: ...a should have 1 diffuser station Diffusers will be 9 1 Single 9 diameter membrane flexible diffuser disc for higher fouling resistance Selected Length of Weighted Super Sink Air Discharge Tubing Used to supply air from the compressor enclosure on shore along the lake bottom to the diffuser Additional lengths connect with PVC insert fittings and PVC glue Heavy 275 wall thickness provides protection...

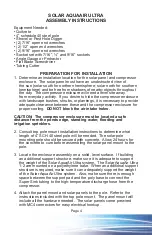
Page 7: ...e located a safe distance from the ponds edge standing water flooding and irrigation sprinklers 2 Consult top pole mount installation instructions to determine what length of 4 SCH 40 steel pole will be needed The solar pole mounting pole should be secured with concrete Allow 24 hours for the concrete to cure before assembling the solar panel mount to the pole 3 Locate the enclosure assembly on a ...

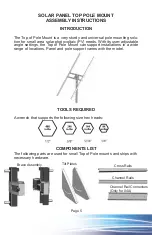
Page 8: ...angle settings the Top of Pole Mount can support installations in a wide range of locations Panel and pole support varies with the model TOOLS REQUIRED A wrench that supports the following size hex heads COMPONENTS LIST The following parts are used for small Top of Pole mounts and ships with necessary hardware Page 5 Brace Assembly Tilt Plates Cross Rails Channel Rails Channel Rail Connectors Only...

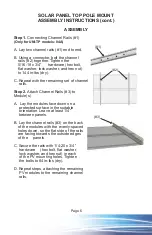
Page 9: ... Attach Channel Rails 3 to Module s A Lay the modules face down on a protected surface in the suitable orientation Leave at least 1 4 between panels B Lay the channel rails 3 on the back of the modules with the evenly spaced holes down so the flat side of the rails are facing towards the outside edges of the panels C Secure the rails with 1 4 20 x 3 4 hardware hex bolt flat washer lock washer and ...

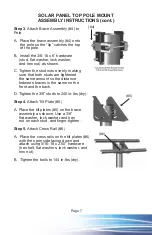
Page 10: ...d the same amount so the distance between braces is the same on the front and the back D Tighten the 3 8 studs to 240 in lbs dry Step 4 Attach Tilt Plate 5 A Place the tilt plates 5 on the brace assembly as shown Use a 3 8 flat washer lock washer and hex nut on each stud and finger tighten Step 5 Attach Cross Rail 6 A Place the cross rails on the tilt plates 6 with the open side facing down and at...

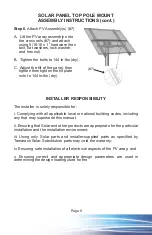
Page 11: ...taller is solely responsible for i Complying with all applicable local or national building codes including any that may supersede this manual ii Ensuring that Solar and other products are appropriate for the particular installation and the installation environment iii Using only Solar parts and installer supplied parts as specified by Tamarack Solar Substitution parts may void the warranty iv Ens...

Page 12: ...d consulting with a local engineer familiar with local regulations and build site requirements including soil conditions terrain and load criteria wind snow seismic These parameters may impact foundation requirements Steel Pole MUST NOT be taller than 72 6 feet above the ground Page 9 Foundation Hole Parameters and Length of 4 SCH 40 Steel Pole Model MAX Wind Speed MIN Post Hole Diameter MIN Post ...

Page 13: ...he base of the hole insuring complete encapsulation of the pipe when concrete is poured as well as allowing for water drainage See Fig 1 Pipe should be installed vertically no matter the slope of the install site Make arrangements to prevent the pipe from twisting prior to pouring concrete Pipe should be braced to remain plumb until concrete has cured at least 24 hours FIGURE 1 Top of Pole Foundat...

Page 14: ...e more it is adjusted AquaMaster recommends adjusting the tilt angle at least twice a year The below table details the formula used to find your tilt angle Fixed Angle Latitude deg Angle Calculation 0 25 90 Latitude 0 87 25 87 Latitude 0 76 Twice a Year Tilt Angle Latitude deg Summer Angle Calculation Winter Angle Calculation All 105 Latitude 75 Latitude Four Times a Year Tilt Angle Latitude deg S...

Page 15: ...ave water available to wash and clean any contact with battery acid Charge only lead acid batteries that are properly sized for the system Explosive battery gasses can be present during charging Make sure there is proper ventilation to release any battery gasses Only use insulated tools near batteries Avoid metal objects near batteries 9 SAAU1 Place batteries into the compressor enclosure in betwe...

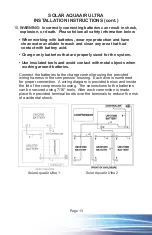
Page 16: ... the system Use insulated tools and avoid contact with metal objects when working around batteries Connect the batteries to the charge controller using the provided wiring harness in the compressor housing Each wire is numbered for proper connection A wiring diagram is provided below and inside the lid of the compressor housing The connections to the batteries can be secured using 7 16 tools After...

Page 17: ...e Super Sink tubing in the water tie several feet of tubing to the compressor enclosure post or wall This will ensure you will have enough tubing to connect to the compressor and will not pull the free end of the tubing into the water 5 Tie the free end of the tubing to the boat and head towards the marking buoy 6 Connect the free end of the tubing to the diffuser assembly and secure it with a sta...

Page 18: ... so the surface boil is approximately the same for all diffusers 3 If upon startup or during operation unusual noises or odors are detected in the compressor enclosure unplug the compressor immediately until the problem is rectified Call your representative or AquaMaster to resolve any problems DANGER To prevent severe shock or electrocution always turn the power OFF at the disconnect switch befor...

Page 19: ... you can start up the system and let the system run continuously WINTER OPERATION PRECAUTIONS The Solar AquaAir Ultra Diffused Air Aeration System has been designed to operate year round and in all climates In freezing weather and on ice covered bodies of water certain precautions must be taken to prevent personal injury or fatalities NOTE In extreme cold weather the airflow may need to be decreas...

Page 20: ...mately 3 months for SolarAir 1 Ultra Air Filter 940569 and every 12 months for SolarAir 2 Ultra Air Filter 940017 It will be necessary to replace the Air Filter more often if dusty conditions exist The Outdoor Enclosure air inlets and discharge ventilation holes need to be kept clean and free of debris and clear of weed and plant growth If the circulation of air is prevented by debris the compress...

Page 21: ... TROUBLESHOOTING CONT COMPRESSOR FILTER COOLING FAN MAINTENANCE KIT Solar Air 1 Ultra 24V 1 940562 1 940569 1 940563 1 940570 Solar Air 2 Ultra 24V 1 940564 1 940017 1 940563 1 940571 Battery Filter Cooling Fan Compressor ...

Page 22: ...fetime Warranty on the enclosure 15 years on the tubing 5 year parts and labor on the diffuser assembly 3 year parts and labor on compressor and cooling fan 5 year parts and labor on the solar panel and all other electrical components and batteries have a 1 year parts and labor warranty Vanes Pistons are considered Wear Items and are not covered under the factory warranty consult factory for assis...

Page 23: ...Notes Page 20 ...

Page 24: ...Notes Page 21 ...

Page 25: ...s Phone Fax Toll Free Visit Floating Fountains Masters Series Classic LE Celestial Fountains Fixed Base Fountains Fixed Base Fountains Series Aeration Volcano II Hydromax Series AquaAir Ultra Aeration Systems Oxymax and Ultimax Subsurface Aeration Systems Lighting and Accessories Night Glow Lighting and Control Panel LED Lighting System RGBW Lighting Systems ...

Reviews: