EnGenius EDS6255 User Manual Download Page 44

43 


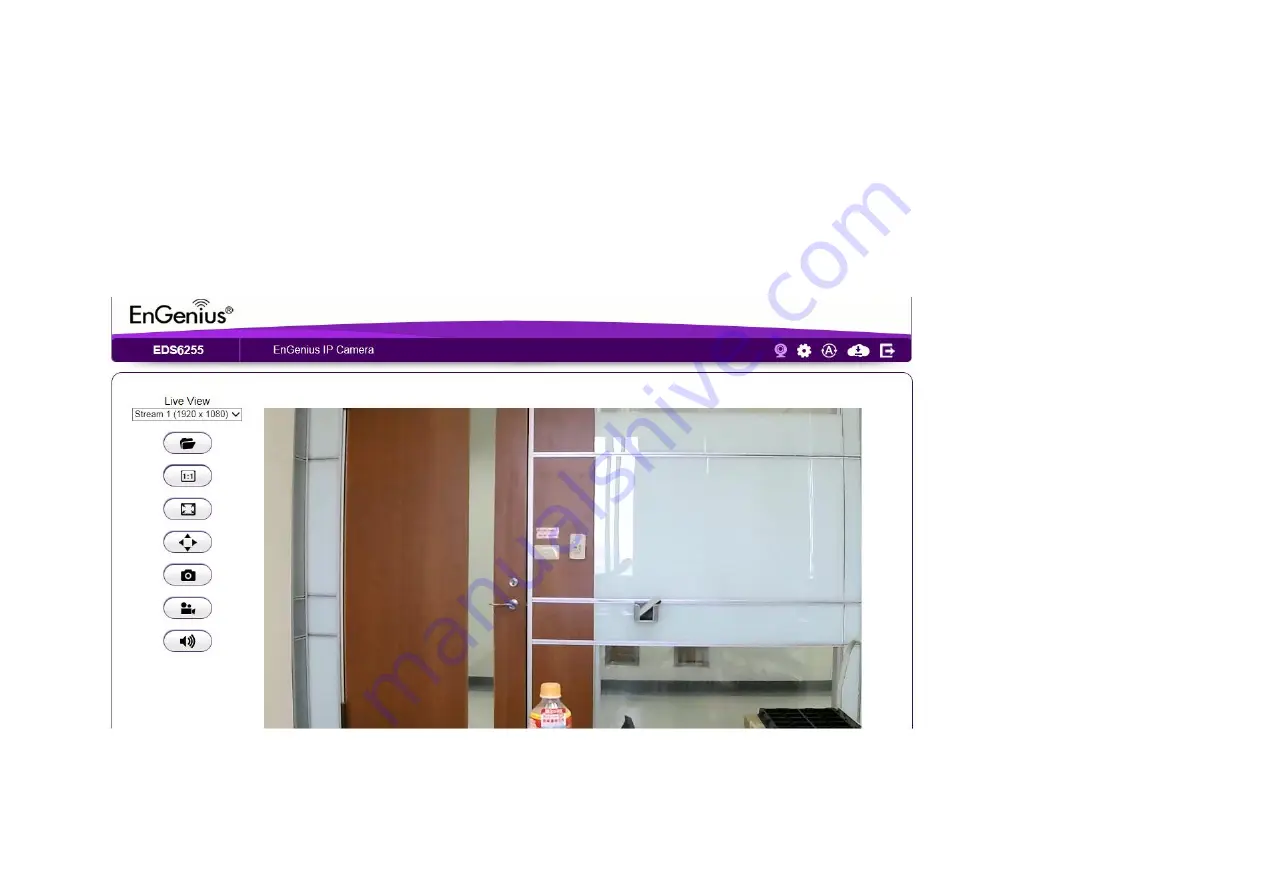
When installation is completed, open the browser and login into the camera again. You should be able to see the camera viewer in live as 

shown below. If you do not see the viewer that means you did not install 

WebCMS

 properly or try login using other browsers. 


NOTE:

 If you are seeing grey color in the viewer, it is because the camera has detected insufficient of light in the room and enabled night vision 

mode automatically. If you point your camera to a brighter area, you should be able to see it switched to normal color mode. Try a few places 

to get a feeling on how it works. If listening closely, you may hear the click sound from the camera when night vision is switched on and off. 


Congratulations, you are now ready to proceed with further camera settings! 

Summary of Contents for EDS6255

Page 1: ...0 Business Solutions 2Megapixel Full HD Wireless Dome Network Camera EDS6255...

Page 2: ...11 2 2 Ceiling Wall Mount 15 2 3 IP Camera Connection 17 2 3 1 Connecting via Ethernet Cable 18 3 Accessing the Camera after Installation 19 3 1 Managing using PC or Laptop 20 3 1 1 EnViewer Finder 20...

Page 3: ...ing the Storage Folder 48 4 1 5 Adding a User Account 49 5 User Interface 50 5 1 Navigation Panel 51 5 2 Live View Settings 54 5 3 Main Menus 57 5 4 System 59 5 4 1 Status 60 5 4 2 Service Port 61 5 4...

Page 4: ...Down 94 5 6 3 4 Delete 94 5 6 3 5 Connect 95 5 7 Media 96 5 7 1 Video 97 5 7 2 Camera 99 5 7 2 1 Light Setting 100 5 7 2 2 Flicker Control 103 5 7 2 3 Mirror 104 5 7 2 4 Day Night Mode 106 5 7 3 Adva...

Page 5: ...3 E mail Alerts 129 5 10 Storage Info 131 5 9 User Management 133 5 10 1 Add User 135 5 10 2 Edit User 136 5 10 3 Delete User 138 5 10 4 Push Message Mobile List 140 6 Camera Connecting to EnGenius R...

Page 6: ...r 162 7 Application Guide 163 7 1 Example Remote Surveillance and Motion Detection 164 7 1 1 Step 1 Choose Event Control 165 7 1 2 Step 2 Configure Motion Detection 166 7 1 3 Step 3 Configure Event Ac...

Page 7: ...Vision feature can assist to deliver 24 7 non stop monitoring With the support of patented EnGenius Cloud service users can monitor their surveillance networks remotely in real time any time anywhere...

Page 8: ...connecting the product in an office or any public setting you may need to consult the IT department in charged for IP setting detail to avoid IP address conflict Like all electronic devices do not in...

Page 9: ...Network Compliant with Optimum Wi Fi Performance Supports Simultaneous Dual Stream Recording with High Speed H 264 Encoding Built in Microphone Multiple Storage Options Built in Micro SD SDHC Slot fo...

Page 10: ...9 1 4 Package Contents The package should contain all of following items shown below...

Page 11: ...10 1 5 Physical Description...

Page 12: ...ed and tested before hardware installation especially if it is mounted on a wall Please also make sure the power outlet is available near the installation site I Basic Connection without PoE A Connect...

Page 13: ...12...

Page 14: ...wer over Ethernet PoE Connection A When connecting to PoE Enabled Switch The camera is PoE compliant please connect the Ethernet Port from the Cable Harness to a PoE enabled Switch using single Ethern...

Page 15: ...14 B When connecting to a non PoE Switch Connect the camera to a non PoE Switch via PoE Injector optional...

Page 16: ...weight of camera Use the ceiling mount bracket screw slots to drill the mounting screws into the ceiling or wall Twist the camera body into the ceiling mount bracket and route cables into the side of...

Page 17: ...ceiling mount hooks into the ceiling light grid steel framing first use the hooks and screw into the ceiling mount bracket until fixed upon the ceiling light grid steel framing When done twist the ca...

Page 18: ...then access the camera through the Internet anytime anywhere This section will guide you through the connection setup Please follow the following guide step by step to setup the connection between yo...

Page 19: ...u may be required to switch to wireless setting or purchase a longer cable to extend the camera for longer range As a rule of thumb if your camera is close enough to the router use Ethernet cable if p...

Page 20: ...lar to the following diagram You can manage the camera using your PC Laptop Tablet or iOS Android based on mobile phone we will call it management station in the following context The key point is tha...

Page 21: ...ou discover the camera within a local network You should be able to find the tool inside the CD Please install the tool to your management station desktop for quick access when you need it Please take...

Page 22: ...s on the list Please turn off any heavy loading applications such as P2P that may occupy your network Enter Username and Password for the selected camera on the list Click on Next to start configurati...

Page 23: ...22 Go to DDNS setting Go to Camera Video Configuration setting Upgrade the current camera firmware Reset the current camera to factory default Reboot restart the current camera...

Page 24: ...23 EnViewer Finder Network...

Page 25: ...ess from your router automatically The requirement is that your router should enable DHCP which is basically the default setting for most of the home router vendors You are not required to enter any I...

Page 26: ...et service is using PPPoE protocol Please consult your local ISP provider for more detail Basically the PPPoE setting is exactly the same as your router You need to provide at least the Username and P...

Page 27: ...lt the camera is connected to a public NTP server pool ntp org and its time is always synchronized with the server over the Internet Normally you only need to change the Time Zone Choose the one that...

Page 28: ...password You will need to provide your new password next time upon login to the camera through EnViewer Finder or Web Browser The Camera Name is the camera host name that represents the identity of th...

Page 29: ...28 3 1 1 1 EnViewer Finder DDNS...

Page 30: ...g used by others then you can access the camera with both your default DDNS and the new alias DDNS ab19791220 engeniusddns com Refresh Time options are 3HR 6HR 9HR 12HR and 24HR DDNS server needs to s...

Page 31: ...30 3 1 1 2 EnViewer Finder Config...

Page 32: ...o worry about this page setting However you may need to know that the camera has two concurrent video streams running at the same time Stream 1 serves for monitoring over browser while Stream 2 serves...

Page 33: ...is setting affects the quality of the video High frame rate results in smoother video but larger video file Please Select this option before hitting Finish button This will open the web browser with t...

Page 34: ...ture improvement please download the latest firmware file to your local computer first before proceeding further Click Browse and select the firmware file you downloaded Click Update to proceed with u...

Page 35: ...its factory default state and your settings on the camera will be erased Note It will take a while for the camera to come back on again Therefore the camera will not appear on the camera list if you...

Page 36: ...a on EnViewer Finder if the camera stops responding for unknown reason Click on Yes to proceed Note It will take a while for the camera to come back on again Therefore the camera will not appear on th...

Page 37: ...revious section if you do not know the IP address or DDNS of your camera For this example we have our DDNS and IP address as follows DDNS ab19791220 engeniusddns com IP Address 192 168 0 101 If you ar...

Page 38: ...uter or IoT Gateway you can manage the camera through the router management interface The benefit of this is that you can manage both the router and the camera on a single integrated user interface Pl...

Page 39: ...Phones You can manage your camera over Tablet or Mobile Phones using the free EnGenius APP EnViewer EnViewer currently supports the two most popular Android and iOS platforms Please search the keyword...

Page 40: ...e Basic Settings Open your browser and type in the camera IP e g 192 168 0 103 address or the given DDNS name printed on the label on the back of your camera e g 0f9e76a engeniusddns com using a regul...

Page 41: ...informed to download and install WebCMS Please click on Download WebCMS to start download you will be required to have Internet connection on your router WebCMS enables browsers to support camera fea...

Page 42: ...41 If prompted with the following question click on Save Internet Explorer Save the downloaded file...

Page 43: ...completed you MUST close all the browsers before install WebCMS Double click on WebCMS to install the program You may not have noticed the installation is very fast it only takes a few seconds for Web...

Page 44: ...ing grey color in the viewer it is because the camera has detected insufficient of light in the room and enabled night vision mode automatically If you point your camera to a brighter area you should...

Page 45: ...user interface language The default factory language is English To change the language click on icon the make the change On the language list click to select the one you feel comfortable with from th...

Page 46: ...n Menu select Network UPnP Then you may want to assign the camera with proper names for better identification if you have several cameras at the same time Meaningful names such as living room kitchen...

Page 47: ...46 Hostname Enter a new name into this field Click Apply to change the camera name...

Page 48: ...era Time It is crucial to setup camera time properly so that scheduling can be arranged and events be recorded with accurate date and time On the Main Menu select System Time Please refer to Chapter 5...

Page 49: ...48 4 1 4 Setting the Storage Folder The Storage Folder is the location where media files will be placed On the Main Menu select System PC Storage Path Please refer to Chapter 5 for detail setting...

Page 50: ...49 4 1 5 Adding a User Account On the Main Menu select User Management User Account Please refer to Chapter 5 for User Management for adding a User...

Page 51: ...50 5 User Interface Camera management page allows you to view and configure the camera at real time This chapter will introduce all supported features and detail configurations...

Page 52: ...51 5 1 Navigation Panel...

Page 53: ...refer to User Management section Administrator has full control of all the camera settings The viewer only has camera view features The descriptions are as follows Switch the management page to camera...

Page 54: ...53 Logout...

Page 55: ...54 5 2 Live View Settings...

Page 56: ...ich has smaller screens You can preview each stream at real time by selecting it from the list This opens the local folder where the real time captured images and clips are stored You may change the f...

Page 57: ...ESC button to cancel the full screen mode This button takes a snap shot on the real time view and store the image in the local folder ePTZ display the digital zoom in for the region of interest use yo...

Page 58: ...when icon changed to purple icon the camera is recording To stop recording simply click the button again 5 3 Main Menus Only Administrator Users can get access to Main Menus Viewers do not have the pr...

Page 59: ...58...

Page 60: ...59 5 4 System The System setting menu consists of system related configurations...

Page 61: ...60 5 4 1 Status Status Page displays the detail system level information on the page including current time firmware version DDNS name IP address and etc...

Page 62: ...ault setting is as follows This is only reserved for advanced users who want to keep certain ports for other particular services Changing the ports will result in unexpected result Unless necessary pl...

Page 63: ...er the Internet Normally you only need to change the Time Zone Choose the one that matches your location Leave the other setting as default should be fine Setting the wrong time server or time zone wi...

Page 64: ...ge the path Snapshot File Type support image format JPG PNG BMP Recording File Type support format AVI MP4 Compression rate comparison High to Low JPG PNG BMP MP4 AVI You should consider keeping the d...

Page 65: ...firmware New firmware may contain bug fixes or feature improvement which is beneficial to you Either download the latest firmware file to your local computer or use Auto Firmware Upgrade when Interne...

Page 66: ...65 Select the downloaded new firmware then click on Open...

Page 67: ...mware It may take a moment for the upgrading process please wait patiently WARNING Do not turn off the device in the middle of upgrade process Terminating the device during the process will damage the...

Page 68: ...There are times that you may want to test new settings or keep different settings for different application scenarios You can do this with following steps Save Settings Click Save to initiate setting...

Page 69: ...68 Click Save to store the file to the chosen location...

Page 70: ...69 Restore Settings Click on Browse to select the backup file...

Page 71: ...70 Choose the configuration file and click on Open Click on Upload to start storing process...

Page 72: ...moment for the uploading process please wait patiently WARNING Do not turn off the device in the middle of the upload Terminating the device during the process will damage the device and may cause th...

Page 73: ...y default To reset to default click on the button Reset to Default If the camera for some reason stop responding or acting abnormally you can choose to Reboot the Device If the device still does not r...

Page 74: ...terface language is English you can change the language with just a mouse click On the language list click to select the one you feel comfortable with from the list The user interface with refresh aut...

Page 75: ...74 5 5 Network The Network setting menu consists of Network related configurations...

Page 76: ...Configuration setting allows you to change the method with which the camera obtains its IP address The default setting Dynamic IP DHCP is applicable to most of the application scenario However advance...

Page 77: ...ic IP you need to specify the detail IP settings similar to above Please note that if you are managing your camera in local network similar to the example shown above you will need to configure your m...

Page 78: ...ct the camera directly to your modem given that you are using PPPoE for your Internet service Please consult your local network service provider for more detail Basically the PPPoE setting is exactly...

Page 79: ...to the field Click Apply when configuration is done to activate new settings Note If you have a working Internet connection through your router there is no need to type in the MAC address Providing su...

Page 80: ...79 5 5 2 EnGenius Cloud Service You must Enable EnGenius Cloud first and then choose the Type...

Page 81: ...ternet using a fixed DDNS name You can either use the default EnGenius DDNS Service or other 3rd party Service you prefer Users are recommended to use the free DDNS address printed on the label enclos...

Page 82: ...bility by clicking on the button Availability Check for verification In this example superman engeniusddns com is available That is when the setting is activated both DDNS name superman engeniusddns c...

Page 83: ...DDNS server will check the synchronization every 24 hours Normally the default setting 24HR is okay for most cases DDNS Status when working properly it should show Connected Note DDNS will only work o...

Page 84: ...rpose You should provide your account information so that the camera can communicate with the selected DDNS vendor Your third party DDNS service account credential should include the following informa...

Page 85: ...access over the Internet possible using camera DDNS name You won t be able to access the camera if you disable UPnP feature Please keep it Enable if you are not sure Hostname You may rename your camer...

Page 86: ...ss the configuration Main Menu On the other hand we also need to enable camera s wireless feature please check again to ensure you have wireless enabled All wireless related settings can be found unde...

Page 87: ...eless access points AP When prompted with Site Survey window click on Refresh button if you do not find your AP on the list On the site list choose your preferred AP and then click Add to AP Profile T...

Page 88: ...change the settings if they do not match with the actual AP wireless security settings Enter your Pre Shared Key and press Save to complete the setting Please wait for a moment for the setup to compl...

Page 89: ...both the camera and the AP at the same time so that they can find each other Normally for WPS enabled products you should be able to find the WPS button on the product Only few rare cases that requir...

Page 90: ...Start to Process Wait a minute for two devices to establish the wireless connection Done NOTE For WPS to setup wireless connection successfully timing is essential Once AP or wireless router has init...

Page 91: ...90 5 6 3 AP Profile You can keep several AP Profiles settings if your application may need to switch between APs in case one of them failed Each profile matches to a specific AP...

Page 92: ...t AP Encryption supports Disabled WEP and WPA pre shared key WPA Type supports WPA TKIP and WPS2 AES Pre Shared Key Type Passphrase or HEX 64 character WEP Please note that WEP has proven be insure th...

Page 93: ...supports Open System and Shared Key Key Length 64bit and 128bit the longer the safer Key Type ASCII or HEX Default Key the key that will be used for authentication Encryption Key 1 4 the candidate ke...

Page 94: ...93 5 6 3 2 Edit On the table Select the profile and then click on Edit to modify the profile setting Once complete the modification click Save to make the changes effective...

Page 95: ...y when camera tries to search for the existing AP You can change the AP priority by moving them up or down Select the profile and then click either on Move Up or Move Down 5 6 3 4 Delete Delete Select...

Page 96: ...95 Delete All this will delete all the AP profiles on the table 5 6 3 5 Connect Select a profile to be connected and then click on Connect to initiate the wireless connection...

Page 97: ...96 5 7 Media All media quality related settings can be found under Media menu These settings will have direct effect on the captured image or video...

Page 98: ...97 5 7 1 Video...

Page 99: ...98 Enable it is recommended that you enable Time Stamp and Video Title the timestamp will show on the top left corner of your video as shown below...

Page 100: ...arer result When directly facing an outdoor window too much light you may want to lower the Brightness a bit There may be different settings under different circumstance therefore you should tune the...

Page 101: ...100 5 7 2 1 Light Setting Brightness Contrast...

Page 102: ...101 Sturation Sharpness...

Page 103: ...102 De noise Please note that some of the effects will be more obvious in higher resolution at real time...

Page 104: ...ich is a consequence of the AC power frequency 50 or 60 Hz As the light can change from picture to picture causing light flicker This will lead to inconsistent light source between each snapshot To el...

Page 105: ...down for sideways That is the view become difficult to monitor when it is upside down The Mirror settings does not reflect on the preview at real time unlike lighting condition settings Therefore you...

Page 106: ...105 None Mirror Flip Vertical None Flip Both Horizontal and Vertical None Both...

Page 107: ...e This controls Night Vision ON and OFF Auto auto detect light sufficiency and switch between Day and Night automatically Day force the camera to turn OFF Night Vision Night force the camera to turn N...

Page 108: ...nual Indoor Outdoor For regular users please choose indoor or outdoor if you are not sure about the terms and behavior the default values will the preconfigured The areas are grey out for preconfigure...

Page 109: ...108 Manual Choose Manual if you would like to fine tune some of the settings that suits your application Please be noted that these settings may have impacts on the image quality and performance...

Page 110: ...109 5 7 4 Privacy Mask Choose Enable if you would like to put certain areas in private Please use selected window to hide certain area for privacy purpose...

Page 111: ...nvironment On the other hand if audio is not necessary for instance an open space with a lot of noises you are advised to Disable the audio to reduce the clips file size Mode Only Mic enable only the...

Page 112: ...111 Sample Rate 8 K Bit Rate 16 Bit Changing Sample Rate and Bit Rate will impact the audio quality The higher the rate the better the quality and the larger the file will become...

Page 113: ...112 5 8 Event Management This camera supports many smart features that allows you to utilize the camera in many application scenarios This section will introduce each of them in detail...

Page 114: ...ondition an event will be triggered and proceed with the defined actions for instance taking snapshots or recording videos for the specified length of time and interval There are two profiles for defa...

Page 115: ...nge for each schedule Trigger Type by Time or Detectors if you select the detectors it can be trigger by Motion detection Audio detection or Tampering detection Event Notification can send the message...

Page 116: ...enable the correlate settings of Network Storage and FTP you can refer to Ch5 8 1 and 5 8 2 Snapshot to Network Storage FTP or E Mail please remember to setup and enable the correlate settings of Net...

Page 117: ...116 5 8 1 1 Motion Detection...

Page 118: ...ed Uncheck the window to remove the window from the view Sensitivity Level 0 to Level 100 with Level 100 being the most sensitive Depends on your application high sensitivity will trigger event more o...

Page 119: ...118 Therefore you can have a combination of three different detection window sizes...

Page 120: ...nsitivity and produce more snapshots or videos However over sensitive events will fill up the storage very quickly Even if you have unlimited storage space large amount of files can become a problem w...

Page 121: ...e live view page when motion triggered Sensitivity Level Level 0 to Level 100 with Level 100 being the most sensitive Depends on your application high sensitivity will trigger event more often than lo...

Page 122: ...ration until Next Event can set 20sec s 30sec s 1min s 5min s 10min s if you set 20sec s for this item system will ignore any trigger during this 20sec s Event Snapshot Snapshot Duration can set 10sec...

Page 123: ...n alarm is triggered Note If setting Buffer Duration Until Next Event to 30 seconds the camera will keep recording for 30 seconds when event is triggered In this case if the Video Length is 10 seconds...

Page 124: ...before setting camera Event or Schedule Recording You will have to tell where the captured images or clips are going to be stored The following concept diagram depicts the flow of the image file when...

Page 125: ...FTP are required to have existing servers ready for upload SMTP is good for small image capture since it sends the file through email You should choose what is best for your application SMTP Network S...

Page 126: ...work Storage This camera supports two types of Network Storage NFS and SAMBA Before going further you need to Enable to configure the network storage first Please refer to the following sections for N...

Page 127: ...S server Path enter the initial path if applicable Folder Size storage allocated for the camera the default value 0 signifies infinity Overwrite when the defined folder is full the oldest files will b...

Page 128: ...r Password password for accessing SAMBA server Folder Size storage allocated for the camera the default value 0 signifies infinity Overwrite when the defined folder is full the oldest files will be ov...

Page 129: ...ort the FTP server port default 21 User Name username for accessing FTP server Password password for accessing FTP server FTP Path enter the initial path if applicable Click Test to verify the connect...

Page 130: ...ra to send captured images to the predefined email box to notify about an event or alarm SMTP is an email sender s server You need to check whether your email service provider supports SMTP and obtain...

Page 131: ...gmail com Port enter SMTP server port normally 587 or 465 Account the email account name if your email is myemail gmail com myemail is the account name Password the password you use to login into you...

Page 132: ...ludes the network storage status total size and available size User can click the Refresh button to get the latest information of these information It depends on different browsers user can double cli...

Page 133: ...rted the SD card If not refresh the page by clicking on Refresh button and double check if the Micro SD card has been properly inserted into the slot Dismount you should dismount the SD card before ph...

Page 134: ...strator has full control over the camera settings while viewer only has the accessibility of watching the real time video Viewer account is particularly useful when you have multiple users such as oth...

Page 135: ...134 Administrator has full control of the camera interface with configuration features as shown below Viewer only has basic camera view interface...

Page 136: ...135 5 10 1 Add User User Name enter username Password enter password Confirm Password enter password for confirmation Authority select Administrator or Viewer Click Add to add the user...

Page 137: ...136 5 10 2 Edit User Select a user from the list by click on the check box Click Edit to change the user account setting...

Page 138: ...137 Make the changes and then click Edit to save the changes Once all necessary changes are made to the accounts click Apply to make the changes affective...

Page 139: ...138 5 10 3 Delete User On the user list select the user account to be deleted Click on Delete Selected to delete the account When prompted with delete confirmation click Yes to delete...

Page 140: ...139 Once all necessary changes are made to the accounts click Apply to make the changes affective...

Page 141: ...t Here will list the devices which enable the feature of push message on this camera When an event triggered camera will send the message to all the devices in this list You can click Delete to disabl...

Page 142: ...with ease EnGenius bundles cameras with Intelligent Router and IoT gateway series and provides a single point of entrance for integrated management Traditionally if you have multiple cameras installe...

Page 143: ...Integrated Storage Smart Recording technology integrates the EnGenius Intelligent Router and IoT Gateway storage feature and allows you to store the media files on the centralized storage over the ro...

Page 144: ...tion known as Port Forwarding because your camera is installed under a local network Smart Recording technology takes care of all the complicated setup and leave you with ease of control That is you w...

Page 145: ...g about Smart Recording is that you can make use of the EnGenius Router Storage function You should attach an external USB storage device portable hard disk or USB flash drive to your router Enter the...

Page 146: ...y enabled Then Enable Samba Service and click on Apply to activate the function On your router s Main Menu Click System IP Camera to access the connected cameras Note that only EnGenius Cameras can be...

Page 147: ...146 You should be see all your cameras listed on the IP Camera Client Table If not click Refresh button to scan the network again Please be noted that only EnGenius Cameras will be listed on the table...

Page 148: ...147 Connect You can get access to the selected cameras camera mange page Add Profile Add the selected camera to a profile please refer to next section for more detail on Profile...

Page 149: ...to a profile so that the router has the privilege to configure your camera and link them together 5 12 1 Add Profile This example shows 4 connecting cameras on the router We have chosen to add two cam...

Page 150: ...Motion Recording Enable Disable this type of recording Over Write Enable Disable over writing the old files when there s no space for storing the new files Folder Name The name of the folder where the...

Page 151: ...150 The added cameras will be listed as shown below You can Edit or Delete profile by selecting the profile and click on the buttons below...

Page 152: ...151 5 12 2 Edit Profile Select the camera profile and then click Edit button to make the changes...

Page 153: ...152 5 12 3 Delete Profile Select the camera profile and then click Delete Selected button to delete the profile Click Delete All to delete all the profiles...

Page 154: ...153 5 12 4 Synchronize...

Page 155: ...rmation on what actually happened to your camera s setting after you added it to the Profile on the router It is helpful for you to go through the automatically configured camera settings and make pro...

Page 156: ...Access the Media files on the Router 5 14 1 Using web browser Please refer to EnGenius Router user s manual for more detail on the Shared Storage feature You can click on USB Port icon to access the...

Page 157: ...156 Choose Admin and click on Start button Choose the storage device to access the file...

Page 158: ...157 In the previous example the Lobby camera profile defines the path sda1 IP_Camera Lobby The media files will be stored as shown below...

Page 159: ...158 Click the file to download it...

Page 160: ...159 5 14 2 Using Windows File Explorer Once enabled Samba on the EnGenius router you should find the router under Network in your File Explorer as shown above...

Page 161: ...160 Double click on ENGENIUS to get access to the storage space Upon security prompt enter the router s username and password to continue...

Page 162: ...161 You can access the media files located under ENGENIUS sda1 IP_Camera Lobby...

Page 163: ...eless router today supports this feature You should enable UPnP if you wish your camera to be recognized by the home router If you can t find the related settings they are most likely enabled by defau...

Page 164: ...bility Note Please ensure that your router supports UPnP Traversal and has it enabled Most of the modern wireless router today supports this feature If you can t find the related settings they are mos...

Page 165: ...pplication concept diagram shows a camera monitoring the property like office or warehouse The management staff wants to remotely monitor their responsible property and needs to be alarmed when motion...

Page 166: ...165 7 1 1 Step 1 Choose Event Control Please select preferred Event Action for example here E Mail would be suggested...

Page 167: ...166 7 1 2 Step 2 Configure Motion Detection Please specify Window of your interest and click Apply...

Page 168: ...Select desired Event Duration and Interval if you enable Event Recording via available methods such as Network Storage or FTP please also review related settings regarding length and resolution Once d...

Page 169: ...mobile devices iOS or Android by using EnViewer EnViewer is an App that allows you to view and manage your camera at real time Where can I download my app You can download it by searching APP store iO...

Page 170: ...ome and Microsoft Internet Explorer Given that you have configured your camera properly you should be able to get access to your camera by entering its DDNS or IP address If you may have troubles find...

Page 171: ...interference Make sure there is no electrical appliance near the camera such as microwave or devices that may interfere with the camera Upon experiencing interference try to turn off possible electric...

Page 172: ...them regularly Your videos or images are stored either locally or in network storage The images and videos are accessible only when provided with proper security check Can EnGenius employees view my v...

Page 173: ...Internet connectivity from other devices connecting to the router and determine possible sources to cause the issue If other connecting devices can connect to the Internet through the router the prob...

Page 174: ...ce in a residential installation This equipment generates uses and can radiate radio frequency energy and if not installed and used in accordance with the instructions may cause harmful interference t...

Page 175: ...e user s authority to operate this equipment This transmitter must not be co located or operating in conjunction with any other antenna or transmitter Radiation Exposure Statement This equipment compl...

Reviews: