background image

ENFORCER 4-in-1 HD Cameras (TVI, CVI, AHD, Analog) 

14


SECO-LARM U.S.A., Inc. 

Special: 


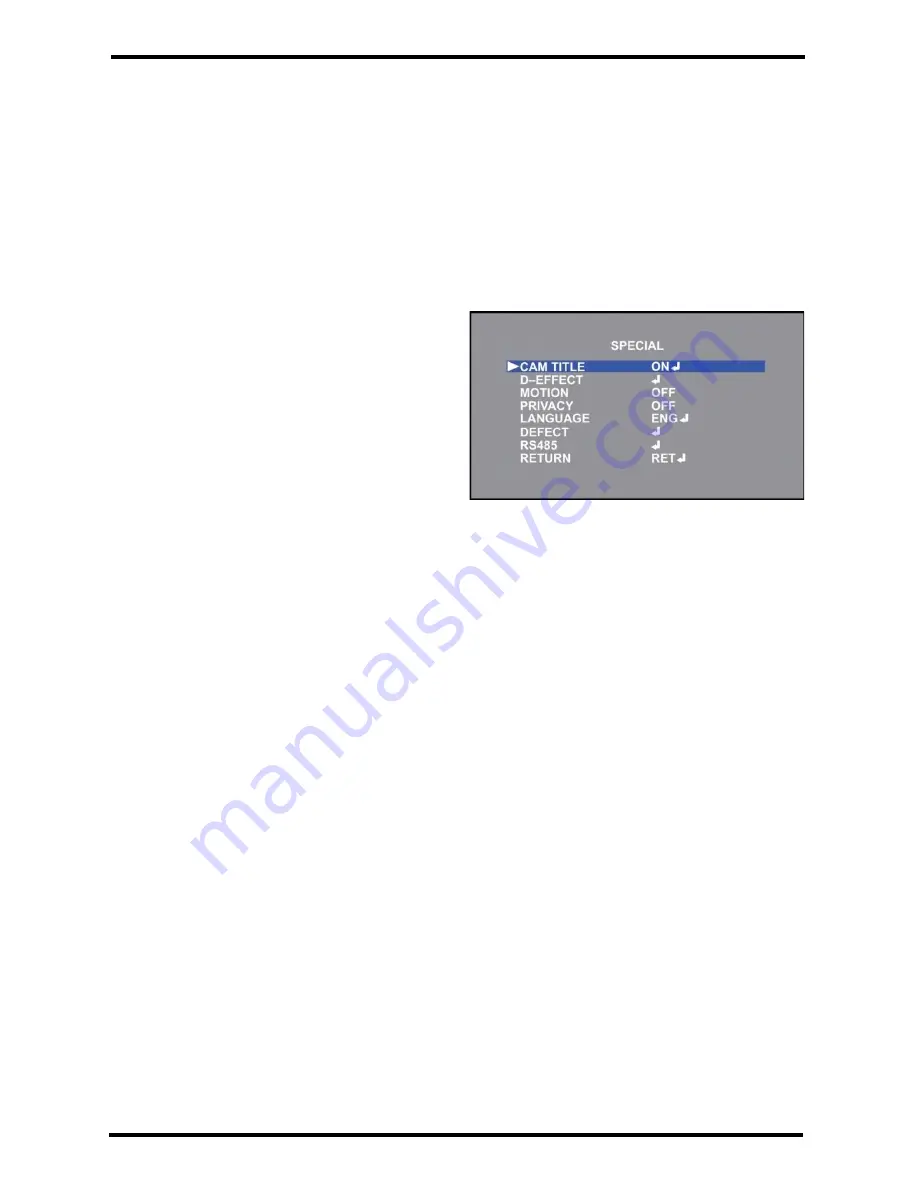
This function accesses the special features of the camera including the camera title, digital effects, 
motion detection, privacy masks, OSD language, and defective pixel correction (DPC).  

1.


Select SPECIAL on the Main Menu screen.  

2.


Select the desired menu operation by moving the joystick to the left or right and pressing enter 
to enter the sub-menu (if applicable).  

3.


Use the joystick to adjust the settings.  

4.


Select RETURN to return to the Main Menu screen. 
 

-


CAM TITLE: Set the camera title to on or off. 
The default camera title is the firmware 
version. 

o


OFF: Camera title off. 

o


ON: Camera title on. Use the joystick to 
select the camera title. Up to 15 
alphanumeric characters can be used.  

-


D-EFFECT: Select to choose a digital effect to 
apply to the camera. 

o


FREEZE: Freeze the camera image at the 
selected moment. 

o


MIRROR: Flip the camera image horizontally, vertically, or horizontally and vertically. 

o


NEG IMAGE: Invert the camera image colors. 

o


RETURN: Return to the SPECIAL menu screen. 


Summary of Contents for EV-Y1201-A2WQ

Page 1: ...ite EV Y2201 A2WQ 2 8mm 1080p 12VDC Rollerball White EV Y2201 A2GQ 2 8mm 1080p 12VDC Rollerball Gray EV Y2201 AMWQ 2 8 12mm 1080p 12VDC Rollerball White EV Y2201 AMGQ 2 8 12mm 1080p 12VDC Rollerball Gray EV Y2201 AMWAQ 2 8 12mm 1080p 12VDC Dome White 4 in 1 HD TVI CVI AHD Analog Cameras On Screen Display Manual EV Y2201 AMWQ shown ...

Page 2: ...in front of bright light sources Highlight Suppression Back Light Compensation HSBLC Define target areas and remove spotlights to make certain objects visible White Balance Adjust the picture s color temperature image color Day Night Adjust the level of ambient light that triggers the camera to switch between color and B W modes Noise Reduction DNR Adjust for less interference on the screen in an ...

Page 3: ...5 After choosing the settings move the cursor to EXIT and select the option to SAVE END RESET or NOT SAVE 6 Press enter on the joystick to make the selection and leave the OSD menu NOTE A submenu is available where the menu displays 1 Press down on the joystick to open the on screen display OSD menu 2 Use the joystick to navigate the OSD menu 3 To select an item press down enter on the joystick To...

Page 4: ...C 0 15 SENS UP OFF AUTO SENS UP X2 X4 X6 X8 X10 X15 X20 X25 X30 BRIGHTNESS 1 100 D WDR OFF ON LEVEL 0 8 AUTO DEFOG OFF AUTO POS SIZE ADJUST POSITION AND SIZE OF BOX GRADATION 0 2 DEFAULT RESET TO DEFAULT SETTINGS BACKLIGHT PAGES 9 10 OFF BLC LEVEL LOW MIDDLE HIGH AREA ADJUST POSITION AND SIZE OF BOX DEFAULT RESET TO DEFAULT SETTINGS HSBLC SELECT AREA 1 AREA 2 AREA 3 AREA 4 DISPLAY ON ADJUST POSITI...

Page 5: ...C 1 2 3 D EFFECT FREEZE OFF ON MIRROR OFF MIRROR V FLIP ROTATE NEG IMAGE OFF ON MOTION OFF ON SELECT AREA 1 AREA 2 AREA 3 AREA 4 DISPLAY ON ADJUST POSITION AND SIZE OF BOX OFF SENSITIVITY 0 100 COLOR GREEN BLUE WHITE RED TRANS 0 00 0 25 0 50 0 75 1 00 ALARM VIEW TYPE ALL OFF BLOCK OUTLINE OSD VIEW ON OFF ALARM OUT ON OFF TIME 0 15 DEFAULT RESET TO DEFAULT SETTINGS PRIVACY OFF ON SELECT AREA 1 AREA...

Page 6: ...0 100 AGC 0 14 SENS UP X2 X4 X6 X8 X10 X15 X20 X25 X30 BLACK DPC OFF ON POS SIZE ADJUST POSITION AND SIZE OF BOX START PRESS ENTER DPC VIEW OFF ON LEVEL 0 100 RS485 CAMID 0 255 ID DISPLAY OFF ON BAUD RATE 2400 4800 9600 19200 38400 ADJUST PAGE 18 SHARPNESS AUTO LEVEL 0 10 START AGC 0 255 END AGC 0 255 OFF MONITOR LCD BLACK LEVEL 0 60 GAMMA USER 0 45 0 50 0 55 0 55 0 60 0 65 0 70 0 75 0 80 0 85 0 9...

Page 7: ...aximum shutter speed to FLK 1 60 1 50000 Default 1 5000 o IRIS SPEED Set the reaction speed of the iris from 0 15 Default 0 o RETURN Return to the Main Menu screen Lens This function is used to select the camera s exposure settings including shutter speed AGC Sens Up brightness WDR and defog settings 1 Select EXPOSURE on the Main Menu screen 2 Press enter to enter the Exposure menu screen 3 Select...

Page 8: ...the EXPOSURE menu screen NOTE This option is only available if SHUTTER is set to AUTO or 1 30 and if AGC is not set to 0 BRIGHTNESS Adjust the camera s brightness from 0 100 Default 40 D WDR Adjust the camera s digital wide dynamic range D WDR settings to provide clear images even under intense back light conditions o OFF Turn D WDR off o ON Turn D WDR on Enter menu to adjust settings LEVEL Higher...

Page 9: ...n is used to control the light level to overcome strong backlight conditions 1 Select BACKLIGHT on the Main Menu screen 2 Select the desired Backlight operation by moving the joystick to the left or right and pressing enter to enter the sub menu if applicable 3 Use the joystick to adjust the settings 4 Select RETURN to return to the Main Menu screen OFF Turn the BLC or HSBLC functions off BLC Sele...

Page 10: ...t whether the HSBLC areas will display a black mask or not Default ON o LEVEL Adjust the sensitivity of the HSBLC area Adjust from 0 100 Default 70 o MODE Select whether the HSBLC will be appear ALL DAY or only during the NIGHT Default ALL DAY ALL DAY The HSBLC areas are active at all times NIGHT The HSBLC areas are only active when a given AGC level is reached AGC LEVEL Higher values will block o...

Page 11: ...balance Control AWC SET to manually adjust the white balance for the current area Point the camera towards a blank white sheet of paper and press enter to set the white balance INDOOR Select INDOOR for general indoor applications Use this mode for color temperature ranges from 2 800 K 5 600 K OUTDOOR Select OUTDOOR for general outdoor applications Use this mode for color temperature ranges from 3 ...

Page 12: ...tween day and night modes Adjust from 0 60 Default 1 o N D DELAY Set the delay time for switching between night and day modes Adjust from 0 60 Default 1 o RETURN Return to the MAIN MENU screen AUTO Select AUTO mode to automatically switch between Color and B W modes by using AGC values set by the camera o D N AGC Set the AGC threshold for the camera When the threshold is reached the camera will sw...

Page 13: ...IGHT is set to B W then WHITE BAL is not available DNR OFF DNR ON This function is used to reduce the noise on the screen and allows for clearer images in low light conditions 1 Select NR on the Main Menu screen 2 Press enter to enter the Noise Reduction menu screen 3 Select the desired Noise Reduction operation by moving the joystick up or down and select the desired setting by moving the joystic...

Page 14: ... applicable 3 Use the joystick to adjust the settings 4 Select RETURN to return to the Main Menu screen CAM TITLE Set the camera title to on or off The default camera title is the firmware version o OFF Camera title off o ON Camera title on Use the joystick to select the camera title Up to 15 alphanumeric characters can be used D EFFECT Select to choose a digital effect to apply to the camera o FR...

Page 15: ...ransparency Adjust from 0 00 1 00 Default 1 00 ALARM Adjust settings for the motion detection notifications VIEW TYPE Select between different view modes for motion detection o OFF Does not give any indication when motion is detected o BLOCK Shows small blocks over the motion in the detection zone that is triggered o OUTLINE Shows an outline around the motion in the detection zone that is triggere...

Page 16: ...d blocks INV Shows the privacy screen as a negative image COLOR Shows the privacy screen as a solid color COLOR Select the color of the selected privacy screen Select from White Black Red Blue Yellow Green Cyan or User Dark Green TRANS Set the selected privacy screen s transparency Adjust from 0 00 1 00 Default 1 00 DEFAULT Return the PRIVACY settings to their default values RETURN Return to the M...

Page 17: ...ite DPC on POS SIZE Adjust the position and size of the White DPC area START Close the iris then press enter to start DPC VIEW Turn on to view any existing defective pixels LEVEL Adjust from 0 100 Default 3 AGC Adjust from 0 14 Default 13 SENS UP Adjust from x2 x30 Default x8 RETURN Return to the DEFECT menu o BLACK DPC The camera will compensate for false black pixels OFF Turn Black DPC off ON Tu...

Page 18: ...l end Adjust from 0 255 Default 255 RETURN Return to the ADJUST menu screen MONITOR Adjust the camera s image according to the type of monitor being used o LCD Select for LCD monitors BLACK LEVEL Adjust the black level of the image Adjust from 0 60 Default 58 GAMMA Adjust the gamma level of the image Adjust from USER 0 45 1 00 Default USER BLUE GAIN Adjust the blue gain of the image Adjust from 0 ...

Page 19: ...tory defaults or exit the menu screen without saving any changes 1 Select EXIT on the Main Menu screen 2 Select the desired operation by moving the joystick to the left or right and pressing enter SAVE END Save all OSD changes and exit the OSD menu RESET Restore all OSD settings to factory defaults and exit the OSD menu NOT SAVE Exit the OSD menu without saving any changes ...

Page 20: ...in part without the written permission of SECO LARM WARRANTY This SECO LARM product is warranted against defects in material and workmanship while used in normal service for three 3 years from the date of sale to the original customer SECO LARM s obligation is limited to the repair or replacement of any defective part if the unit is returned transportation prepaid to SECO LARM This Warranty is voi...

Reviews: