background image


User Manual 

Energy Genius Basic RTD 


Thank you for purchasing this Energy Genius wireless electricity monitor. This guide will help you set up the wireless 

monitoring system quickly and easily. 


What are included in the standard package? 


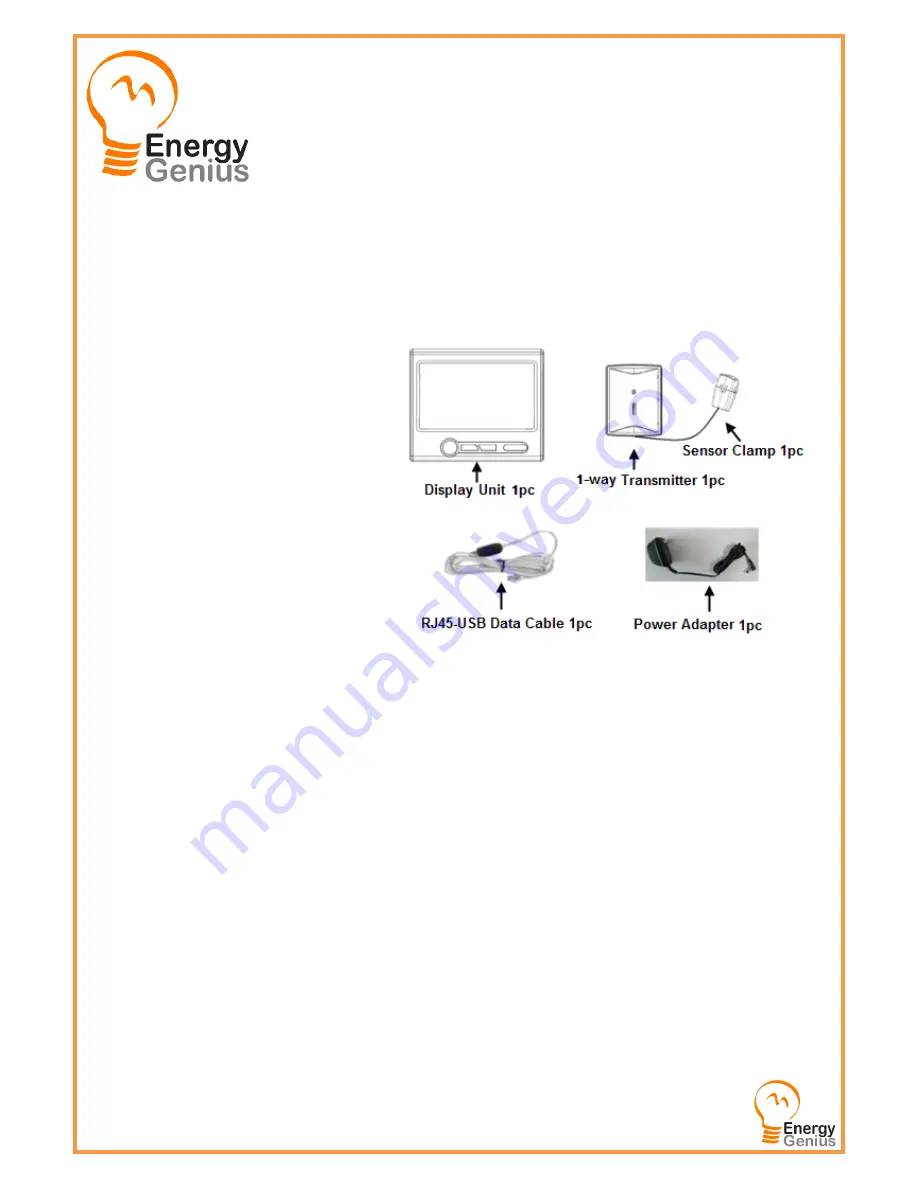
Your package should contain: 


1pc of Display Unit 

1pc of Power Adapter for the Display Unit 

1pc of 1-way Power Transmitter 

1pc of Sensor Clamp fixed on the transmitter 

1pc of RJ45-USB Data Cable (3m) - Optional 

as displayed in the right photo 


and 1pc of the User Manual 


The monitor can support up to 15pcs of 1-way 

power  transmitters  and  each  transmitter  can 

support up to 3pcs of sensor clamps. 


If you’ve bought extra transmitters and sensor clamps, please put them in appropriate place before installation. 


If any parts are missing, please contact your seller immediately. 


Before installation, please pay attention to following information: 

1)


Please read all instructions before you use the monitoring system 

2)


Please shake the Display Unit and the Power Transmitter first before installation. In case you hear any sound from 

inside of the part, please don’t use it. Please replace it with your seller. 

3)


Do not allow children or people unfamiliar with these instructions to use your monitoring system. 

4)


Keep the monitor, transmitter and sensor clamp away from sources of heat, water or any other liquid. 

5)


Place the monitor, transmitter and sensor clamp where children can not touch or pull. 

6)


Don’t try to disassemble or modify any parts of the monitoring system. In case of problem, please consult your seller 
or contact….. 

7)


Don’t use the monitoring system if you find your electric wire in abnormal conditions, such as loose wire, exposed 

copper wire, burnt mark on wire insulation layer, holes on wire layer or damage on electric meter. In case of such 

abnormalities, please consult a professional electrician immediately. 

8)


Periodically check all wires and components to ensure there is no damage. 

9)


Use a dry cloth to clean. Don’t use solvent, abrasive cleaners or water. 


Summary of Contents for RCS-S22A

Page 1: ...ctions before you use the monitoring system 2 Please shake the Display Unit and the Power Transmitter first before installation In case you hear any sound from inside of the part please don t use it Please replace it with your seller 3 Do not allow children or people unfamiliar with these instructions to use your monitoring system 4 Keep the monitor transmitter and sensor clamp away from sources o...

Page 2: ...r Clamp Diameter 10mm and 25mm optional Transmitter Battery Life 2 years Signal Interval 8 seconds Data Accuracy 1A 100A 7 for 10mm and 18mm clamp Displayed Cost Currencies Euro Customizable Voltage Range 80 265V Maximum Input Current under 220V 60A or 100A Minimum Input Current under 220V 0 2A KW reading in real time Yes Cost Forecast Per Hour Day Month Display of CO2 Emission Yes Memory function...

Page 3: ...ansmitter start to work Keep the Transmitter as close to the Display Unit as possible Pull out the clear plastic tab marked with REMOVE BEFORE USING from the back of the transmitter The tab is an insulation sheet once it is pulled out the built in batteries will make the transmitter start to work immediately Step 3 Pairing of the Display Unit with the Transmitter Press the UP DOWN key of the Displ...

Page 4: ...moved Now use a slim stick to push into the pairing hole of the transmitter as shown in below photo and hold it there until the LED light of the transmitter flashes quickly The transmitter is now starting to pair with the Display Unit The pairing may take up to 60 seconds When the pairing is successfully finished the antenna icon stops flashing and stays on the top right corner of the LCD screen T...

Page 5: ...ed together with it You may choose to put the Transmitter in a dry place near the monitored object or stick the Transmitter on the wall near the monitored object Fix the Sensor Clamp around the live wire or the null line also called zero line of the monitored object just as below photo is showing Don t fix the clamp around the ground wire Make sure to let the wire pass through the clamp Note There...

Page 6: ...ower supply 3 phase power supply If the monitored object use a 3 phase power supply You need two more sensor clamps Attach the DC plug of each sensor clamp into the DC sockets on the back of the Transmitter Fix the 3pcs of Sensor Clamps around the lines of Phase A B and C Don t fix the clamps around the ground wire and neutral wire ...

Page 7: ...nd Functions of the Display Unit After the Display Unit and the Transmitter have been successfully paired we need to make some settings of the LCD screen so that we can get desired correct information from the Display Unit Full LCD Symbols First have a look at the full LCD symbols to get an idea of the meaning of each word and value for the Main Display Interface and how the monitor works Default ...

Page 8: ... CO2 emission unit kgs based on current power under consumption as below photos Resetting and Data Clearance If the unit needs to be reset and the data needs to be cleared from the display unit please operate as below 1 Cut off the power Pull the power adapter plug out of the display unit If there are batteries inside remove them first Then press the UP key and DOWN key at the same time and hold t...

Page 9: ...se the voltage set should be the line to line voltage not line to neutral voltage And line to line voltage 1 732 line to neutral voltage Coding Channels View If more than one Transmitter is paired with the energy Display Unit the Default Display displays the total data of all paired transmitters To view the information of a single transmitter press the UP DOWN key upon the Default Display to tune ...

Page 10: ...ta Please set the flashing value in turn of correct Year Month and Date and press OK key to confirm each one The confirmation of the data will return the LCD to the Default Display During the setting if idle time of no operation is over 60 seconds the setting will exit automatically without saving Please note that the clock runs in 24 hour mode Accumulated Electricity Consumption and History Data ...

Page 11: ... same time UP key and DOWN key and hold them there for about 3 seconds until the LCD screen displays the Buzzer status bOFF means the Buzzer is off bON means the Buzzer is on Press the UP DOWN key to switch the Buzzer status Press OK key to exit setting If key operation is idle for 60 seconds the setting will exit automatically without saving Temperature The temperature that can be displayed on th...

Page 12: ...ing number and press OK key to confirm until the complete tariff value is set After the pressing of OK key to confirm the first complete tariff value the CLOCK value will begin to flash Now press the UP DOWN key to set each flashing value and press the OK key to confirm until you get the complete correct time for the Start Time of 01 period The Start Time of 01 period is usually 00 00 After confir...

Page 13: ...ranty excludes and does not cover defects malfunctions or failures caused by misuse unauthorized repairs modifications or accidental damage All defective parts will be repaired free of charge or replaced Note This warranty does not apply to batteries This warranty is only applicable to a product purchased through a PowerSave Inc authorized Reseller In no event shall PowerSave Inc be liable for con...

Reviews: