Trilennium
∏
SmartKey
™
Retrofit
• Phillips Screwdriver
Tools Required:
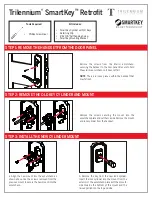
STEP 1: REMOVE THE HANDSET FROM THE DOOR PANEL
Remove the screws from the interior escutcheon,
securing the handset to the door panel. Be sure to hold
the exterior escutcheon so it does not fall.
NOTE
: There are loose pieces within the handset that
may fall out.
STEP 2: REMOVE THE OLD KEY CYLINDER AND MOUNT
Remove the screws securing the mount into the
escutcheon plate and set them aside. Remove the mount
and lock cylinder from the handset.
• SmartKey Cylinder with (2) Keys
• Retaining Clip
• #8 x 3/8" Self-Tapping Screw
• SmartKey Mounting Bracket
Kit Includes:
STEP 3: INSTALL THE NEW CYLINDER MOUNT
a. Align the new mount into the escutcheon as
shown above. Use the screws removed from the
previous mount to secure the new mount into the
escutcheon.
b. Remove the key from the new lock cylinder.
Insert the lock cylinder into the mount from the
exterior of the escutcheon plate with the smooth
side towards the bottom of the mount and the
raised portions on the top and side.


