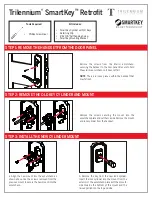
STEP 3 (CONT.): INSTALL THE NEW CYLINDER MOUNT
STEP 4: REINSTALL THE HANDSET ONTO THE DOOR PANEL
Exterior First:
• Place the escutcheon gasket over the inside face of the
escutcheon.
• Guide the cylinder tailpiece and spindle into the respective hubs
in the hardware.
• Hold in place
Interior Next:
• Align the receiving slot in the thumbturn with the cylinder
tailpiece.
• Guide the spindle into the hub in the hardware.
• Secure with the two #10-32 mounting screws from interior to
exterior.
Do not overtighten.
Cylinder
Tailpiece
Escutcheon
Gasket
Spindle
Spindle
#10-32
Mounting
Screws
• All three lock bolts should engage strikes as door is closed.
• Turn thumbturn 90° to extend bolts (all three) an additional 1/2" to deadbolted position.
• Rotate interior lever downward to disengage bolts and open door. Bolts can also be moved to latched position by turning thumbturn.
• Engage deadbolt again. From the exterior, confirm that the lever cannot rotate and disengage the latches (door is deadbolted). With
key, confirm that the door can be unlocked and then opened by rotating the lever downward.
c. Insert the retaining clip into the groove on the
cylinder as shown above.
d. Secure the lock cylinder and retaining clip with
the #8 x 3/8" self-tapping screw.
Groove
STEP 5: CHECK FUNCTION OF THE HANDSET AND LOCK
8817 W. Market St., Colfax, NC 27235
1.800.334.2006
www.enduraproducts.com


