17
h
WEP Key (Hex or ASCII):
Type a character string into the field. For 64-bit
enter 5 alphanumeric or 10 hexadecimal characters. For 128-bit enter 13
alphanumeric or 26 hexadecimal characters.
h
Click on the
Apply
button to save the changes.
h
Show Password
check box. If you want to make sure the accuracy of
password you type, click the
Show Password
box to check it.
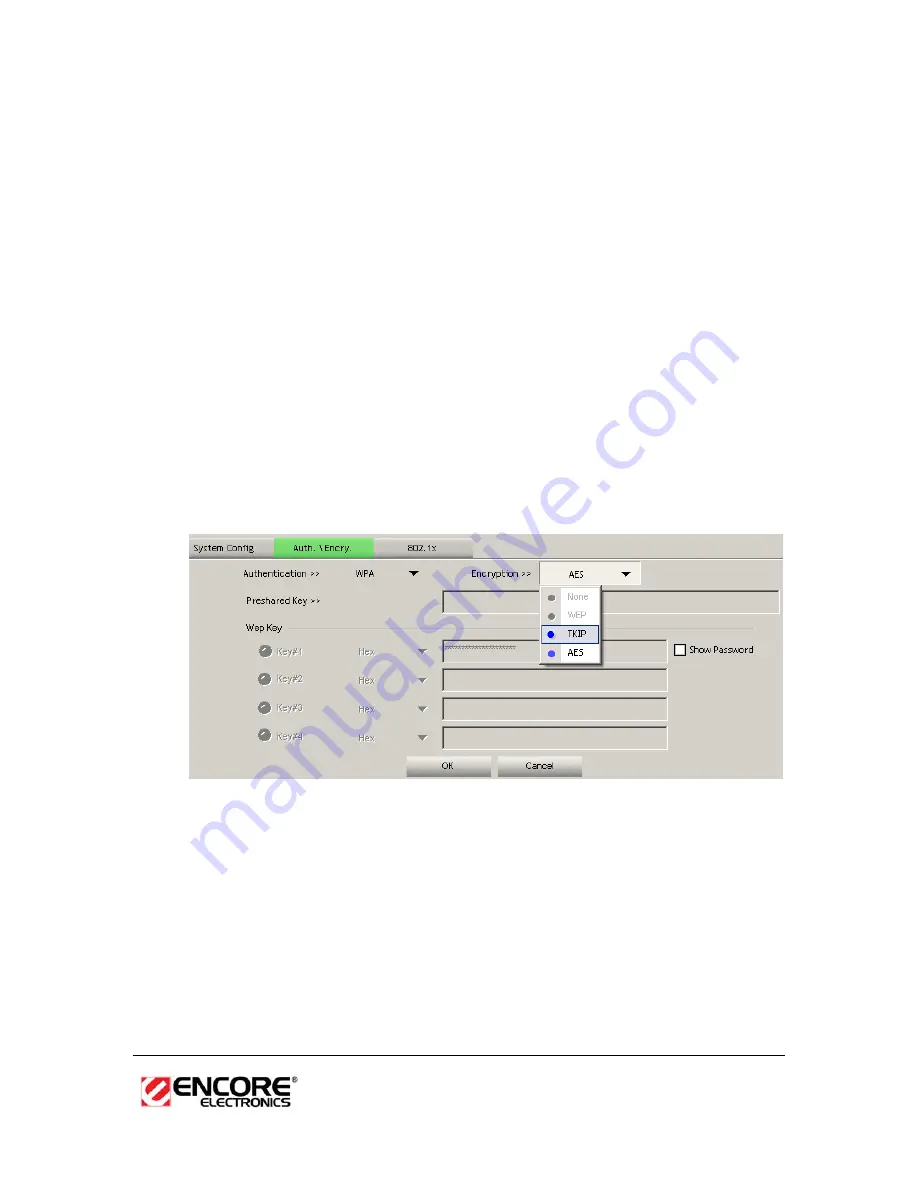
WPA, WPA2 Authentication & TKIP, AES Encryption
WPA (Wi-Fi Protected Access) was designed to improve upon the security
features of WEP (Wired Equivalent Privacy). This is used along with 802.1x
security setting. The technology is designed to work with existing Wi-Fi products
that have been enabled with WEP. WPA provides improved data encryption
through the Temporal Integrity Protocol (TKIP), which scrambles the keys using a
hashing algorithm and by adding an integrity-checking feature which makes sure
that keys haven’t been tampered with. EAP (Extensible Authentication Protocol)
is an extension to the PPP protocol that enables a variety of authentication
protocols to be used. It passes through the exchange of authentication messages,
allowing the authentication software stored in a server to interact with its
counterpart in the client.
h
Authentication Type
: Select
WPA
or
WPA2
from the drop-down list.
h
Encryption:
Select
TKIP
or
AES
from the drop-down list.
h
Click on the
Apply
button to save the changes.
h
Show Password
check box. If you want to make sure the accuracy of
password you type, click the
Show Password
box to check it.
WPA-PSK
Authentication
& TKIP, AES Encryption
WPA – PSK (Pre-shared Key) is used in a Pre Shared Key mode that does not
require an authentication server. Access to the Internet and the rest of the
wireless network services is allowed only if the pre-shared key of the computer
matches that of the Access Point. This approach offers the simplicity of the WEP
Summary of Contents for ENUWI--XAN3
Page 1: ...ENUWI XAN3 Wireless N150 Adapter User s Manual ...
Page 9: ...9 2 Click on Windows Driver icon to start the installation process ...
Page 11: ...11 5 The installation is complete Click on the Finish button ...
Page 28: ...28 3 Select the Remove all button ...
Page 30: ...30 NOTE The image above may have different title from your screen ignore it ...


