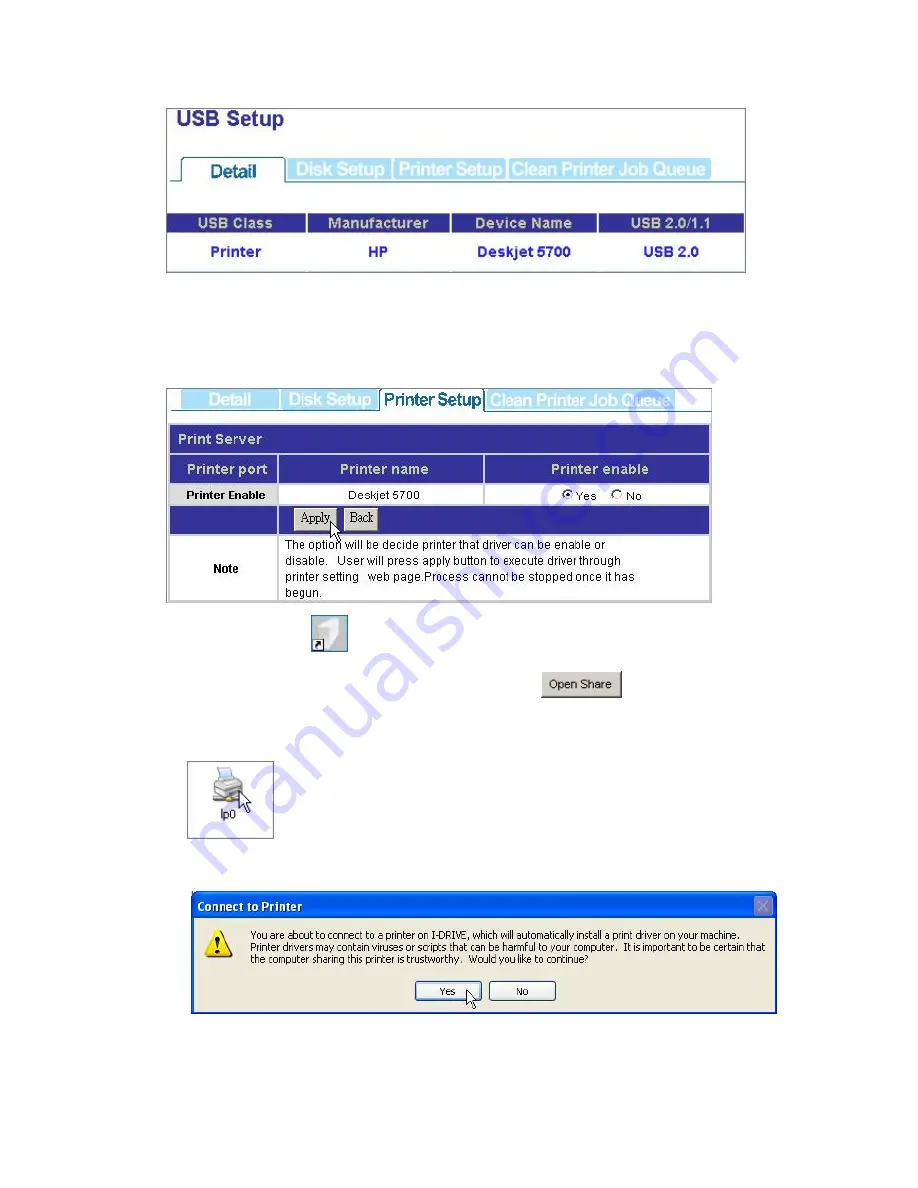
4.
Click Printer Setup, Click “Yes” in the “Printer enable” column and click “Apply”
Note: After finishing the four steps above, the printer server function is activated.
To setup the computers that are going to use the printer, please follow the
instructions from step 5.
5.
Double click the
shortcut on your desktop to start the PNMD. The PNMD
window pops up. Select your NAS and click the
button.
6.
You can find a printer icon. Double click on this icon to proceed.
7.
The system asks for installing the driver for the printer. Click “Yes” on the
warning dialogue windows to proceed.
8.
Insert your CD that came with your printer. Click the “Have Disk Button”
54


