9
Procedure for Removing the Front of the Switching Unit
(see Fig. 5)
2, 3 – use a screwdriver to press down and hold the inner lock, remove the front cover
Mobile Application
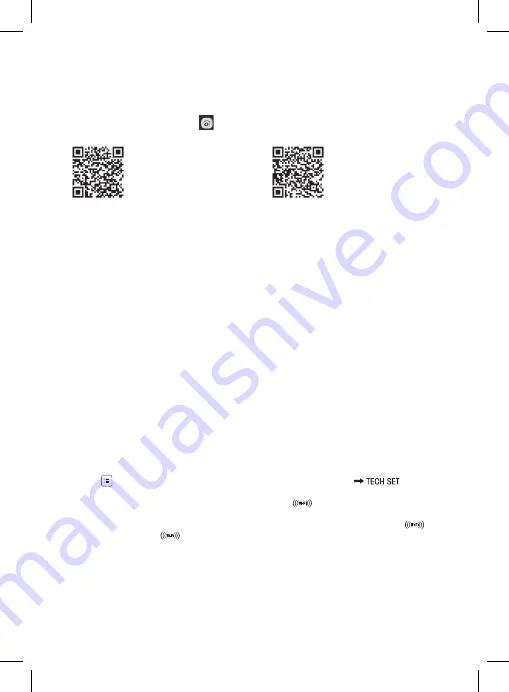
The thermostat can be controlled using a mobile application for iOS or Android.
Download application SmartTherm
for your device.
QR code for downloading the Android app
QR code for downloading the iOS app
Description of Registration and Login to the Application
(see Fig. 6)
To use the mobile application, you must first register by clicking the
Register
button.
Fill in your login, e-mail and password and confirm with
Register
.
After successfully registering, you log in to the application by filling in your e-mail and password and
clicking
Login
.
If you check the
Remember Password
field, the application will remember your login information.
In case you forget your password, click
Forgot Password
.
Enter your e-mail and click
Get
.
You will receive a verification code to your e-mail which you then fill in the
Verification code
field.
Then, enter a new password (
New password, Confirm password
) and confirm with
OK
.
Attention: The thermostat can only be controlled by 1 user at a time via the application. If another user wants
to control the thermostat, the previous user must log out.
Connecting the Thermostat to a WiFi Network for Control via the Mobile
Application
(see Fig. 7)
First, register to the application then log in by clicking
Login
.
Then, click on
Heating controls, + Add new devices
.
Select the type of your thermostat and enter (scan) its ID code.
The ID label is located on the back of the thermostat‘s stand. (Write down the ID code for the event of
the ID label fading or getting damaged!)
Select your WiFi network, enter the password and click
Next
(ticking
Remember Password
saves the
login information).
The application will begin connecting the WiFi network to the thermostat.
Press the button on the thermostat, followed by
-
, the arrow will indicate
; confirm by
pressing
>
.
The screen will display
COFI
, confirm by long-pressing
>
, the
icon will begin flashing.
The thermostat will start searching for the WiFi network.
The device will pair with the network within 2 minutes, and the thermostat screen will show the
icon .
If pairing is unsuccessful (
icon will keep flashing), repeat the process.
Viewing Details/Deleting a Connected Thermostat
(see Fig. 8)
Click the 3 orange dots to display
Settings
, where you can view the details (IP address, MAC etc) of
the connected thermostat.
Clicking
Delete
removes the connected thermostat from the app menu.
Summary of Contents for P5623
Page 2: ...2 1 2 3 2 1 1 2 3 4 5 15 14 13 12 6 7 8 9 10 11 1 ...
Page 3: ...3 4 5 1 2 3 2 1 3 4 5 ...
Page 4: ...4 6 ...
Page 5: ...5 7 ...
Page 6: ...6 1 2 3 4 5 6 7 8 9 10 11 12 8 10 9 ...
Page 7: ...7 11 12 6 7 1 2 3 4 5 A B D C E F ...
Page 118: ...118 ...
Page 119: ...119 ...


