background image

TB-6594

 Page 11 of 12

© 2018 DESCO INDUSTRIES, INC.

Employee Owned

EMIT 

- 3651 Walnut Avenue, Chino, CA 91710 • (909) 664-9980 • Website: 

DescoEMIT.com

Operation

NOTE: The SmartLog Pro® must first be programmed 

with the user ID table using the TEAM5 Software before 

being deployed for employee use, or the default test 

settings will be applied.
See the 

TEAM5 User Manual

 for more information.

If the SmartLog Pro® is located near a restroom, sink or 

other water source, operators will need to be instructed 

to thoroughly dry their hands before testing. Wet hands 

may cause inaccurate test results and damage to the 

tester.
1.  A circling light around the test switch indicates when 

the SmartLog Pro® is on standby and ready to 

perform a test. 

2.  Initiate the test procedure by identifying yourself to 

the SmartLog Pro®. This may be done using the 

touchscreen keypad, barcode scanner or proximity 

reader. 


NOTE: Hold the proximity badge in front of the RFID 

icon for a full second if using proximity badges. See 

Figure 20. 

3.  Follow the prompt on the SmartLog’s display. 
4.  When performing a footwear test, be sure to place 

both feet on the dual foot plate (one foot per plate). 


NOTE: Keep the foot plate clean with 99% isopropyl 

alcohol when using the 1 Gigohm high test limit. A 

dirty foot plate could yield a false pass. 


When performing a wrist strap* test, be sure to 

completely plug in the wrist cord into the tester’s  

jack. 

5.  To begin the test, use your finger to bridge the test 

switch’s inner and outer contacts. The blue standby 

LED will become solid to indicate that the test has 

been initiated. Hold your finger down until the test 

results are displayed on the touchscreen. 


If your finger is removed too early, the tester’s blue 

LEDs will blink three times to indicate that the test 

was not completed. DO NOT touch any other metal 

while performing your test as this will affect your 

results. 

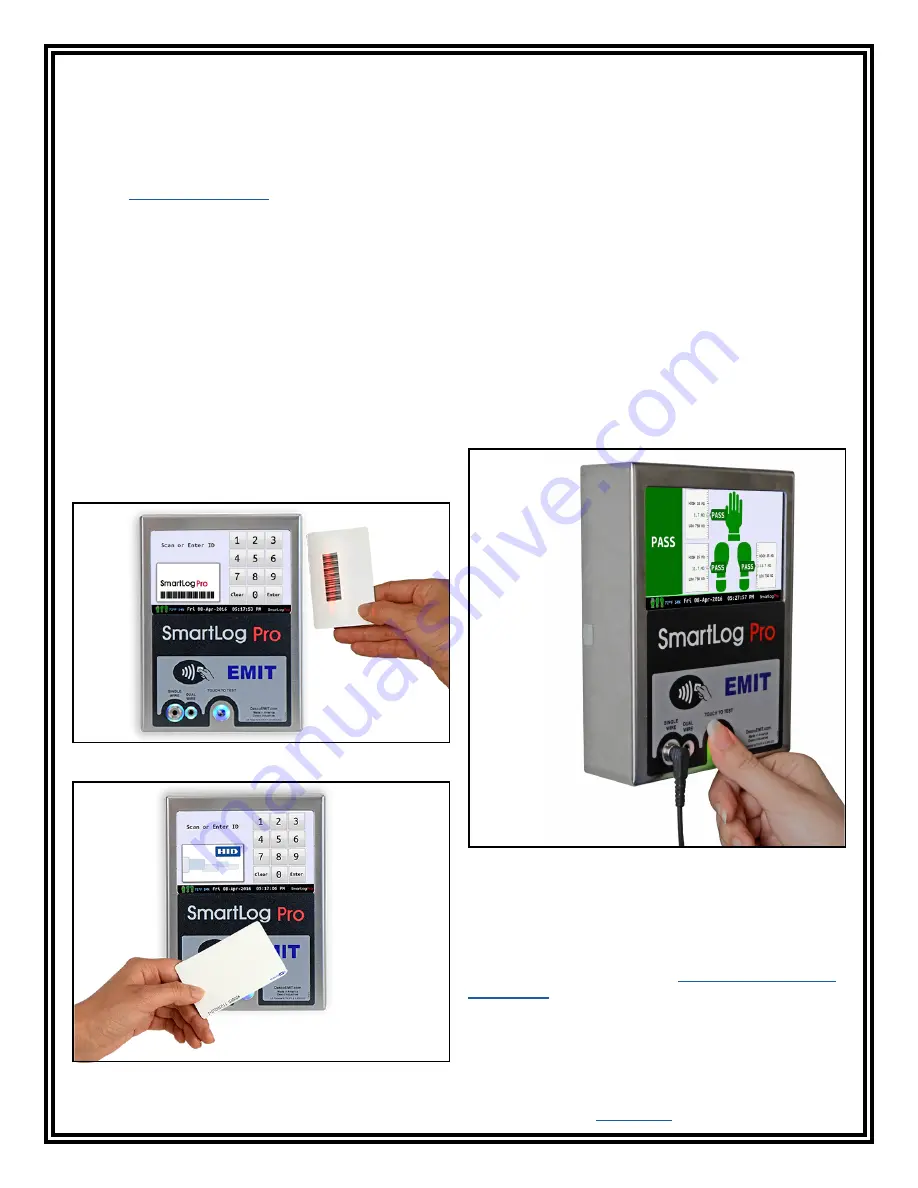
Figure 19.  Using the barcode scanner

Figure 20.  Holding a proximity badge in front of the 

RFID icon on the SmartLog Pro®

Figure 21.  Performing a test with the SmartLog Pro®

6.  The relay terminal will activate if the defined tests 

are passed (if applicable).

NOTE: Failures may be caused by dry skin or minimal 

sweat layer. For wrist straps, try using an approved 

dissipative hand lotion such as 

Menda Reztore™ ESD 

Hand Lotion

 prior to use. Footwear test results can be 

improved by taking a short walk to build a sweat layer 

for better conductivity.
*The SmartLog Pro® may also be used to test smocks 

or garments that feature a grounding mechanism for 

operators using a coiled cord connection.

Summary of Contents for 50780 SmartLog Pro

Page 1: ...mated reports that may be e mailed to track short term and long term corrective actions Test limits and test parameters wrist strap only footwear only wrist strap and footwear etc may be customized wi...

Page 2: ...DescoEMIT com Contents 3 System Overview 4 Items and Accessories 4 Packaging 5 Features and Components 6 Installation 6 Hardware Setup 7 10mm Wrist Cord Adapter 8 Relay Terminal 8 Network Setup 9 Tes...

Page 3: ...site DescoEMIT com System Overview SmartLog Pro SmartLog Pro PC with TEAM5 Software Supervisor Department Manager Department Manager Department Manager Figure 2 Illustration of the SmartLog Pro System...

Page 4: ...787 Replacement Foot Plate Cable 50788 Handheld QR Code Scanner USB Use the SmartLog Pro along with the TEAM5 Software to automate the collection of employee ESD testing This software is offered in tw...

Page 5: ...12 2018 DESCO INDUSTRIES INC Employee Owned EMIT 3651 Walnut Avenue Chino CA 91710 909 664 9980 Website DescoEMIT com Features and Components Figure 3 SmartLog Pro features and components A B C D E F...

Page 6: ...egrates with electronic door locks lights buzzers etc See Relay Terminal on page 8 for more information N Ground Terminal Secure the tinned wire termination of the included ground cord to this termina...

Page 7: ...face of the SmartLog Pro Be sure to clear the clip at the base of the plunger s shaft when inserting into the jack 6 Connect the SmartLog Pro to the bracket Use the included thumbscrew to secure the...

Page 8: ...tLog Pro to a local area network LAN using its Ethernet communication module DYNAMIC IP PROCEDURE 1 Verify that the Ethernet cable is securely connected to your network and SmartLog Pro The LEDs on th...

Page 9: ...te of this address as it will be required to establish communication between the SmartLog Pro and the TEAM5 Server Software Figure 13 Locating the IP address in the Admin Menu Figure 14 Locating the N...

Page 10: ...When used with the EMIT SmartLog TEAM5 allows manufacturers and assemblers to automate the collection of employee ESD testing It has a set of robust employee management functions that allows automated...

Page 11: ...lean with 99 isopropyl alcohol when using the 1 Gigohm high test limit A dirty foot plate could yield a false pass When performing a wrist strap test be sure to completely plug in the wrist cord into...

Page 12: ...umidity sensor embedded within the SmartLog Pro Figure 22 EMIT 50424 Limit Comparator Figure 23 EMIT 50784 5 Pound Electrode for Limit Comparator Specifications SmartLog Pro Input Voltage and Frequenc...

Reviews: