background image

Installation and start-up procedures   63


25A Switch Mode Rectifier

NT5C06B / C   Installation and User Manual


Note:


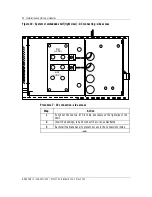
If the desired HVSD level is greater than the –57 V float 

limit, hold the FLT/EQL switch to EQL and use the 

EQL potentiometer to bring the float voltage to the 

desired HVSD level. Hold the switch through the 

following steps. 

Float voltage adjustment 

Note:


For installation where rectifiers can be connected to the 

charge bus (all rectifiers with DC breakers ON and 

remote sense leads connected) prior to final adjustment, 

Procedure 13 can be omitted and be performed in the 

“Parallel verification” procedure section. 

Procedure 13 - Float voltage adjustment 

Step Action 

Adjust the float potentiometer FLT to 0.5 volt DC (see 

Note 

below) above 

the desired float voltage determined by the battery vendor or power 
engineer, using the voltmeter attached to the test point (V+ V-). 

Final system’s float voltage adjustment will be performed as indicated in 
“Parallel verification” Procedure15, step 4. 

end–


Note:


The 0.5 volt DC extra does not apply to MPR25 rectifiers 

of a release above Rel: 30. 

Equalize voltage adjustment 

Procedure 14 - Equalize voltage adjustment 

Step Action 

Hold the equalize switch in the EQL position. 

While the switch is up, set the equalize potentiometer to 0.5 volts DC 

(see 

Note

 below) above the desired level determined by the battery 

vendor or power engineer, using the voltmeter attached to the test point 

(V+ V-). 

–end–


Note:


The 0.5 volt DC extra does not apply to MPR25 rectifiers 

of release above Rel: 30. 

Summary of Contents for MPR15 Series

Page 1: ...ystems Astec Advanced Power Systems A part of Emerson Network Power MPR25 MPR15 Series Single Phase 48V 25A Switch Mode Rectifier NT5C06B C Installation and User Manual P0711722 Standard 10 00 May 2001 UM5C06B C 169 2071 500 ...

Page 2: ......

Page 3: ... information contained herein confidential and shall protect same in whole or in part from disclosure and dissemination to all third parties and use the same for start up operation troubleshooting and maintenance purposes only Any modification to the equipment must be approved by the person responsible for product safety and design quality at Astec Advanced Power Systems Ltd to ensure that the equ...

Page 4: ......

Page 5: ...d to reflect Astec identity ECN 102 14607 January 1998 Standard release 7 0 This issue includes clarification for Rectifier Replacement Add On Procedure supplement P0850648 New factory setting and information on RFA alarm at no load condition November 1994 Standard release 6 0 This issue is to add enhanced extended temperature feature to MPR15 rectifier and to revise the signal availability on the...

Page 6: ...6 Publicaton history UM5C06B C 169 2071 500 P0711722 Standard 10 00 May 2001 February 15 1991 Standard release 2 0 October 1 1990 Standard release 1 0 ...

Page 7: ...ut voltage 18 Output regulation 18 Output noise and ripple 18 Acoustical noise 19 Efficiency and power factor 19 Reliability 19 Heat dissipation 19 Electromagnetic Interference EMI 19 Environmental 19 Operating 19 Transportation 20 Storage 20 Operation 21 Rectifier operation 21 Display and rear interface 22 Display 22 Local float equalize control 22 Indicator lamps 22 Rectifier failure alarm RFA 2...

Page 8: ...ure 41 Cabling the power shelf 43 Shelf configuration 44 19 inch system shelf NT5C10CA 1 2 44 19 inch embedded shelf NT5C10BF 1 and NT5C10BP 44 19 inch embedded shelf NT5C10BA 1 2 44 19 inch embedded shelf NT5C10BA 3 4 44 19 inch embedded shelf NT5C10BA 5 6 NT5C10BB 3 4 45 19 inch embedded shelf NT5C10BB 1 2 45 23 inch system shelf NT5C10CB 1 2 NT5C10CB 5 6 NT5C10CC 1 2 NT5C10CD 1 2 NT5C10CG 45 23...

Page 9: ...ge disconnect reconnect LVDR adjustment 67 Rectifier replacement add on procedure 68 Low voltage disconnect 69 Electrical 69 Environmental 69 Storage 69 DC cabling 70 Control and monitoring signals 70 Operation 71 Test feature 71 Signal connections 71 Maintenance 73 Maintenance 73 Rectifier 73 Filter 74 Fan cooling 74 Storage 74 Power shelf 74 Low voltage disconnect 75 Troubleshooting 75 Rectifier...

Page 10: ...nch power shelf front view 37 Figure 6 Power shelf NT5C10BJ or NT5C10BK exterior view 37 Figure 7 Power shelf NT5C10BJ or NT5C10BK interior view 37 Figure 8 Power shelf NT5C10BM e w EQL switch assembly 38 Figure 9 Power shelf NT5C10CO equipped with start delay LED 38 Figure 10 19 inch power shelf 42 Figure 11 23 inch power shelf 42 Figure 12 19 inch power shelf NT5C10BF and NT5C10BP only 43 Figure...

Page 11: ...ded application NT5C10BC 1 NT5C10BC 2 NT5C10BC 3 NT5C10BM 91 Figure 39 Embedded application NT5C10BJ NT5C10BK e w RPM1000C and LVD Kit 92 Figure 40 Embedded application NT5C10BJ NT5C10BK e w RPM1000C and LVD Kit 93 Figure 41 Embedded application NT5C10BJ NT5C10BK e w LVD and I F Circuit Pack Kit 94 Figure 42 Embedded application NT5C10BJ NT5C10BK e w LVD and I F Circuit Pack Kit 95 Figure 43 Embed...

Page 12: ...access 53 Procedure 9 Rectifier installation 57 Procedure 10 LVD installation in the shelf 59 Procedure 11 Rectifier power up 61 Procedure 12 HVSD adjustment 62 Procedure 13 Float voltage adjustment 63 Procedure 14 Equalize voltage adjustment 63 Procedure 15 Parallel verification 65 Procedure 16 Low voltage disconnect adjustment 66 Procedure 17 LVD 50 A adjustment for unit release 02 02A 3 and 3A ...

Page 13: ...22 0 0M1982 CSA C22 2 107 1957 and UL1950 High voltages are present inside the unit Consequently insulated tools eye protection and adequate lighting are required when working on the unit The latest drawings must be used This equipment contains a number of discrete and micro electronic solid state devices subject to permanent damage caused by electrostatic potentials when handling and installing u...

Page 14: ...14 About this manual UM5C06B C 169 2071 500 P0711722 Standard 10 00 May 2001 This page is left blank intentionally ...

Page 15: ...while standard models operate from 0 to 65 C ambient The MPR15EX model operates in an ambient temperature range of 40 C to 50 C and the standard MPR15E operates in a range of 0 C to 50 C The MPR25E and MPR25EX are suitable for various embedded and system applications These models offer features that facilitate installation operation and maintenance The MPR15EX is intended for low power application...

Page 16: ...re summary UNIT FEATURE MPR15E MPR25E ENHANCED MPR15EX MPR25EX ENH EXTENDED TEMPERATURE DC Breakers X X Remote ON OFF X X Remote HVSD Reset X X Float EQL Control X X Remote Equalize X X Fan Alarm Indicator X X RFA Indicator X X Local Remote Sensing X X Current limit X X Current walk in X X Thermal Shutdown X X Ext temp range X Current Meter X X AC breaker X X Brown grey option X X Filter A0370200 ...

Page 17: ...ves are listed in Table 3 Table 3 MPR15 MPR25 input current requirements Input voltage frequency range 120 V AC 47 63 Hz 96 132 V AC 208 V AC 47 63 Hz 176 264 V AC 240 V AC 47 63 Hz 176 264 V AC 1 MPR15 10 5 A 16 5 A n a n a 2 MPR25 n a 11 7 A 15 5 A 10 2 A 15 5 A NT5C10 Shelf a 2 rectifiers 21 0 A 33 0 A 23 4 A 31 1 A 20 4 A 31 1 A 3 b 3 rectifiers 31 5 A 49 5 A 35 1 A 46 6 A 30 6 A 46 6 A Condit...

Page 18: ...t power for output from 57 V DC to 59 5 V DC Note The AC inrush current during the turn on sequence of the rectifier under all input and output conditions specified in this document will not exceed its full load steady state value Output noise and ripple less than 22 dBrnC at voice frequency with batteries measured at the point of regulation and over the entire range of the rectifier inducing oper...

Page 19: ...ty The rectifier has a mean time between failures MTBF greater than 120 000 hours Bellcore spec TR NWT 000057 under normal operating conditions at 30 C Heat dissipation The maximum heat dissipation is 150 W at 56 V and 25 A load 1 x MPR25 Electromagnetic Interference EMI The rectifier meets FCC part 15 sub part B for Class A digital devices Environmental Operating A two inch airflow clearance is r...

Page 20: ...aximum sinusoidal 762 mm 30 in maximum drop packaged Pressure 87 5 mm Hg at 15 200 m 50 000 ft Temperature shock 50 C to 27 C 58 F to 80 F in 5 min Storage The following environmental limits must be observed during storage Temperature 50 C to 75 C 58 F to 167 F Humidity Up to 95 Relative Humidity at 25 mm 1 in of water vapor pressure The rectifier contains aluminum electrolytic capacitors For this...

Page 21: ...nd filtered The output section provides EMI filtering a shunt for output DC current sense and output protection in the form of a DC breaker A current mode pulse width regulator varies the pulse width of the signal driving the power MOSFETs This allows regulation to the output DC voltage The monitoring circuitry includes soft start rectifier fail alarm RFA rectifier RFA ON LED local and remote equa...

Page 22: ...QL position the rectifier changes to equalize mode and boosts the output voltage to the value set by the EQL potentiometer Otherwise the rectifier delivers a float voltage set by the FLT potentiometer Indicator lamps Designation Color Description RFA ON Red Rect Failed or no load current Green Rectifier operational Fan Red Fan Failed LOAD AC F1 3 4A 250V OUTPUT V V DC EQL FLT FAN HVSD ON RFA FILTE...

Page 23: ... of the rectifier An RFA will also be issued upon inhibition of the rectifier Internal high voltage shut down HVSD The rectifier includes a high voltage monitor Whenever the rectifier output voltage exceeds a value adjustable from 52 to 59 5 V it shuts down immediately locks out and transmits an RFA This function is not dependent on the output load condition Local ON OFF control DC and optional AC...

Page 24: ... integrated logic circuit Fan filter option A fan filter option is available for dusty environments to prevent the dust particles from entering and deteriorating the cooling efficiency of the rectifier See the Recommended Replacement Parts section to order an air filter kit The maximum operating ambient temperature should be limited to 50 C 122 F for environments requiring the rectifier air filter...

Page 25: ...her sensing leads will not result in a voltage increase at the rectifier output terminals Current limiting The rectifier will automatically limit the output current to 17 5 to 20 A MPR15 and 25 5 to 30 A MPR25 Extended periods of operation in the current limiting mode and repeated transitions between constant voltage operation and constant current operation have no detrimental effect on the perfor...

Page 26: ...s connected in parallel and sensing at the same point will share the load with other rectifiers having similar negative output slope characteristics 300 mV drop from zero to full load The rectifier will share the load proportionally to its output rating to a precision within 10 Monitoring features Input AC voltage monitor The rectifier monitors the input voltage and inhibits its operation when the...

Page 27: ...nected on the positive lead near the output terminals The shunt signal is available on the signal connector see Figure 3 Test points V V Voltage jacks are provided for measuring the voltage at the point of regulation Control features Remote ON OFF control When a ground signal is applied to the Temporary Release TR input the rectifier inhibits its operation and activates the rectifier s RFA Upon re...

Page 28: ...he AC optional and DC breakers are closed Remote equalize control The rectifier is equipped with remote equalize control This function is operated by applying a remote ground signal BAT POS and returns to normal Float operation upon removal of the signal Signal connections The interface connector located at the rear of the rectifier provides control alarm and monitoring signals The control inputs ...

Page 29: ...emote sense leads are open The signals normally connected to Astec controllers are indicated below 1 1 REMOTE EQL 2 SENSING RG 3 SENSING RC 4 TEMPORARY RELEASE 5 REMOTE HVSD RESET 6 REMOTE HVSD 7 RFA NC 8 Not Connected 9 FAN ALARM NC 10 RFA COMMON 11 FAN ALARM COMMON 12 SHUNT 13 SHUNT 14 FAN ALARM NO 15 RFA NO 16 GROUND 17 SENSE COMMON 18 SENSE NC 19 SENSE NO 20 Not Connected 21 Not Connected 22 N...

Page 30: ...ion Signal RG RC Sensing Leads battery or charge discharge bus HVSD Remote High Voltage Bat RTN Shutdown HVSDR Remote High Voltage Bat RTN Shutdown Reset TR Remote Inhibit Bat RTN EQ Remote Equalize Bat RTN RFA Rectifier Failure Alarm Form C contacts F ALM Fan Failure Alarm Form C contacts Shunt and Shunt Rectifier Current 50 mV at 25 A ...

Page 31: ...25 or MPR15 Figure 4 2 x MPR25 or MPR15 LVD 3 x MPR25 or MPR15 b 23 inch mounting 3 x MPR25 or MPR15 Figure 5 2 x MPR25 or MPR15 LVD Figure 7 2 x MPR25 or MPR15 LVD RPM1000C Figure 6 3 x MPR25 or MPR15 EQL SW Assembly Figure 8 c There are two main application versions System In the system version Table 4 the rectifier signals are brought out from the shelf through cables terminated with connectors...

Page 32: ...ATURES MPS75S MPS75E MPS50S MPS50E Mounting 23 23 19 19 Rectifier Positions 3 2 3 2 2 Lvd Position 0 1 0 0 1 Control Signal Access Connectors Open Cable Connectors Open Cable Individual Ac Available Available Available Available Common Ac Available Available Available Available Brown Yes Yes Yes Yes Dolphin Grey Chassis Yes Yes No No Oxford Grey Chassis Yes Yes No Yes Emi Filtering Option Availabl...

Page 33: ...3FA NT5C10BC 1 Brown Individual FLS X 23 NT6C13FA 5 NT5C10BC 3 Brown Common FLS X 23 NT6C13FA 5 NT5C10BD 3 Oxford Grey Common FLS X 23 NT6C13FC 5 NT5C10BE Brown N A N A N A 8 2 Rectifier adapter NT6C13FF NT5C10BM Dolphin Grey Common FLS X 23 EQL Switch N A 2 NT5C10BJ Brown Common FLS X 23 LVD I F PCB NT6C13FA 3 5 LVD RPM 1000C NT6C13FJ 4 5 NT5C10BK Dolphin Grey Common FLS X 23 LVD I F PCB NT6C13FC...

Page 34: ...BA 5 O BK R W BR Y NT5C10BB 1 O BK R W BR Y NT5C10BB 3 O BK R W BR Y NT5C10BF 1 TB1 2 TB1 1 TB1 5 TB1 4 TB1 3 TB1 6 NT5C10BC 1 BL BR NT5C10BC 3 BL BR NT5C10BD 3 P1 2 P1 1 P1 3 NT5C10BE J2 1 J2 4 J2 3 5 J2 2 J2 6 NT5C10BM BL BR NT5C10BJ 4 PE1 1 PE1 2 PE1 3 PE1 5 PE1 6 PE1 7 PE1 4 P3 1 PE1 8 NT5C10BJ 3 P1 1 P1 2 P1 3 P1 5 P1 6 P1 7 P1 4 P3 8 P1 8 NT5C10BK 4 PE1 1 PE1 2 PE1 3 PE1 5 PE1 6 PE1 7 PE1 4 ...

Page 35: ...WN COM 23 P1 1 P1 2 P1 3 P1 5 P1 6 P1 7 P1 4 P1 8 5 NT5C10CC 1 2 DOLPHING REY COM X 23 P1 1 P1 2 P1 3 P1 5 P1 6 P1 7 P1 4 P1 8 5 NT5C10CD 1 2 OXFORDGR EY COM X 23 P1 1 P1 2 P1 3 P1 5 P1 6 P1 7 P1 4 P1 8 5 NT5C10CE DOLPHING REY INDIV X 23 P1 1 P1 2 P1 3 P1 5 P1 6 P1 7 P1 4 P1 8 5 NT5C10CF BROWN INDIV 23 P1 1 P1 2 P1 3 P1 5 P1 6 P1 7 P1 4 P1 8 5 NT5C10CG DOLPHING REY COM 23 P1 1 P1 2 P1 3 P1 5 P1 6 ...

Page 36: ...rm normally closed contact W White RFA C Rectifier Fail Alarm common input G Green RFA MAJ Rectifier Fail Alarm Major multiple rectifier failures S Slate SEN ALM Sense failure Alarm LVA Low Voltage Alarm TR Temporary Release AC FAIL AC Fail Alarm RFA NO Rectifier Fail Alarm normally open contact NSR No Standby Rectifier NC Normally Close NO Normally Open C Common OTP EMI Output EMI Filter Followin...

Page 37: ...or NT5C10BK exterior view Figure 7 Power shelf NT5C10BJ or NT5C10BK interior view F4 F3 F2 HVSD LVR F1 RPM 1000C RS 232 S1 UNIT EQL LVD BOD LVD FAN AUX HVSD FA RFA MIN RFA MAJ AC FLOAT SER NO REL 50A LOW VOLTAGE DISCONNECT NT6C13F BYPASS NORMAL POS POS LVD BYP CHASSIS GRD CHASSIS GRD CHASSIS GRD 12 11 10 9 8 7 6 5 4 3 2 1 1 2 3 4 5 6 7 8 9 10 11 12 ...

Page 38: ...e power shelf equipped with one two or three rectifiers has the following specifications Condition Typical input current value for 54 V dc full load output maximum input current at Output 54 V dc current limit minimum line Input Voltage 208 V AC Frequency 47 63 Hz Range 176 264 V AC Input Current one rectifier 11 7 15 5 two rectifiers 23 4 31 0 three rectifiers 35 1 46 5 Output Voltage 46 V DC TO ...

Page 39: ...MPR15 rectifier powered from 120 V AC the power shelf equipped with one two or three rectifiers has the following specifications Condition Typical input current value for 54 V dc full load output maximum input current at Output 54 V dc current limit minimum line Input Voltage 120 V AC Frequency 47 63 Hz Range 96 132 V AC Input Current one rectifier 10 5 16 5 two rectifiers 21 0 33 0 three rectifie...

Page 40: ...well as with the standard temperature range It is designed for use under the following environmental conditions Temperature 40 C to 65 C 40 F to 149 F Humidity 0 95 non condensing Altitude Sea level to 2100 m 7000 ft Storage During shipping and storage the acceptable environmental range is high temperature 75 C dry heat 167 F low temperature 50 C 58 F humidity 0 to 95 non condensing ...

Page 41: ...equivalent Dummy load Installation procedure Procedure 1 Power shelf installation Step Action 1 Position the power shelf against the rack 2 Fasten the shelf in the position indicated on the drawings normally directly below the Controller or below another power shelf 3 Release the clamping bar from the front of the power shelf Refer to Figures 10 11 and 12 4 Remove the AC junction box cover left si...

Page 42: ...1 500 P0711722 Standard 10 00 May 2001 Figure 10 19 inch power shelf Figure 11 23 inch power shelf POS 1 POS 2 AC JUNCTION BOX BLANK PANEL LVD POSITION DC CONTROL WIRING CLAMPING BAR POS 1 POS 2 POS 3 AC JUNCTION BOX BLANK PANEL DC CONTROL WIRING CLAMPING BAR ...

Page 43: ...net frame by one of the shelf mounting screws which is installed with an external tooth washer This grounding method is sufficient but if desired an extra ground cable color green insulation 105 C of size 8 AWG for common AC or 12 AWG for individual AC applications can be installed in addition to the existing cable and be connected to an external system ground Using a 0 25 inch ring lug terminal t...

Page 44: ...mored Cable DC cables 6 AWG BAT and BAT RTN Signals one cable for remote sensing and alarm Note See Appendix A for additional information 19 inch embedded shelf NT5C10BA 1 2 Capacity 1 x MPR25 LVD 1 x MPR25 1 x MPR25 standby LVD AC common cable 2 8 AWG armored cable Refer to Figure 13 Side DC cables 6 AWG BAT and BAT RTN Refer to Figure 19 Side and Figure 20 Rear Signals 1 cable for remote sensing...

Page 45: ...ystem shelf NT5C10CB 1 2 NT5C10CB 5 6 NT5C10CC 1 2 NT5C10CD 1 2 NT5C10CG Capacity 3 x MPR25 AC common cable 2 6 AWG armored cable Refer to Figure 13 side DC cables 4 AWG BAT and BAT RTN Refer to Figure 19 side and to Figure 20 rear Signals 2 x 8 conductor cables terminated with connectors 23 inch system shelf NT5C10CB 3 4 NT5C10CE NT5C10CF NT5C10CH Capacity 3 x MPR25 AC individual cable 2 12 AWG a...

Page 46: ...ble Refer to Figure 13 side DC cables 4 AWG BAT and BAT RTN Refer to Figure 19 side and to Figure 20 rear Signals 1 cable for remote sensing and alarm 23 inch embedded shelf NT5C10BL Capacity 3 x MPR25 AC individual cable 2 12 AWG armored cable Refer to Figure 16 DC cables 4 AWG BAT and BAT RTN Refer to Figure 19 side and to Figure 20 rear Signals 1 cable for remote sensing and alarm 23 inch embed...

Page 47: ...and to Figure 19 rear Signals 2 cables for remote sensing and alarm Note See Appendix B for additional information Figure 13 System shelf or embedded left view common bussed AC side access FR GRD L2 L1 CAUTION ATTENTIO Procedure 2 Common bussed AC connection side access Step Action 1 Punch out 1 125 inch dia knockout on left side of shelf 2 Mount conduit connector with lock nut 3 Run and connect w...

Page 48: ...M5C06B C 169 2071 500 P0711722 Standard 10 00 May 2001 Figure 14 Extra ground connection mounting location optional Typical installation view for all shelf models Figure 15 Embedded shelf left view individual ac side access old vintage 4 3 2 1 ...

Page 49: ...n and connect wires as illustrated 4 Re install the blank panel to prevent access to the connections inside end Figure 16 Embedded shelf left view Individual AC side access Procedure 4 Individual AC connection side access Step Action 1 Punch out the 0 875 in dia knockout on the left side of the shelf 2 Mount the conduit connector with a lock nut 3 Run and connect wires as illustrated 4 Re install ...

Page 50: ... side access Procedure 5 Individual AC connection side access Step Action 1 Punch out the 0 875 in dia knockout on the left side of the shelf 2 Mount the conduit connector with a lock nut 3 Run and connect wires as illustrated 4 Re install the blank panel to prevent access to the connections inside end 4 3 1 2 CAUTI ATTENTION L1 L1 L2 5 6 L2 L2 FR GRD L1 ...

Page 51: ...iew common bussed AC rear access Procedure 6 Common bussed AC connection rear access Step Action 1 Punch out the 1 125 in dia knockout on the left rear of the shelf 2 Mount the conduit connector with a lock nut 3 Run and connect the wires as illustrated 4 Re install the blank panel to prevent access to the connections inside end L1 L2 ...

Page 52: ... shelf right view DC connecting side access Procedure 7 DC connection side access Step Action 1 Punch out the top two 875 inch dia knockouts on the right side of the shelf 2 Insert the bushings run and connect the wires as illustrated 3 Re install the blank panel to prevent access to the connections inside end BR VDC BAT VDC ...

Page 53: ...ess Procedure 8 DC connection rear access Step Action 1 Punch out the top two 0 875 inch dia knockouts on the right rear of the shelf 2 Insert the bushings run and connect the wires as illustrated 3 Re install the blank panel to prevent access to the connections inside end Power plant interface signal cabling Rectifier and Controller interface connections BR VDC BAT VDC ...

Page 54: ...controller interface connections section of this manual Refer to the reference section for all the interface signal wiring information for each shelf model number Following is a brief description of special interface or alarms signals for specific applications NT5C10BA 1 2 NT5C10BF 1 and NT5C10BP hot standby power shelf The NT5C10BA 1 2 NT5C10BF 1 and NT5C10BP wiring is such that when the power sh...

Page 55: ...helves can be equipped with two MPR15 and MPR25 rectifiers and a low voltage disconnect unit NT6C13FC or with two rectifiers one RPM1000C and one low voltage disconnect unit without a control circuit pack NT6C13FJ When the NT6C13FJ unit is used the RPM1000C performs the control and monitoring functions The NT6C13FJ is equipped with an interface circuit pack that receives the LVD signal from the RP...

Page 56: ...ize switch is set to the EQL position a battery return signal is sent to the remote equalize input port of each rectifier in the power shelf The rectifier output voltage will increase by the amount set with the EQL adjustment potentiometer of the rectifier Each rectifier must be individually adjusted to the same equalize voltage level The yellow LED indicates that the rectifiers are in equalize mo...

Page 57: ...t an RFA signal to the controller during the time that it is inhibited but it will transmit an RFA signal to the Controller after the delayed start period if the DC or AC circuit breaker is open When the rectifier is on the delayed start mode the RFA LED on the rectifier will be lit red The DELAYED START yellow LED of the timer will be ON indicating that the rectifier with the red RFA LED is on de...

Page 58: ...e rectifier is provided directly by an internal wire harness in the power shelf Figure 21 Rectifier AC and DC power internal cabling harness DC DC GND AC AC 12 AWG 12 AWG 12 AWG 12 AWG 12 AWG 12 AWG 12 AWG 12 AWG 12 AWG 12 AWG BLACK RED GREEN BLACK WHITE CONNECTOR AMP 530521 9 CONTACTS AMP 530520 1 KEYING PLUG AMP 530533 1 NOTE Noten When required keying plugs CPC A0377927 can be ordered Insert on...

Page 59: ... 1 2 Remove the LVD faceplate 3 Slide the LVD about two thirds of the way into the shelf 4 Connect the LVD as shown in Figure 22 and 23 Use 2 X 10 AWG wires for contactors 5 Re install the small LVD faceplate 6 Push the LVD the remaining distance into the shelf and slide the blank panel into the shelf between the LVD and the adjacent rectifier 7 Secure the clamping bar by tightening the two captiv...

Page 60: ... voltage limits All rectifiers are factory set as follows unless otherwise requested by the customer MPR15 MPR25 Float Voltage 52 10 V DC 48 00 V DC Equalize 0 70 V DC above float 0 00 V DC above float HVSD 59 00 V DC 56 50 V DC LVD LVD Alarms Low Voltage Alarm LVA 47 00 V DC Low Voltage Disconnect LVD 43 50 V DC 2 1 8 CHASSIS GROUND BAT SENSE LEADS TO LOAD T B BAT LOAD BAT RTN ...

Page 61: ...ange is needed continue with the parallel verification procedure Note Quick disconnect tab TB1 is located on the right end side of the shelf and can be accessed by removing the front cover see Figure 24 For system applications refer to the appropriate system procedure guide for the fuse or dip switch location Procedure 11 Rectifier power up Step Action 1 Verify that the DC and AC rectifier circuit...

Page 62: ...VSD potentiometer slowly counterclockwise until the rectifier shuts down The test point voltage shall start decaying to 0 volt 4 Turn the float potentiometer counterclockwise two full revolutions 5 Cycle the AC breaker OFF ON The unit shall power up with the return of the float voltage on the test points 6 To verify turn the float potentiometer slowly clockwise until the unit shuts down Read the f...

Page 63: ...t Step Action 1 Adjust the float potentiometer FLT to 0 5 volt DC see Note below above the desired float voltage determined by the battery vendor or power engineer using the voltmeter attached to the test point V V 2 Final system s float voltage adjustment will be performed as indicated in Parallel verification Procedure15 step 4 end Note The 0 5 volt DC extra does not apply to MPR25 rectifiers of...

Page 64: ... must have been individually adjusted as indicated in the Power up HVSD adjustment FLT adjustment and Equalize adjustment procedures before proceeding with the following steps DANGER When adding or replacing a rectifier verify that the rectifier DC and AC circuit breakers are in the OFF position Reconnect the sense leads if disconnected before the rectifier power up for all the shelf rectifiers by...

Page 65: ...be read from the system s meter voltage reading Verify that the system float voltage level is constant while proceeding through the next step 5 The load share amperage for each rectifier must be equal Adjust the individual float potentiometer as needed to balance the current delivered by each rectifier It is recommended that the current from each rectifier be at least 3 amperes that is 9 A for thr...

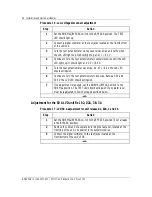
Page 66: ...eter clockwise At 47 0 5V the LVA LED should extinguish 6 Continue to turn the test potentiometer clockwise Between 50 and 50 5 V the LVD LED should extinguish 7 If no adjustment is required set the NORMAL BYPASS switch to the NORMAL position The TEST LED should extinguish If any alarm level must be readjusted follow the steps described below end Adjustment for the 50 A LVD unit Rel 02 02A 3 3A Pr...

Page 67: ...se loss of power to the load Note 1 To ensure that the potentiometer is turned fully counterclockwise the pot must be turned 20 full turns or until a click sound emitted by the pot s clutch is heard Note2 The effect of the LVDR potentiometer in setting the reconnect voltage level is approximately 1 6 V for each turn for Rel 2 and 2A or approximately 0 75 V for Rel 3 and 3A The connect disconnect v...

Page 68: ...sh turn the LVDR potentiometer slightly counterclockwise or clockwise if the LED extinguishes before 50 V 6 To verify the adjustment set the test voltage to 43 5 V Readjust the LVD potentiometer until the LVD LED lights up 7 Readjust the test voltage to 51 V The LVD LED should extinguish between 50 and 50 5 V If it does not repeat step 17 8 Set the NORMAL BYPASS switch to the NORMAL position The T...

Page 69: ...applications The Low Voltage and Low Voltage Disconnect alarms are visually displayed on the LVD unit and can also be monitored externally Electrical Input voltage 42 to 60 V DC Input current 0 400 A LVD current capacity 50 A LVD range 42 to 53 V DC Auto reconnect 8 V above the release level Environmental The LVD will operate satisfactorily under the following conditions Temperature 40 C to 65 C 4...

Page 70: ...nnect connections Control and monitoring signals The control and monitoring signals for the Low Voltage Disconnect unit are shown below These signals are accessible on the terminal block in the unit The Installation and start up procedure describes how to interconnect the LVD in an embedded shelf application Figure 26 Low voltage control and monitoring signals LVD Terminal block J1 20 AWG wire LV ...

Page 71: ...ometer sets the level at which the load disconnects and the LVDR potentiometer sets the level at which the load reconnects Test jacks TP1 and TP2 provide the plant discharge voltage when the TEST switch is set to NORMAL Test feature The internal test feature facilitates the verification of the low voltage disconnect reconnect and low voltage alarm circuitry without disconnecting the load When the ...

Page 72: ...72 Low voltage disconnect UM5C06B C 169 2071 500 P0711722 Standard 10 00 May 2001 This page is left blank intentionally ...

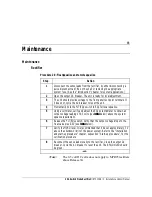
Page 73: ...e FLT EQL switch to EQL for local equalize 5 Using a voltmeter verify and adjust the EQL potentiometer to obtain an output voltage reading of 0 5 volts see Note below above the system equalize requirement 6 Release the FLT EQL switch Verify that the output voltage drops to the float value plus 0 5V see Note below 7 Verify the HVSD level It is recommended that it be set approximately 3 V above the ...

Page 74: ...e them to OFF and remove the unit from the power shelf Inspect the air outlet for obstruction by foreign objects Visually inspect the air outlet of the enclosure or cabinet If a problem is detected in the rectifier contact your local Astec service facility The unit must not be opened for on site servicing DANGER Do not attempt to access the inside of the unit with a tool or finger Severe electrica...

Page 75: ...ntiometer is adjusted properly Refer to the Start up procedure section of the Installation and start up procedure chapter of this manual for the adjustment procedure If the unit is used in parallel with other units the rectifier may indicate an RFA alarm when the unit produces no current see Note below This could mean that the float voltage is too low Increase the float voltage by turning the FLT ...

Page 76: ... absence of fan rotation The rectifier will be inhibited and an RFA and Fan alarm will be activated The Fan Fail LED will turn RED Fan replacement procedure DANGER Before replacing the fan turn the rectifier off Remove the rectifier from the shelf Wait five minutes to allow all internal capacitors to fully discharge CAUTION Take the necessary precautions to prevent any dirt dust moisture or metall...

Page 77: ...e air is blown outwards when the fan is operated 7 Secure the fan fan grill and chassis plate with the four retaining screws 8 Reconnect the fan connector and mount the fan assembly in the unit with the five mounting screws 9 Plug the unit back in and power it up Holding a piece of paper at the front the unit will confirm that the air is pulled inwards from the front 10 Listen carefully for any no...

Page 78: ...e disconnect In case of difficulty follow the steps indicated below Note When the LVD is defective and has to be removed from the system bypass the LVD externally using a 6 AWG cable to maintain power to the load CAUTION Before readjusting the potentiometers set the test switch to the Test Bypass position ...

Page 79: ...LVA and LVD LED lit Check the voltage level at the test jacks and the position of the Test switch Verify the LVA and LVD adjustment Set the test switch to the Test Bypass position to verify their operation Replace the circuit pack if it is still not operational The LVD disconnects the load Verify the voltage at the test jacks Remove the faceplate and check the fuse located on the control PCB ...

Page 80: ...80 Maintenance UM5C06B C 169 2071 500 P0711722 Standard 10 00 May 2001 This page is left blank intentionally ...

Page 81: ... 3 INDIV AC EMI FILTER 3 RECTIFIERS NT5C10CB 5 COMMON AC 3 RECTIFIERS NT5C10CF INDIVIDUAL AC 3 RECTIFIERS NT5C0CC 1 COMMON AC EMI FILTER 3 RECTIFIERS NT5C10CE INDIVIDUAL AC EMI FILTER 3 RECTFIERS NT5C10CD 1 COMMON AC EMI FILTER 3 RECTIFIERS 19 SHELF BROWN 23 SHELF BROWN 23 SHELF DOLPHIN GREY 23 SHELF OXFORD GREY NT5C10CG COMMON AC DOLPHIN GREY 3 RECTFIERS NT5C10CH INDIVIDUAL AC DOLPHIN GREY 3 RECT...

Page 82: ...B 3 COMMON AC 2 RECTIFIERS 1 LVD NT5C10BA 5 COMMON AC 2 RECTIFIERS 1 LVD NT5C10BC 1 INDIVIDUAL AC EMI FILTER 3 RECTIFIERS NT5C10BC 3 COMMON AC EMI FILTER 3 RECTIFIERS NT5C10BD 3 COMMON AC EMI FILTER 3 RECTIFIERS ENGLISH FRENCH NT5C10BK COMMON AC EMI FILTER 2 RECTIFIERS RPM1000C OPT LVD OPT NT5C10BP COMMON AC HOT STANDBY 2 RECT 1 LVD OR 3 RECTIFIERS DOLPHIN GREY NT5C10BJ COMMON AC EMI FILTER 3 RECT...

Page 83: ...3 LOW VOLTAGE DISCONNECT NT6C13FA 5 85 WIDE BROWN FOR THE NT5C10 POWER SHELF NT6C13FC 5 85 WIDE GREY NT6C13FE 2 20 WIDE BROWN NT6C13FF RECTIFIER ADAPTER NT6C13FG 2 20 WIDE GREY NT6C13FH LVD CONTROL 289 A FINISH 800E CABINET NT6C13FJ 50A LVD E W RPM1000C BROWN NT6C13FK 50A LVD E W RPM1000C GREY NT6C13FM 2 20 WIDE BROWN ...

Page 84: ...ig 37 NT5C10CB 4 Fig 37 NT5C10CB 5 Fig 37 NT5C10CB 6 Fig 37 Embedded application 19 Brown System application 23 Dolphin grey NT5C10BF 1 Fig 34 NT5C10CC 1 Fig 37 NT5C10CC 2 Fig 37 NT5C10CG Fig 37 NT5C10CH Fig 37 NT5C10CO Fig 45 Embedded application 23 Brown System application 23 Oxford grey NT5C10BC 1 Fig 38 NT5C10CD 1 Fig 37 NT5C10BC 2 Fig 38 NT5C10CD 2 Fig 37 NT5C10BC 3 Fig 38 NT5C10CE 1 Fig 37 N...

Page 85: ...7 SEN C 18 SEN NC 19 SEN NO 20 NC 21 NC 22 NC 23 NC 24 NC 25 NC TO 1ST RECTIFIER CIRCUIT POSN 1 P1 CONN AND LEADS ARE PART OF RECTIFIER 1 P2 EQL 2 RG 3 RC 4 TR 5 HVSDR 6 HVSD 7 RFA NC 8 SPARE 9 FAN ALM NC 10 FAN ALM NO 11 FAN ALM C 12 SH 13 SH 14 RFA ALM NO 15 RFA NO BAT GRD 16 17 SEN C 18 SEN NC 19 SEN NO 20 NC 21 NC 22 NC 23 NC 24 NC 25 NC TO 1ST RECTIFIER CIRCUIT POSN 2 P2 CONN AND LEADS ARE PA...

Page 86: ...TIFIER CIRCUIT POSN 1 P1 CONN AND LEADS ARE PART OF RECTIFIER 1 P2 EQL 2 RG 3 RC 4 TR 5 HVSDR 6 HVSD 7 RFA NC 8 SPARE 9 FAN ALM NC 10 FAN ALM NO 11 FAN ALM C 12 SH 13 SH 14 RFA ALM NO 15 RFA NO BAT GRD 16 17 SEN C 18 SEN NC 19 SEN NO 20 NC 21 NC 22 NC 23 NC 24 NC 25 NC TO 2ND RECTIFIER CIRCUIT POSN 2 P2 CONN AND LEADS ARE PART OF RECTIFIER 1 2 3 4 5 6 7 8 J1 BAT GRD 48V BAT TO POWER SHELF DC TERMI...

Page 87: ... 16 17 18 19 20 21 25 P1 CONN AND LEADS NC NC NC SEN NO SEN NC SEN C BAT GRD RFA NO RFA ALM NO SH SH FAN ALM C RFA NC FAN ALM NC SPARE RFA C HVSD TR RC RG EQL HVSDR TO SECOND RECTIFIER CIRCUIT POS 0 RG RC RFA NC FAN ALM NC RFA C FAN ALM C RFA NC FAN ALM NC FAN ALM C BLACK RED SLATE ONE W HITE DOT RFA C W HITE ONE SLATE DOT RED ONE ORANGE DOT AC RELAY 1 4 8 5 C1 NC1 C2 NC2 AC FAIL 0A AC FAIL 0B BLU...

Page 88: ...14 15 16 17 18 19 20 21 25 P1 CONN AND LEADS ARE PART OF RECTIFIER NC NC NC SEN NO SEN NC SEN C BAT GRD RFA NO RFA ALM NO SH SH FAN ALM C RFA NC FAN ALM NC SPARE RFA C HVSD TR RC RG EQL HVSDR TO FIRST RECTIFIER CIRCUIT P2 1 2 3 4 5 6 7 8 9 10 11 12 13 14 15 16 17 18 19 20 21 25 P2 CONN AND LEADS ARE PART OF RECTIFIER NC NC NC SEN NO SEN NC SEN C BAT GRD RFA NO RFA ALM NO SH SH FAN ALM C RFA NC FAN...

Page 89: ...5 EQL RG RC TR HVSDR HVSD RFA NC SPARE FAN ALM NC RFA C FAN ALM C SH SH FAN ALM NO RFA NO BR SEN C SEN NC SEN NO NC NC NC J4 1 2 3 4 5 6 7 8 9 10 11 12 13 14 15 16 17 18 19 20 EQL RG RC TR HVSDR HVSD RFA NC SPARE FAN ALM NC RFA C FAN ALM C SH SH FAN ALM NO RFA NO BR SEN C SEN NC SEN NO NC NC J2 MAIN 2 STANDBY MAIN 1 RG RC RFA J1 J2 TO MONITORING CIRCUIT TB1 2 TB1 1 TB1 5 TB1 3 TB1 4 1 2 3 4 5 6 7 ...

Page 90: ...QL RG RC TR HVSDR HVSD RFA NC SPARE FANALM NC RFA C FANALM C SH SH FANALM NO RFA NO BAT GRD SEN C SEN NC SEN NO SPARE TOFIRST RECTIFIER CIRCUIT NC NC NC 1 2 3 4 5 6 7 8 9 10 11 12 13 14 15 16 17 18 19 20 21 25 NC RFA C FANALM C NC NC NC NC BAT GRD NC NC NC NC NC NC NC RG RG RFA NC J1 P1 TOMONITORING CIRCUIT FIRST APPEARANCE P0714580 CAASSY 22 8 COND 1 2 3 4 5 6 7 8 EQL FAN ALM HVSDR HVSD TR P1 P07...

Page 91: ...References 91 25A Switch Mode Rectifier NT5C06B C Installation and User Manual Figure 38 Embedded application NT5C10BC 1 NT5C10BC 2 NT5C10BC 3 NT5C10BM ...

Page 92: ...R RFA NO FAN ALM NO SH SH FAN ALM C RFA C FAN ALM NC RFA NC HVSD EQL HVSDR TR RC RG PART OF RECTIFIER NT5C06 TYPE POS 3 PART OF RECTIFIER NT5C06 TYPE POS 2 NC EQL 1 RG RC FAN ALM NC 2 3 4 5 6 7 8 9 10 11 12 13 14 15 16 17 18 19 20 HVSDR HVSD RFA NC TR NC 20 19 18 17 16 15 14 13 12 11 10 9 8 7 6 5 4 3 2 1 25 RG RC TR HVSDR EQL HVSD RFA NC FAN ALM NC RFA C FAN ALM C SH SH FAN ALM NO RFA NO BR SEN C ...

Page 93: ...UIT AS REQUIRED J4 COM EVENT REL FA OUT EQL OUT 1 ALL MIN OUT 2 ALL MAJ OUT 3 UNIT FAIL MAJ ALM CONN AS REQUIRED P4 1 8 2 3 4 5 6 7 TO DMS1 U CABINET ALARM NT6C13FJ OR FK LOW VOLTAGE DISCONNECT PROVIDED PER MS5C10 P0736442 CA ASSY PART OF KIT CA ASSY P0736447 CA ASSY PART OF KIT P0736447 TO HALL SENSORS OR TRANSDUCER EVENT 7 EVENT 6 EVENT 5 EVENT 4 EVENT 3 EVENT 2 EVENT 8 RS 232 SPARE RXD TXD DTR ...

Page 94: ...EN C BR RFA NO FAN ALM NO SH SH FAN ALM C RFA C FAN ALM NC RFA NC HVSD EQL HVSDR TR RC RG PART OF RECTIFIER NT5C06 TYPE POS 3 PART OF RECTIFIER NT5C06 TYPE POS 2 NC EQL 1 RG RC FAN ALM NC 2 3 4 5 6 7 8 9 10 11 12 13 14 15 16 17 18 19 20 HVSDR HVSD RFA NC TR NC 20 19 18 17 16 15 14 13 12 11 10 9 8 7 6 5 4 3 2 1 25 RG RC TR HVSDR EQL HVSD RFA NC FAN ALM NC RFA C FAN ALM C SH SH FAN ALM NO RFA NO BR ...

Page 95: ... HVSD HVSDR J1 P1 8 7 6 5 4 3 2 1 TR EQL RFA NC HVSD HVSDR FAN ALM NC RC RG NT6C13FA OR FC LOW VOLTAGE DISCONNECT PROVIDED PER MS5C10 P0736442 CA ASSY LVD ALM LVA RFA COM 8 7 6 5 4 3 2 1 BR 48V E1 LVA ALM LVA COM NT5C10PC I F CKT PACK PART OF KIT P0736446 RC NO C NC NO C NC 48V DC BAT GRD CA ASSY PART OF NT5C10PC CKT PACK CA ASSY PART OF NT5C10PC CKT PACK CA ASSY PART OF NT5C10PC CKT PACK RG TB1 C...

Page 96: ...173 CA ASSY TO MONITORING CIRCUIT NC 25 SPARE P1 NC NC SEN NO SEN NC SEN C BR RFA NO FAN ALM NO SH SH FAN ALM C RFA C FAN ALM NC RFA NC HVSD EQL HVSDR TR RC RG PART OF RECTIFIER NT5C06 TYPE POS 2 PART OF RECTIFIER NT5C06 TYPE POS 1 NC NC NC NC NC NC NC NC NC NC 1 NC 2 3 4 5 6 7 8 9 10 11 12 13 14 15 16 17 18 19 20 NC NC NC NC NC NC NC NC NC NC NC NC NC NC NC NC NC NC NC NC NC 20 19 18 17 16 15 14 ...

Page 97: ...ITORING CIRCUIT NC 25 SPARE P1 NC NC SEN NO SEN NC SEN C BR RFA NO FAN ALM NO SH SH FAN ALM C RFA C FAN ALM NC RFA NC HVSD EQL HVSDR TR RC RG PART OF RECTIFIER NT5C06 TYPE POS 2 PART OF RECTIFIER NT5C06 TYPE POS 1 NC NC NC NC NC NC NC NC NC NC NC 1 NC 2 3 4 5 6 7 8 9 10 11 12 13 14 15 16 17 18 19 20 NC NC NC NC NC RFA C NC NC NC NC NC NC NC NC NC NC NC NC NC NC NC 20 19 18 17 16 15 14 13 12 11 10 ...

Page 98: ...CK NC TO AC FAIL ALARM MONITORING CIRCUIT TO MONITORING CIRCUIT TO MONITORING CIRCUIT MAIN BR 48V EQL RG RC FAN ALM NC HVSDR HVSD RFA NC TR TR RFA NC HVSD HVSDR FAN ALM NC RC RG EQL J3 J4 1 2 3 4 5 6 7 8 8 7 6 5 4 3 2 1 220V 110V NEUTRAL TB1 NO C NC 8 7 6 5 4 3 2 1 1 2 3 TB2 J2 1 2 3 4 5 6 7 8 TR RFA NC HVSD HVSDR FAN ALM NC RC RG EQL EQL RG RC FAN ALM NC HVSDR HVSD RFA NC TR 8 7 6 5 4 3 2 1 J1 FR...

Page 99: ...C NC NC NC NC NC J4 J2 25 P1 NC NC SPARE SEN NO SEN NC SEN C BR RFA NO FAN ALM NO SH SH FAN ALM C RFA C FAN ALM NC RFA NC HVSD EQL HVSDR TR RC RG PART OF RECTIFIER NT5C06 TYPE POS 1 PART OF RECTIFIER NT5C06 TYPE POS 2 1 2 3 4 5 6 7 8 9 10 11 12 13 14 15 16 17 18 19 20 NC 20 19 18 17 16 15 14 13 12 11 10 9 8 7 6 5 4 3 2 1 25 NC P1 FAN ALM NO RG RC TR HVSDR EQL HVSD RFA NC FAN ALM NC RFA C FAN ALM C...

Page 100: ...100 References UM5C06B C 169 2071 500 P0711722 Standard 10 00 May 2001 This page is left blank intentionally ...

Page 101: ...rmal operation and will become active when another rectifier in the same power shelf issues an RFA FTIP application The MPR15E NT5C06CB CD rectifier is used in this application Two rectifiers maximum can be used in each system plus one 50 A LVD The main rectifier is active and carries the load and the standby is inhibited It will be activated upon removal or failure of the main rectifier hot stand...

Page 102: ...Rectifier Fail RFA TB1 5 No Standby Rectifier NSR TB1 6 Low Voltage Disconnect LVDA TB1 3 part of LVD unit Low Voltage Alarm LVA TB1 6 part of LVD unit Note When the Main 2 rectifier is missing TB1 3 and TB1 4 must be strapped together Factory set voltage limits Refer to User Manual UM 167 7011 010 Voltage Level Limits for Power Plants Rectifiers and Controllers FTOP application The MPR25EX rectif...

Page 103: ...larms Available alarms for monitoring the status of the FTOP power system are as follows RFA Battery Return RTN NSR No Standby Rectifier Battery Return RTN Power and signal lead termination The power and signal cables are terminated as follows a Power Cables Battery Return RTN A TB1 1 white with red tracer Battery 48 V A TB1 2 red b Signal Cables Negative Sense RC TB1 1 48 V Positive Sense RG TB1 ...

Page 104: ... two MPR15E NT5C06CB CD SMRs plus one 50 A LVD module NT6C13FA FTIP application The middle rectifier is wired as Standby Shelf labeling The following component and connection positions are labeled on the power shelf a Front left to right MAIN1 STANDBY MAIN2 LVD b Rear right to left Signal Connections RC TB1 1 RG TB1 2 J1 TB1 3 J2 TB1 4 RFA TB1 5 NSR TB1 6 Power Connections RTNA TB2 1 48V A TB2 2 N...

Page 105: ...in order that the required total AC input current for the two rectifiers be reduced to less than 20 amperes The rectifier that is delayed will be activated immediately if the main rectifier fails is pulled out or missing or produces an RFA The delayed start rectifier will not transmit an RFA signal to the Controller during the time that it is inhibited but it will permit transmission of an RFA sig...

Page 106: ...ectifiers Input AC 120 V AC 18 A Power system maximum load 6 A typical to 10 A maximum Battery charging current 7 to 11 A depending on power system load Maximum battery reserve 120 AH based on 8 hours Delayed Start delay Two positions 12 and 24 hours 12 hours for 6 A load application and 24 hours for 10 A load applications Factory delayed start setting 24 hours 6 5 4 3 2 1 OPEN CLOSED 6 5 4 3 2 1 ...

Page 107: ... as follows 24 hour delay 5 Plug the AC power plug into the wall receptacle 6 Turn ON the AC circuit breakers of the main rectifier Verify that the DELAYED START yellow LED is lit 7 Verify the main rectifier voltage and set the voltage limits as specified by the system and the manufacturer of the battery by referring to the Start up procedure section found in the Installation and start up procedur...

Page 108: ...ify the system s operation CAUTION The power system batteries must be fully charged to their nominal voltage before proceeding with the following steps Procedure 23 Adjustment and verification Step Action 1 Release the clamping bar of the power shelf by loosening the two retaining screws 2 Remove the right blank panel by removing the screw pushing it up and pulling it out 3 Locate the timer SW1 sw...

Page 109: ...D START rectifier will resume its normal operation 8 Connect an external 6 ampere load or use a telecommunication system load and readjust the float and equalize voltage of the rectifiers so they share the load 9 Reset the timer by closing and opening the SW1 6 switch and observe the operation of the power system The DELAYED START yellow LED is lit The output current of the main rectifier is appro...

Page 110: ...indicated when a rectifier delivers less than 0 1 A see Note 2 Turning the FLT potentiometer slightly clockwise will return it to normal operation with no RFA Note 2 Sends an alarm at no load condition only for the following releases or under NT5C06BB BB 1 BB 3 BC Rel 10 NT5C06CA CA 1 CA 3 CA 5 CC Rel 10 NT5C06CB CB 1 CB 3 CD Rel 12 NT5CO6CE 61 46 Rel 12 6 5 4 3 2 1 OPEN CLOSED ...

Page 111: ...oubleshooting The following are recommended steps for analyzing possible malfunctions of a system equipped with an NT5C10CO power shelf This is in addition to the information contained in the Troubleshooting section of User Manual UM 167 9021 107 Table 13 Systems equipped with NT5C10CO power shelf fault diagnosis Fault symptom Possible causes Delayed Start did not activate delayed start LED is not...

Page 112: ...112 Appendix B NT5C10CO shelf UM5C06B C 169 2071 500 P0711722 Standard 10 00 May 2001 This page is left blank intentionally ...

Page 113: ...113 25A Switch Mode Rectifier NT5C06B C Installation and User Manual Appendix C Recommended replacement parts ITEM CPC Air Filter Kit A0370200 Fan Assembly P0710139 Fuse 3 4 A 250 V F1 A0351850 ...

Page 114: ...114 Appendix C Recommended replacement parts UM5C06B C 169 2071 500 P0711722 Standard 10 00 May 2001 This page is left blank intentionally ...

Page 115: ... Service ETAS and the Installation Technical Assistance Service ITAS Local toll free prefixes The following prefixes give access to toll free numbers in various countries For further information please contact the local service provider Country Prefix Australia 0011 Belgium 00 Brazil 0021 Denmark 00 Finland 00 or 990 France 00 Germany 00 Hong Kong 001 Ireland 00 Japan 001 KDD 041 ITJ 0061 IDC Kore...

Page 116: ...156 Singapore 800 213 49156 Italy 800 213 49156 South Korea 800 213 49156 Netherlands 800 213 49156 Taiwan 800 213 49156 Norway 800 213 49156 Sweden 800 213 49156 Switzerland 800 213 49156 United Kingdom 1 800 213 49156 In the Caribbean and Latin America CALA In the Middle East Bahamas 1 800 389 0081 Israel 800 213 49156 Barbados 1 800 534 0225 Brazil 08 1571 012288 Colombia 980 192288 Dominican R...

Page 117: ...lize HVSD High Voltage Shutdown LED Light Emitting Diode LVA Low Voltage Alarm LVD Low Voltage Disconnect LVDR Low Voltage Disconnect Reconnect MPR Modular Power Rectifier MPS Modular Power Shelf NC Normally Closed NO Normally Open NSR No Standby Rectifier NSR No Standby Rectifier PCB Printed Circuit Board RFA Rectifier Fail Alarm TR Temporary Release FAN ALM Fan Alarm ...

Page 118: ...118 Abbreviations and acronyms 167 2071 500 Standard 8 0 May 1999 This page is left blank intentionally ...

Page 119: ......

Page 120: ...ies and use the same for start up operation troubleshooting and maintenance purposes only Any modification to the equipment must be approved by the person responsible for product safety and design quality at Astec Advanced Power Systems Ltd to ensure that the equipment complies with the operation standards This equipment generates uses and can radiate radio frequency energy and if not installed an...

Reviews: