14 • Control Link ACC I&O Manual
026-4704 Rev 6
Enter the number of ACC devices in the
CtrlLink
ACC
number field.
4. Press
to return to the Network Setup menu,
then select
-
Network Summary
.
5. Locate the CtrlLink ACC units you added to the
network list (press
and
to scroll through the
list). The default name for a Control Link ACC
begins with a two-letter designator of the model
type (
CL
for ControlLink) and a three-letter
designator for
ACC
(anti-condensate controller).
6. By default, each CtrlLink ACC’s board number in
the network list is indicated by a
-
(dash). To set the
address and begin communication, press
to
Commission. (If you have more than one MODBUS
network, specify which network you want the
device to belong to.) A screen will open that will
allow you set the address:
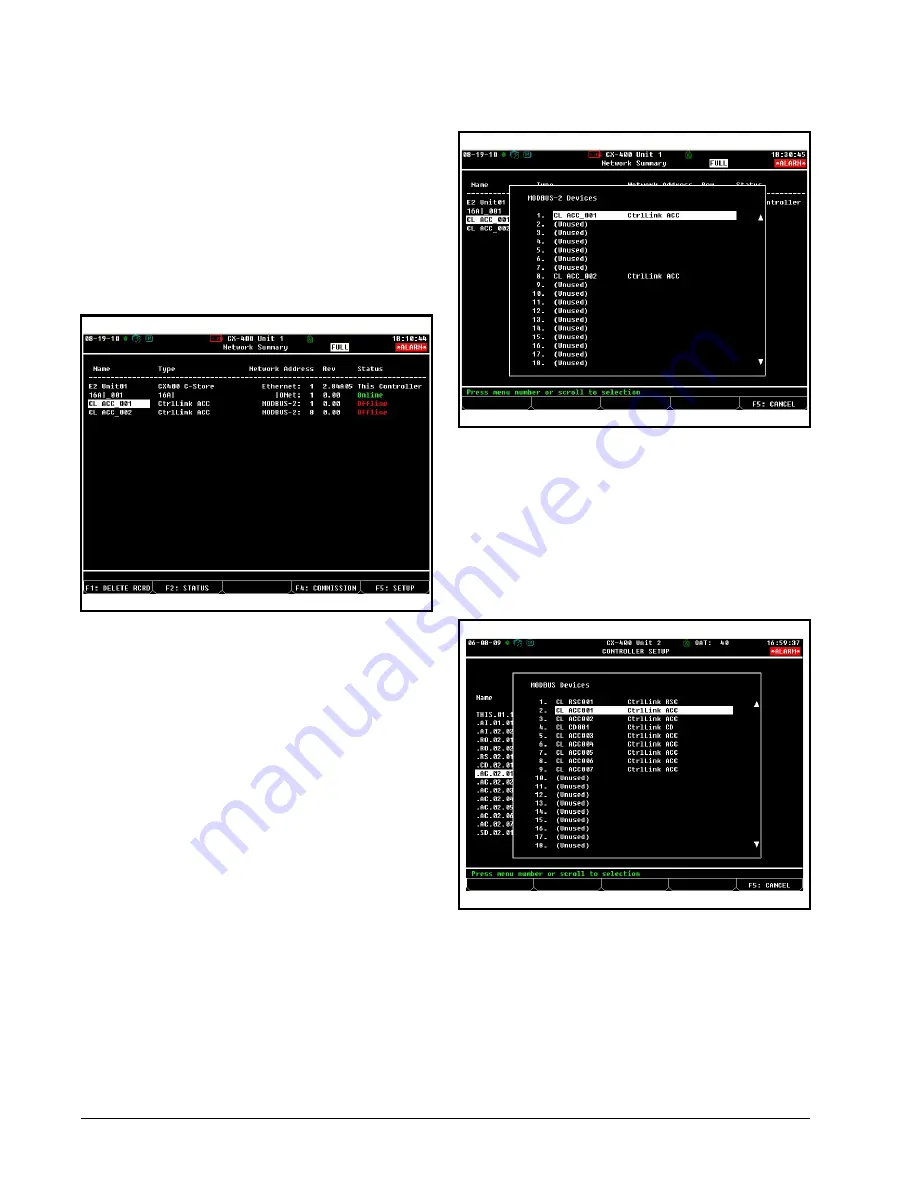
7. In the list of MODBUS devices, choose the address
number corresponding to the Control Link ACC’s
dip switch/jumper setting, and press
to select
it. If a network ID has already been selected, its
name will be shown next to the network ID in this
list. If the network ID you are trying to assign has
already been used, you must set the network ID dip
switch/jumper on this device to a different number
that is not being used.
8. Repeat
Steps 5
and
6
until each Control Link ACC
device has been commissioned.
9. When finished, press
to return to the Network
Setup menu, then press
-
Network Summary
(
Figure 7-8
). Locate the Control Link ACCs you set
up, and look at each device’s status in the
Status
Figure 7-8
-
Network Summary Screen
Figure 7-9
- Set the Address of the ACC
Figure 7-10
-
List of MODBUS Devices


