background image


12 


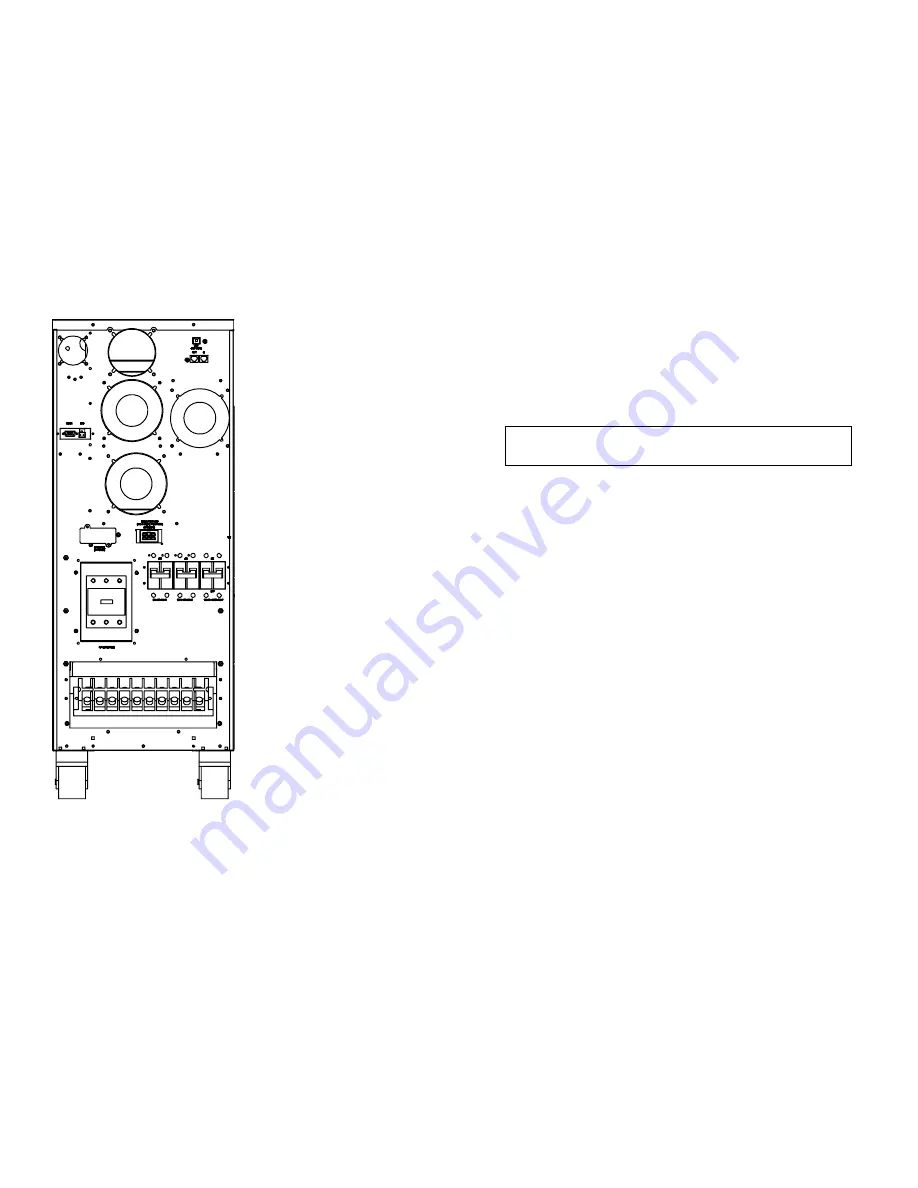
15/20 KVA Rear panel

(ISO and With ISO)


13

5.3 Connection to mains and loads (4000 - 20000 VA)


Only qualified specialists or technicians who conform to applicable safety 
standards may carry out the installation of this equipment. The installation must 
further comply with all local legislation and regulations. 

Follow all installation and safety instructions very carefully, otherwise those 
performing installation may suffer from a hazardous situation and the UPS or 
load connections may also be damaged. 


The high voltage and current contained within the UPS equipment can injure   

or kill personnel and damage equipment. 


For electrical installation, closely observe the nominal current rating of the source. 

Installing External battery cabinets 

z


First disconnect the UPS from mains and loads before attempting an 
External Battery Cabinet installation. 

z


Use the battery cable provided with the External Battery Cabinet to 
connect the External Battery Cabinet to the UPS. Connect a second 
battery cabinet to the first one with the cable provided if more than one is 
to be installed. 

z


Be aware of UPS parameters and changing the Battery pack quantity 
when using the external battery cabinets (see chapter 7.2) 

Installing UPS 

z


Ensure that the installation site has all electrical connections properly 
carried out. In addition, refer to figures 2 and 3 to check the fuse and 
cable dimensions. 

z


Isolate and secure the source against reclosing. Both input and output 
circuit breakers (located in the back) must be “OFF”. 

z


Refer to figure 2 for single cable input and figure 3 for dual cable input. 
Connect the UPS according to these diagrams. If installing dual cables, 
the interconnection jumper (b*) needs to be removed as in figure 2. Fuse 
and cable sizes are given in figure 3. 

z


During installation, if it cannot be determined that neutral is grounded or 
the identification of the neutral status of the mains supply is unreliable, 
an additional two pole disconnect device is necessary in the building 
installation. 

z


At the back of the unit you will find the Emergency Power Off (EPO), 
which when open will immediately shut down the logic circuit output of 
the UPS as in figure 2 and 3. Wiring the EPO signal is optional. 

z


Caution! 

Local safety requirements may require a separate external 

Emergency Power Off that opens output circuit breakers, and if so, use 

Summary of Contents for 4K VA 20K VA UPS

Page 1: ...ced by harmful interference from the equipment it is recommended to use one of the following preventive measures z Place the receiving antenna in a separate location or orientation z Ensure a greater...

Page 2: ...ide Refer servicing to qualified service personnel CAUTION Non isolated Battery supply Risk of electric shock battery circuit is not isolated from AC input hazardous voltage may exist between battery...

Page 3: ...lation must be carried out in accordance with this manual Electrical installations must also carefully follow local legislation and regulations Only qualified personnel should conduct these installati...

Page 4: ...ions of the batteries sends any forewarnings if replacement is needed Otherwise every 30 days of normal mode operation a battery discharge test is performed and any problems reported on the LCD displa...

Page 5: ...e very hazardous to the operator 5 4 Storage Please adhere to the following instructions if the UPS is not installed immediately z Store the equipment as is in its original packing and shipping carton...

Page 6: ...6 5 2 Rear panel views 4K 5KVA 120VDC Rear panel 7 6KVA Rear panel Without ISO...

Page 7: ...8 6KVA Rear panel With ISO 9 8K 10KVA Rear panel Without ISO...

Page 8: ...10 8K 10 KVA Rear panel With ISO 11 12KVA Rear panel ISO and With ISO...

Page 9: ...nstalled z Be aware of UPS parameters and changing the Battery pack quantity when using the external battery cabinets see chapter 7 2 Installing UPS z Ensure that the installation site has all electri...

Page 10: ...connections be used use connections according to chapter 6 of the manual provided with that option The connections can be referred to on the rear panel z The installation is now complete b removable j...

Page 11: ...munications cards It can be used parallel with either the RS232 or USB ports Currently there are two cards available for the optional interface slot An SNMP WEB card allows management and monitoring o...

Page 12: ...tput power has commenced and the LCD will display Line mode z Switch on the loads Shutting down the UPS z Shut down and turn off the loads z Push the ON OFF button on the front panel for two seconds T...

Page 13: ...rol panel Normal display The UPS status is shown in normal display mode From here you have a choice to go to UPS meters display and the Setting display by pushing the button UPS meters display Various...

Page 14: ...t Input Voltage range when bypass is available 10 10 15 15 20 10 15 Free Run Mode Free Run Set Select if UPS can run in Free run mode unsynchronized ON OFF ON Bypass Enable Disable at Free run mode By...

Page 15: ...tness any alarm indication on the control panel Alarm indicators The UPS gives the following audible alarms z If UPS is on battery and the ON BATTERY LED is on UPS will beep every 5 seconds z If the b...

Page 16: ...Low Output Voltage Constant beep Low output voltage Call the Local dealer Bus Fault 2 Beeps per second High internal DC bus Voltage Turn off protected loads Turn off UPS and call your local dealer Si...

Page 17: ...h W ISOTR 342 x 690 x 715 13 4 x 27 2 x 28 1 342 x 690 x 878 13 5 x27 2 x34 6 342 x 863 x 905 13 5 x 34 0 x 35 6 Physical Net Weight kg lb W ISOTR 130 0 286 0 176 5 388 3 225 0 495 0 29 Shipping Weigh...

Page 18: ...lf test adjustable battery transfer points and alarm settings Battery Battery Protection Cut off without draining any current when battery is low 31 Cold Start DC start YES Back Up Time Tower model Ab...

Page 19: ...Receptacles Hardwire Dimensions W x D x H mm inch TBD 428 597 260 18 9 23 5 10 2 428 658 260 18 9 25 9 10 2 Net Weight kg lb TBD 86Kg 189lb 110Kg 242lb Physical Shipping Weight kg lb TBD 100Kg 220lb 1...

Page 20: ...MPONENT INCLUDING 3U UPS 3U BATT CABINET FRONT VIEW REAR VIEW 35 2 UPS REAR PANEL COMPONENTS H TERMINAL BLOCK I BREAKER J EXTERNAL BATTERY CONNECTOR K BYPASS SWITCH L SNMP SLOT M RS232 EPO N TVSS O US...

Page 21: ...TION a Remove the original right side panel and take apart the control panel unit Then assemble the blank right side panel b Connect the Control panel unit and Remote control port from rear side 37 c...

Page 22: ...ge the position of the two mounting brackets to mount the 3U rack mount in a 23 inch EIA 310 C standard rack 3 Tower installation a Move the mounting brackets from the front to the side and attach the...

Page 23: ...ting brackets from the front to the side and attach the brackets by screws Then mount the UPS to the wall as the below pictures shown 5 Installation with rear Bracket We can use bracket to support the...

Reviews: