background image

14

1. Preparing the appliance for use 

  Open the oven door (do not use the open door as storage place!). 
  Place the prepared food on the grill grid or roasting/baking tray and insert it in the provided insertion level of 
  the oven chamber. Close the oven door.

  NOTE: We recommend putting the food on the baking tray and then placing the tray on the inserted
   

 grill grid

2. Setting the temperature


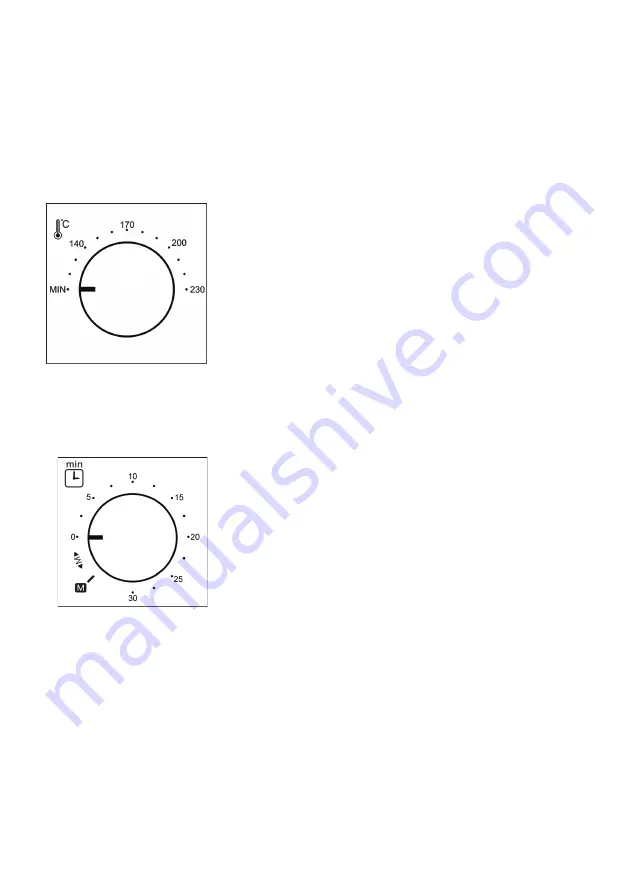
                                           Set the desired temperature by means of the upper rotary knob. 


                                          Temperature pilot lamp 


                                          The appliance is equipped with a temperature pilot lamp. 

                                                      When the pilot lamp goes off, the set temperature is reached. 
                                                      Cycling on and off during operation, the pilot lamp shows the thermostatic  
   

                                          regulation of the temperature.  


                                          ATTENTION: This means that the pilot lamp does not glow for some time, 


                                          although the oven is switched on. Therefore, make sure that the knob of 


                                          time setting has been set back to “0” once the baking procedure is finished.

3. Switching appliance ON (with / without timer)


                                          You have two possibilities to put the oven into operation:


                                          1. Manual operation:  


                                          To put the appliance into operation, turn the lower rotary knob to the left to 


                                          the manual setting “M”. In this case the appliance will not switch off 

                                                        automatically. To cut off you have to reset the rotary knob to “0” position 


                                          2. Time-controlled operation: 


                                          To put the appliance into operation, turn the lower rotary knob to the right 


                                          as far as it will go and then back to the requested operating time. 

                                                       The clock will switch the appliance off automatically after the selected time 
                                                       has elapsed and you will hear a short ring. The selected time can be 
                                                       adjusted at any time even during operation by turning the knob to the left 
                                                       or to the right.

4. Switching the appliance OFF
The appliance will switch off automatically if it is operated via the timer. At manual operation, the lower rotary 
knob has to be set back to “0”. 

Pull the power plug after each use for safe switch-off.

5. Taking ready food out
Open the oven door (do not use the open door as storage place!). Take the ready food out of the oven chamber. 
If you want to take out the hot roasting/baking tray or the grill grid, protect your hands by using potholders or a 
grill glove. Close the oven door.

Summary of Contents for RG 9

Page 1: ...Bedienungsanleitung Instruction manual D GB RG 9 Kleinbackofen Mini Oven...

Page 2: ...de Control panel 3 Backofent r mit Griff Oven door with handle 4 2 Schubebenen 2 insertion levels 5 2 Quarz Heizk rper mit Schutzabdeckung 2 quartz heating elements with protector 6 Klappbares Kr melb...

Page 3: ...ehschalter f r Temperatur Rotary knob for temperature setting 2 Drehschalter f r Zeiteinstellung Rotary knob for time setting 3 Position f r Dauerstellung Position of continuous operation 4 Temperatur...

Page 4: ...maintenance Tips und notes Produktbeschreibung Bedienblende Einleitung Bestimmungsgem er Gebrauch Technische Daten Lieferumfang Verpackungsmaterial Entsorgungshinweis F r Ihre Sicherheit Allgemeine S...

Page 5: ...chutzklasse I Volumen Backraum ca 9 Liter Lieferumfang Kontrollieren Sie den Lieferumfang unmittelbar nach dem Auspacken auf Vollst ndigkeit sowie den einwandfrei en Zustand des Produktes und aller Zu...

Page 6: ...tbare Sch den aufweist In diesen F llen das Ger t vom Netz trennen und von einer Elektro Fachkraft berpr fen lassen Beachten Sie bei der Verlegung des Netzkabels dass niemand sich darin verheddern ode...

Page 7: ...sich entz nden Verwenden Sie nur hitzebest ndige Beh lter aus Metall feuerfestem Glas Keramik oder Silikonmaterial zum Braten und Backen Niemals kaltes Wasser auf die hei e Backofent r spritzen Beim f...

Page 8: ...Ober Unterhitze ausgestattet Diese Einstellung kann nicht ver ndert werden Mit dem oberen Drehschalter stellen Sie die gew nschte Temperatur ein Temperatur Kontrolllampe Das Ger t ist mit einer Temper...

Page 9: ...ie Uhr das Ger t automatisch aus und ein kurzes Klingelzeichen ert nt Die eingestellte Zeit kann durch Rechts und Linksdrehen auch w hrend des Betriebs jederzeit ver ndert werden 4 Ger t ausschalten D...

Page 10: ...Scheuer und L sungsmittel oder scharfen Gegenst nde verwenden Keine Stahlwolle oder Scheuer Pads verwenden Keinesfalls Backofen Sprays verwenden Ger t und Zubeh rteile keinesfalls mit einem Dampfreini...

Page 11: ...lume baking chamber 9 litres Scope of supply Check the scope of supply for completeness as well as the soundness of the product immediately after unpacking Refer to the product description on page 2 P...

Page 12: ...entangled cords increase the risk of an electric shock Do not misuse the power cord for unplugging the appliance Never immerse the appliance power cord and power plug in water for cleaning Do not sto...

Page 13: ...bserve the following when setting up the appliance o Place the appliance with its rear to the wall Leave a ventilation distance of 4 cm o Place the appliance on a heat resistant stable and even surfac...

Page 14: ...ut the oven into operation 1 Manual operation To put the appliance into operation turn the lower rotary knob to the left to the manual setting M In this case the appliance will not switch off automati...

Page 15: ...the appliance from the underside On no account you must use steel wool scrubbing pads abrasives solvents or oven cleaners Never use a steam jet appliance for cleaning appliance and accessories Always...

Page 16: ...al Kaufbeleg keine Kopie und einer schriftlichen Fehlerbeschreibung an unsere nachstehende Adresse Ohne original Kaufbeleg wird die Reparatur ohne R ckfrage kostenpflichtig erfolgen Ohne schriftliche...

Reviews: