background image

DAB Mode 

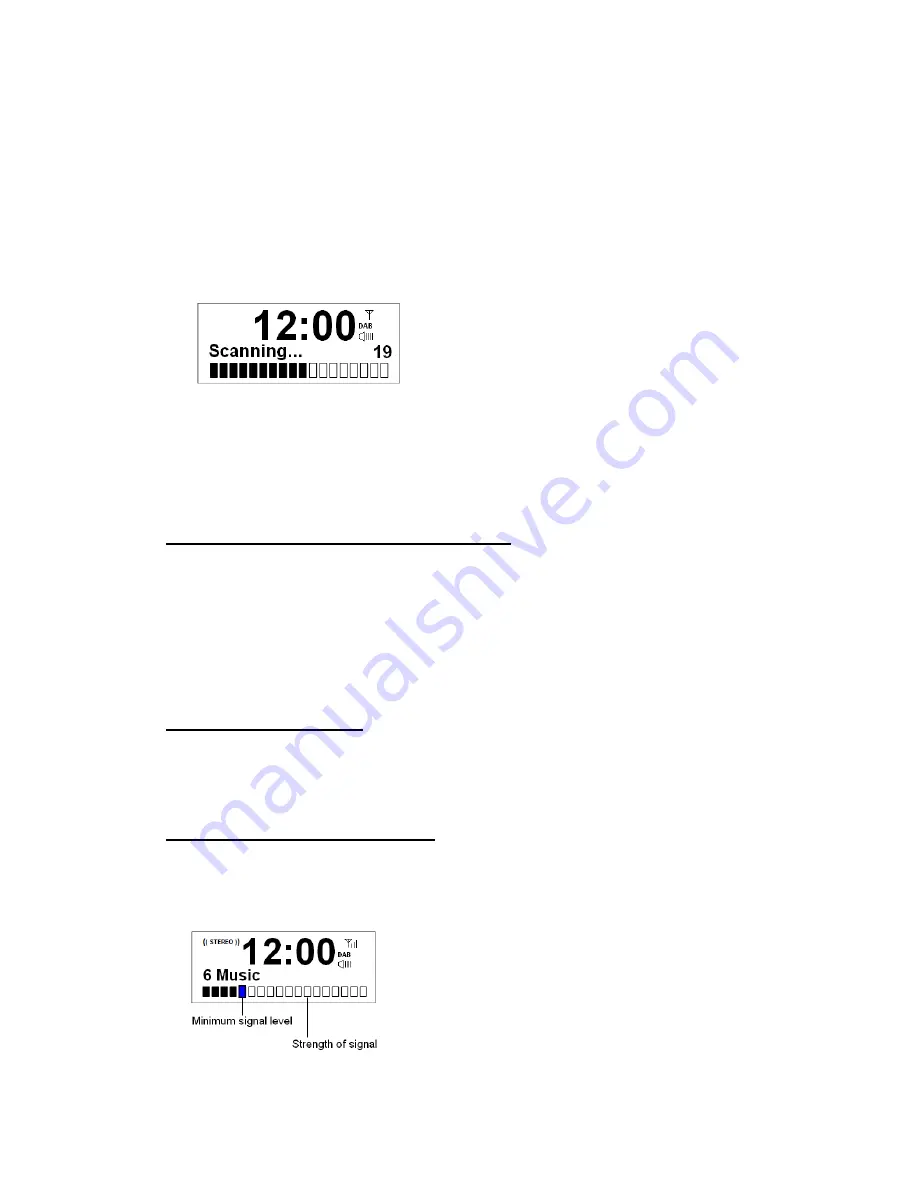
When you turn on the radio it will automatically search and store all the available stations. You 

should conduct an additional Full Scan to ensure all stations are picked up and stored. It is 

also recommended every few months to run a new scan to pick up any new DAB/DAB+ that 

may have begun broadcasting after purchasing your DAB radio.     

1.  For initial use, your radio will conduct a full scan and store stations list in memory.   


2.  Once the scanning is completed, the DAB/DAB+ stations will be displayed in alphanumeric 

order. The first station in the list will be selected to play. 


  Note

:    a.    The DAB/DAB+ stations will be displayed and stored in alphanumeric order.


b.    If no DAB/DAB+ signal is found, it may be necessary for you to relocate your radio. 


Selecting another DAB/DAB+ Station 

While a program is playing, press and hold 

MODE

/

MENU

 button to select 

Station list

 menu, 

and then press

 SCROLL

/

SELECT

 knob to confirm. Or press and hold 

SCROLL

/

SELECT


knob to activate 

Station list

 menu. 

Turn

 SCROLL

/

SELECT

 knob to cycle through available stations, and then press


SCROLL

/

SELECT

 knob to play station the station you selected. 


Updating Station List 

Press and hold 

MODE

/

MENU

 button, turn

 SCROLL

/

SELECT

 knob to select 

Full scan

 menu, 

and then press 

SCROLL/SELECT

 knob to confirm. 


Showing the Signal Strength 

During playing a DAB/DAB+ program, repeatedly press 

INFO

 until the LCD display shows a 

signal bar with the strength of the current station. 


The indicator on the signal bar shows the 

minimum acceptable signal level.


Note: 

Stations with signal strength below the 

minimum signal level may not provide a 

steady stream of audio. 


Summary of Contents for Sound Player - 2

Page 1: ...DAB DAB and FM Digital Radio with Bluetooth ...

Page 2: ...ecome frayed or otherwise damaged immediately Do not use a cord that shows cracks or abrasion damage along its length the plug or the connector end 6 To prevent fire or shock hazard do not use this plug with an extension cord or other outlet unless the blades can be fully inserted to prevent blade exposure 7 To prevent fire or shock hazard do not expose this device to rain or moisture 8 Do not pla...

Page 3: ... is encouraged to try to correct the interference by one or more of the following measures Reorient or relocate the receiving antenna Increase the separation between the equipment and receiver Connect the equipment into an outlet on a circuit different from that to which the receiver is connected Consult the dealer or an experienced radio TV technician for help The normal function of the product m...

Page 4: ...ength 9 DRC Dynamic Range Control value 10 Prune 10 Viewing Station Information 10 FM Mode 11 Selecting FM Mode 11 Scan Setting 11 Audio Setting 11 Viewing Station Information 12 Aux in Mode 13 Bluetooth Mode 14 General Operation 15 Storing Preset Stations 15 Playing a Preset Station 15 Setting Sleep 15 Setting Time 16 Setting Alarm 16 Setting Backlight 17 Setting Language 17 Factory Reset 17 SW V...

Page 5: ...t volume level In the menu setting turn to browse options press to confirm selection 6 PRESETS button Press and hold to store preset stations Press to recall preset stations 7 AUX IN1 socket Connect to a 3 5mm audio cable not supplied in Auxiliary In 1 mode 8 BACK button Press to return to previous menu screen 9 MODE MENU button Press to shift among DAB FM Auxiliary In 1 Auxiliary In 2 and Bluetoo...

Page 6: ...UX OUT socket Connect to a 3 5mm audio cable not supplied 2 AUX IN2 socket Connect to a 3 5mm audio cable not supplied in Auxiliary In 2 mode 3 SERVICE port Please leave this software upgrade port for service professional ...

Page 7: ...djust bass value 6 VOLUME buttons Press to adjust volume level 7 MUTE button Press to mute radio Press again to pick up sound 8 and SELECT buttons Press or to scroll left and right Press or to scroll up and down Press SELECT to confirm selection 9 INFO button Press to browse station info in DAB and FM mode 10 TREBLE buttons Press to adjust treble value 11 and buttons in Bluetooth mode Press to pre...

Page 8: ...hieve the best signal Using Headphones You will require headphones fitted with a 3 5 mm diameter stereo plug The Headphone socket is located on the front of this unit Headphones are not supplied with this radio Turning the Unit On Off Insert the plug of power cord into the mains socket Press and hold INFO POWER button to turn on the unit press and hold INFO POWER button again to switch radio to st...

Page 9: ... necessary for you to relocate your radio Selecting another DAB DAB Station While a program is playing press and hold MODE MENU button to select Station list menu and then press SCROLL SELECT knob to confirm Or press and hold SCROLL SELECT knob to activate Station list menu Turn SCROLL SELECT knob to cycle through available stations and then press SCROLL SELECT knob to play station the station you...

Page 10: ...elected option Prune This feature enables your radio to remove inactive stations from the station list 1 Press and hold MODE MENU button turn SCROLL SELECT knob to select Prune menu and then press SCROLL SELECT knob to confirm 2 Turn SCROLL SELECT knob to select Yes and then press SCROLL SELECT knob to confirm Viewing Station Information There is a variety of station information transmitted by bro...

Page 11: ...t any available station This may result in a poor signal to noise ratio hiss from weak stations 1 To change the scan settings to stop only at stations with good signal strength press and hold MODE MENU button turn SCROLL SELECT knob to select Scan setting menu and then press SCROLL SELECT knob to confirm 2 Turn SCROLL SELECT knob to select Strong stations only and press SCROLL SELECT knob to confi...

Page 12: ...transmitted by broadcast and this radio also offers a shortcut for you to view them To view currently playing station information press the INFO POWER button repeatedly the display will show the information through Radio Text Program type Program info Audio info Time and Date ...

Page 13: ...FO POWER button to switch on unit 3 Press MODE MENU button repeatedly to select Auxiliary In 1 mode if audio device is connected through AUX IN1 socket 4 Press MODE MENU button repeatedly to select Auxiliary In 2 mode if audio device is connected through AUX IN2 socket 5 In Aux in mode you may operate your audio device directly for playback features 6 To gain optimal volume levels adjusting the ou...

Page 14: ...your Bluetooth device and select the search mode 4 ELKO Sound Player will appear on your Bluetooth device 5 Select ELKO Sound Player and enter 0000 for the password if necessary 6 Display will show when connection is successful 7 To disconnect the Bluetooth function switch to another function on the unit or disable the function from your Bluetooth device Note If the unit is idle for approximately ...

Page 15: ...s MODE MENU button repeatedly to select DAB or FM mode 2 Press PRESETS button to show the saved preset stations 3 Turn SCROLL SELECT knob to select the preset station you want to play and then press SCROLL SELECT knob to confirm Setting Sleep This function enables your unit to switch to standby mode by itself after a set sleep time 1 Press and hold MODE MENU button turn SCROLL SELECT knob to selec...

Page 16: ... to select options press it to confirm the setting Alarm states On or Off Alarm time 00 00 manually set up the time Alarm duration time 15 30 45 60 90 MINS Alarm source DAB FM or Buzzer if you selected DAB or FM as alarm source select last listened or saved preset station to play when alarm sounds is needed Alarm active day Daily Once Weekends or Weekdays Alarm volume turn SCROLL SELECT knob to ad...

Page 17: ...guage menu and then press SCROLL SELECT knob to confirm 2 Turn SCROLL SELECT knob and then press it to select language Factory Reset A factory reset resets all user settings to default values so time date alarm settings presets and Bluetooth memory are lost 1 Press and hold MODE MENU button turn SCROLL SELECT knob to select Factory Reset menu and then press SCROLL SELECT knob to confirm 2 Turn SCR...

Page 18: ... Radio poor reception Weak radio aerial signal Interference caused by the vicinity of electrical equipment like TVs Video Recorders Computer Thermostats Fluorescent Lamps TL engines etc Aim the aerial for best reception and ensure it is fully extended Keep the unit away from other electrical equipment Cannot find ELKO Sound Player on Bluetooth device Bluetooth function is disabled on your Bluetoot...

Page 19: ...uct or in the instructions means that your electrical and electronic equipment should be disposed at the end of its life separately from your household waste There are separate collection systems for recycling in the EU For more information please contact the local authority or your retailer where you purchased the product ELKO AS Eyvind Lyches vei 10 1338 Sandvika NORWAY Phone 004767215459 www el...

Reviews: