USA-30
USA-29
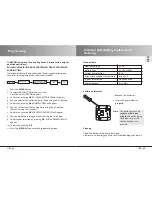
Programming
SETTING
INTERMEDIATE POSITION, VENTILATION/REVERSE, PROG1 END LIMIT
(Time/ position programming)
See
previous page
INTERMEDIATE
POSITITION
VENTILATION
(REVERSE)
PROG 1
END LIMIT
OK
PROG 1
INTERMEDIATE
POSITION
PROG 1
VENTILATION
see
next page
OK
OK
+/–
+/–
+/–
+/–
OK
OK
You have confirmed the
HOLIDAY/LIGHT SENSOR menu levels.
INTERMEDIATE POSITION will appear.
1. You can set the switching time to move to the INTERMEDIATE
POSITION using the
+/-
button. The switching time is indicated in
a few seconds or you can move to the INTERMEDIATE POSITION
from the upper end limit using the
UP/DOWN
button.
2. Confirm by pressing
OK
.
3. You can set the switching time to move to VENTILATION/REVERSE
using the
+/-
button. The switching time is indicated in a few
seconds or you can move to the VENTILATION/REVERSE from the
lower end limit using the
UP/DOWN
button.
4. Confirm by pressing
OK
. PROG1 END LIMIT appears.
5. You can select PROG1 END LIMIT, PROG 1 INTERMEDIATE
POSITION and PROG1 VENTILATION/REVERSE using the
+/-
button.
6. Confirm your selection by pressing
OK
.
The function PROG1 END LIMIT has now been set.
Please read on for further programming options using the
SETTING menu.
US
A
Programming
SETTING
HOLIDAY, LIGHT SENSOR
(Holiday OFF/ON, sun/twilight setting)
SETTING
HOLIDAY
HOLIDAY ON
LIGHT
SENSOR
CONNECTED ?
SUN
TWILIGHT
OK
OK
OK
+/–
+/–
+/–
OK
see
next page
1. Press the
MENU
button.
2. To select the SETTING menu, press the
+
button until SETTING appears.
3. Confirm by pressing
OK
. HOLIDAY ON/OFF will appear.
4. You can set the holiday function to ON or OFF by pressing the
+/-
button.
5. Confirm your selection by pressing
OK
.
Note:
This dialog window will only be displayed if a light sensor is
connected to the device.
You have confirmed the holiday function. SUN will appear.
The value set is displayed.
6. You can reset the sunlight setting by pressing the
+/-
button.
(The two digits on the left of the display show the current
light value.)
7. Confirm your entry by pressing
OK
.
To set the TWILIGHT SETTING, follow the same procedure as for
SUN.
The SUN/TWILIGHT function has now been set.
Please read on for further programming options using the
SETTING menu.


